Growth360 lets you store up to eleven phone numbers and eleven email addresses per contact, and apply multiple tags to keep contacts organised and easy to filter.
Multiple Phone Numbers
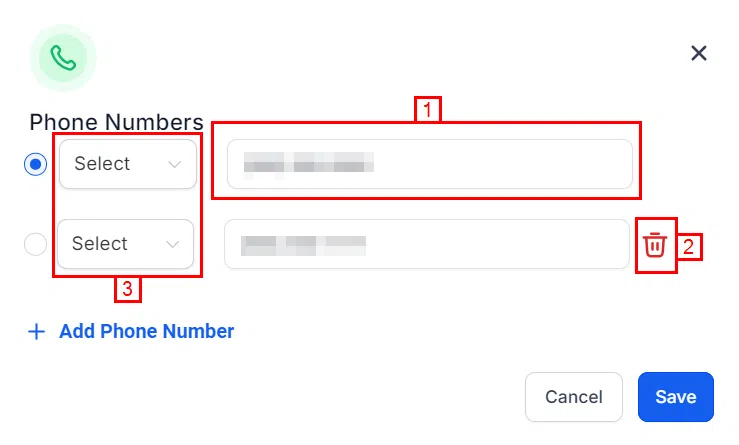
You can add up to eleven phone numbers per contact, label each one (Home, Landline, Mobile, Work), designate a primary number, and call any of them directly from the contact record.
Adding Phone Numbers
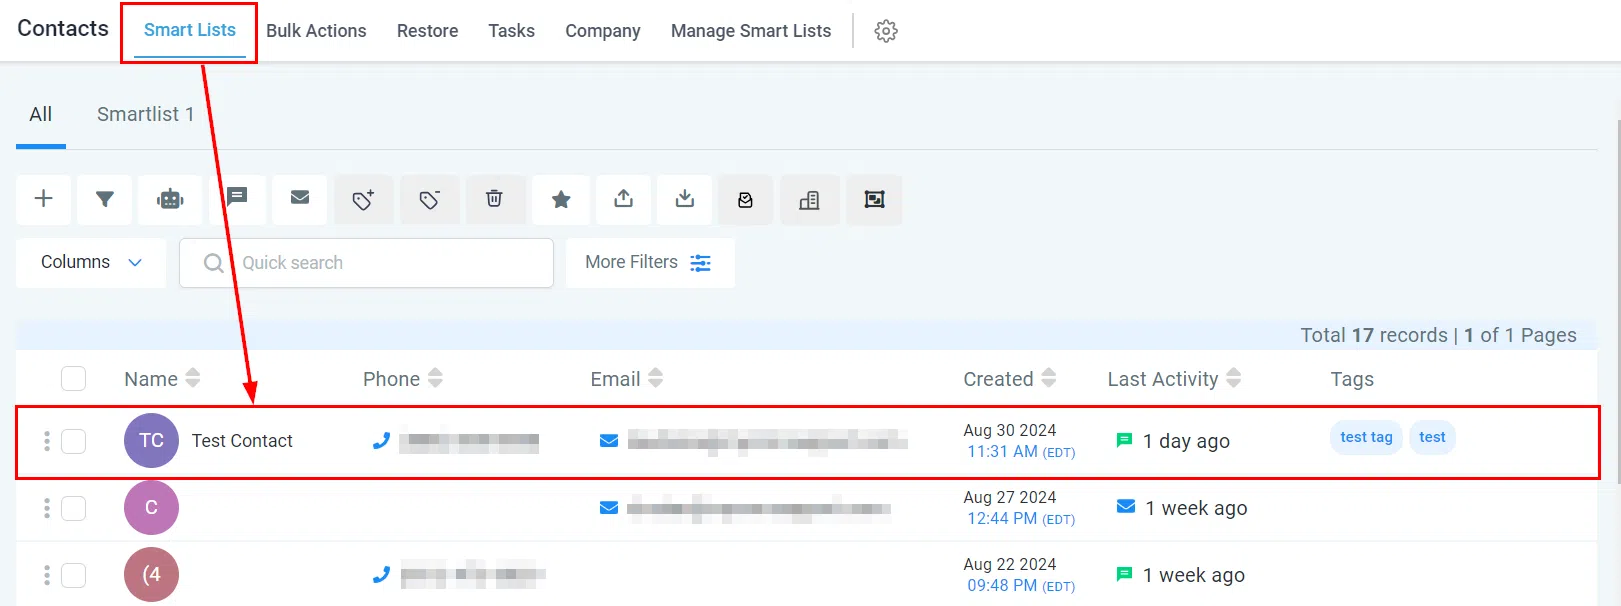
Navigate to the Contacts section and open an existing contact or create a new one.
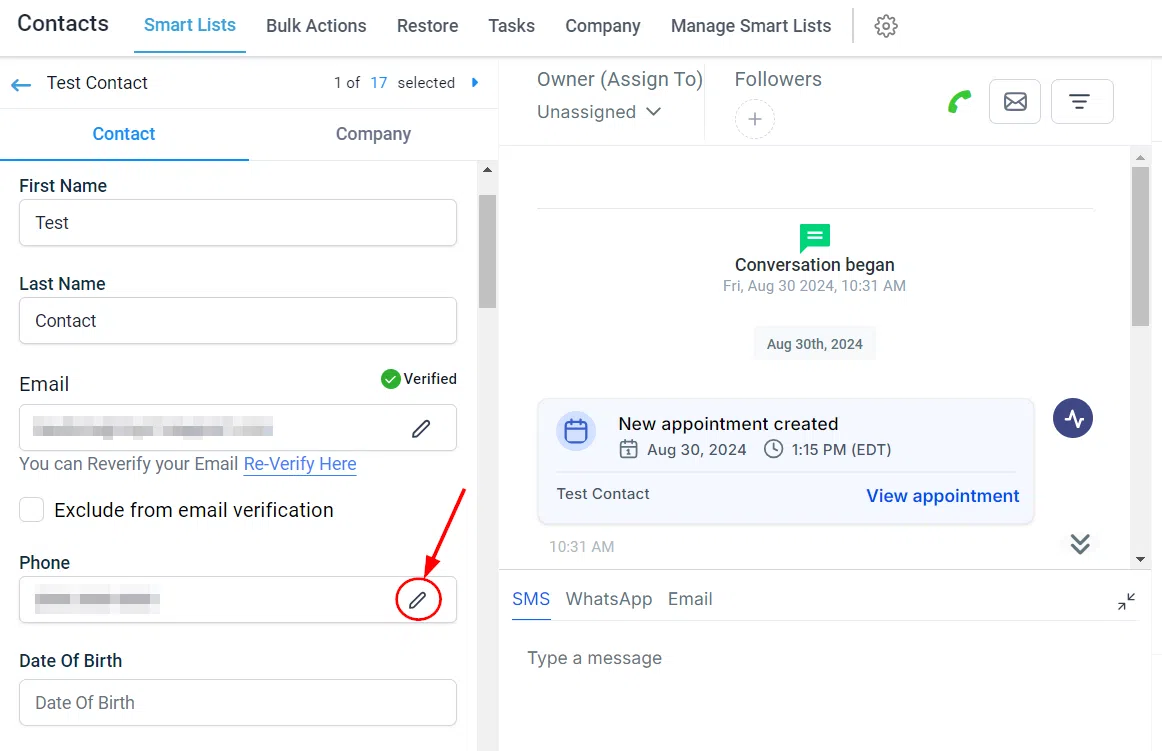
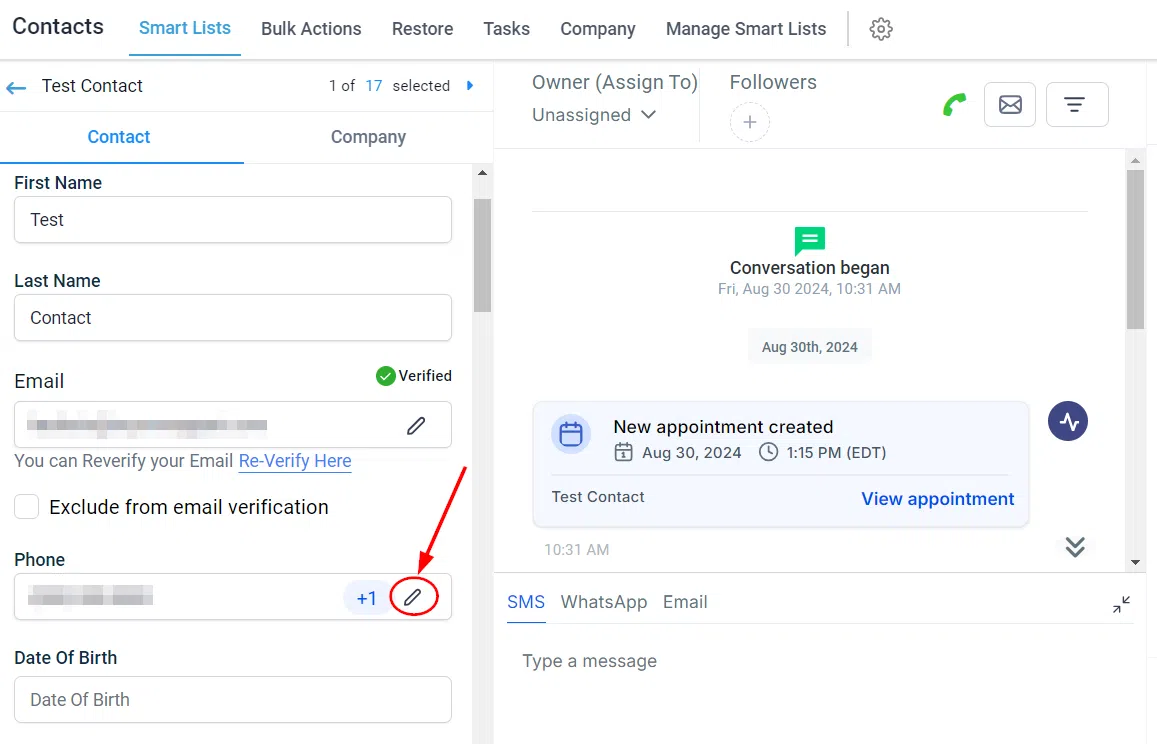
Click the pencil icon to edit the contact, then scroll to the Phone Numbers section.
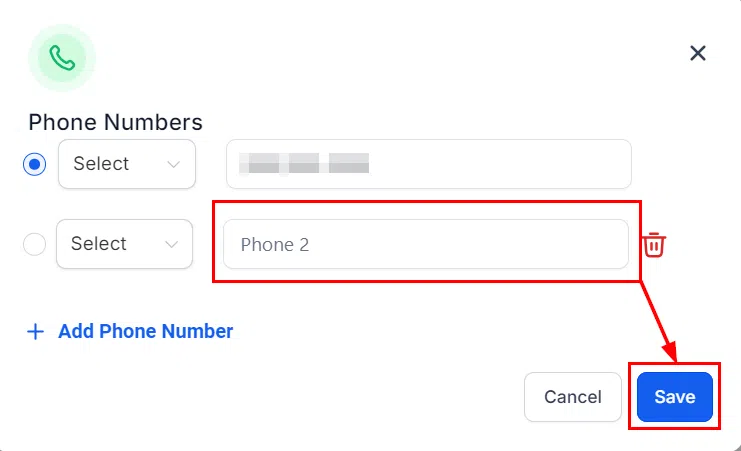
Click Add Phone Numbers to add a new number. You can add up to eleven in total.
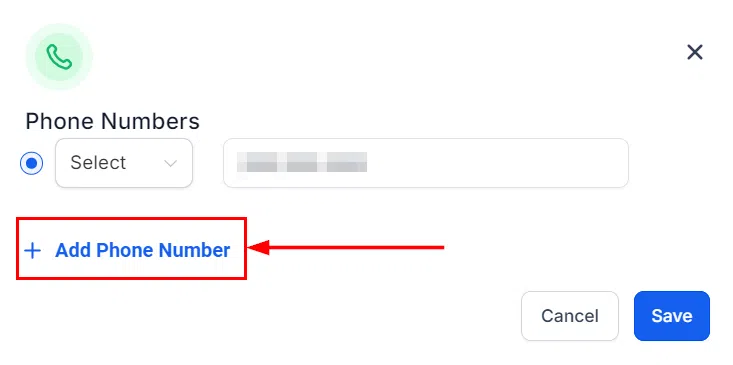
Enter the number and click Save.
Designating a Primary Number
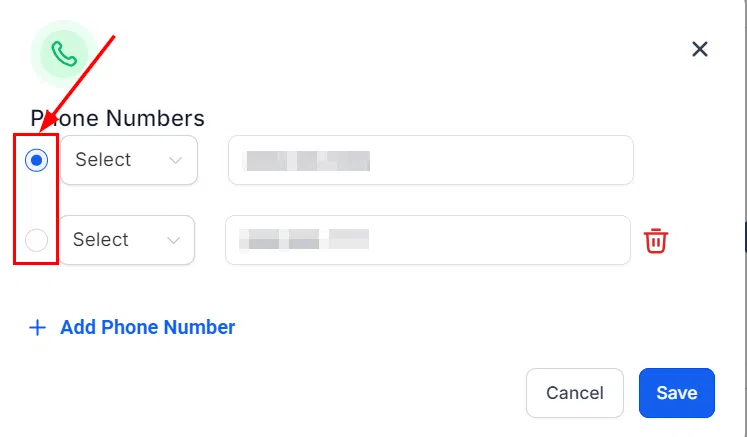
Click the radio button next to a number to make it the primary contact number. The primary number is used by default for calls and SMS.
Adding Labels
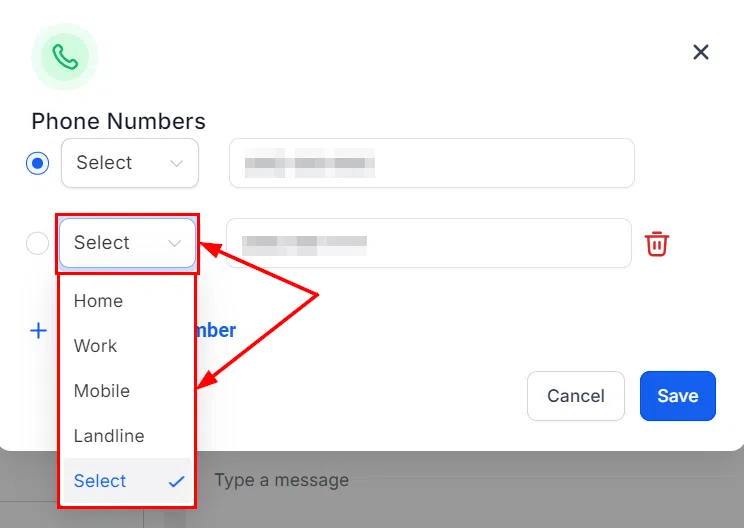
Choose a label (Home, Landline, Mobile, Work) from the dropdown when adding or editing a number. Each label can only be applied once per contact.
Managing Phone Numbers
Click the pencil icon next to any number to edit it, change its label, or delete it. The primary number can be edited but not deleted until another number is set as the default.
Calling from a Contact
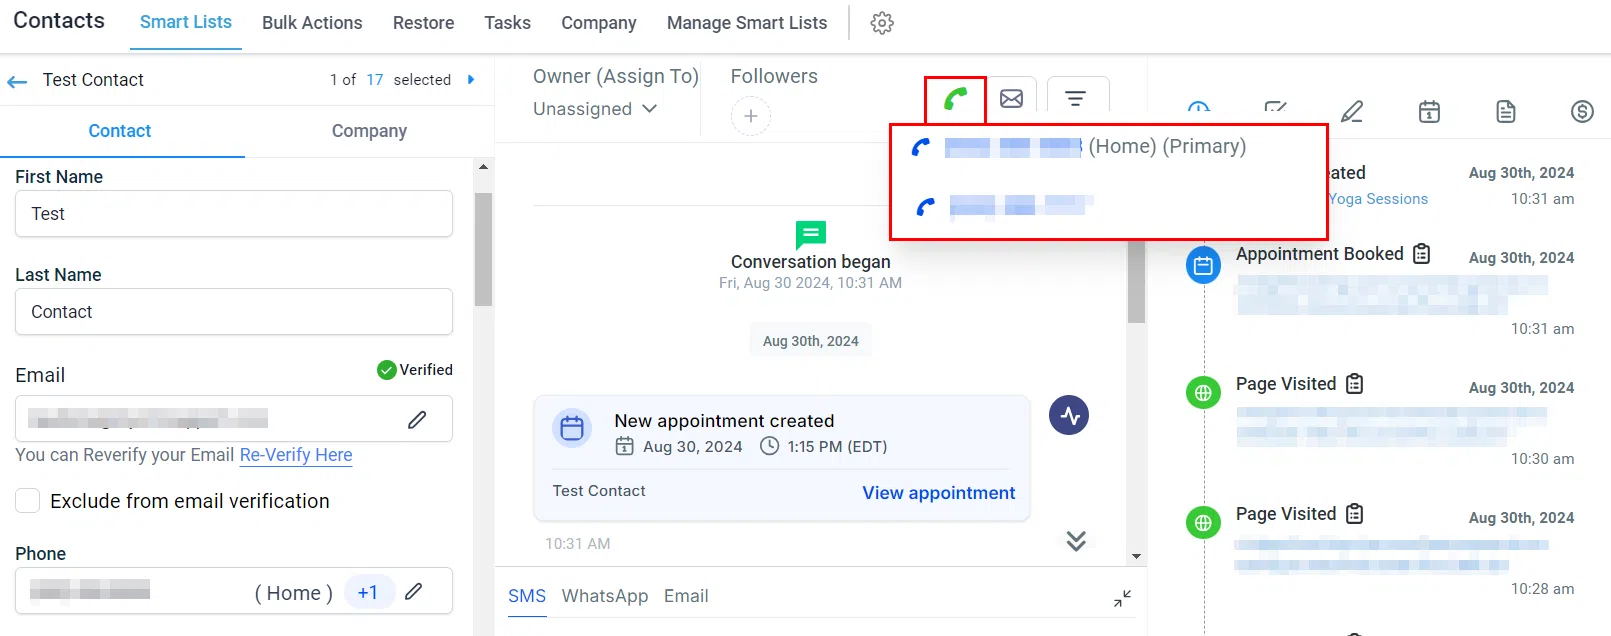
Hover over the phone icon in the Contact Details section to see a list of all phone numbers. Click the one you want to call.
Multiple Email Addresses
Growth360 supports one primary email address plus up to ten additional email addresses per contact – useful for managing contacts who have separate work, personal, or role-specific email addresses.
Adding Email Addresses
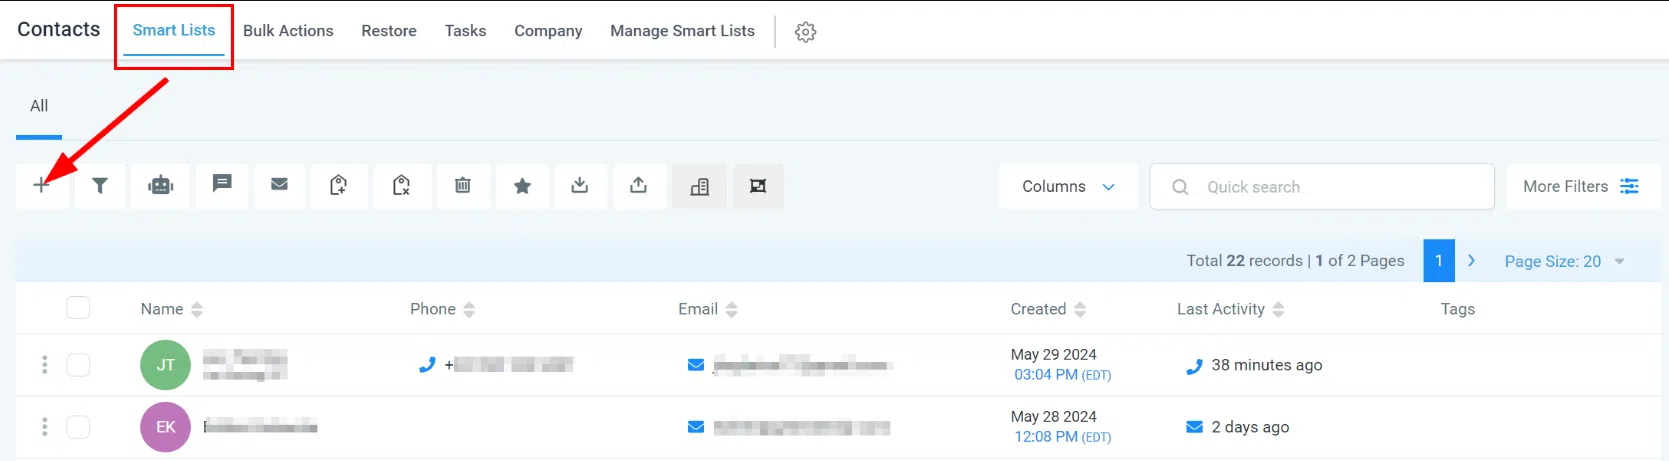
Go to Contacts > Smart Lists and open the contact you want to update.
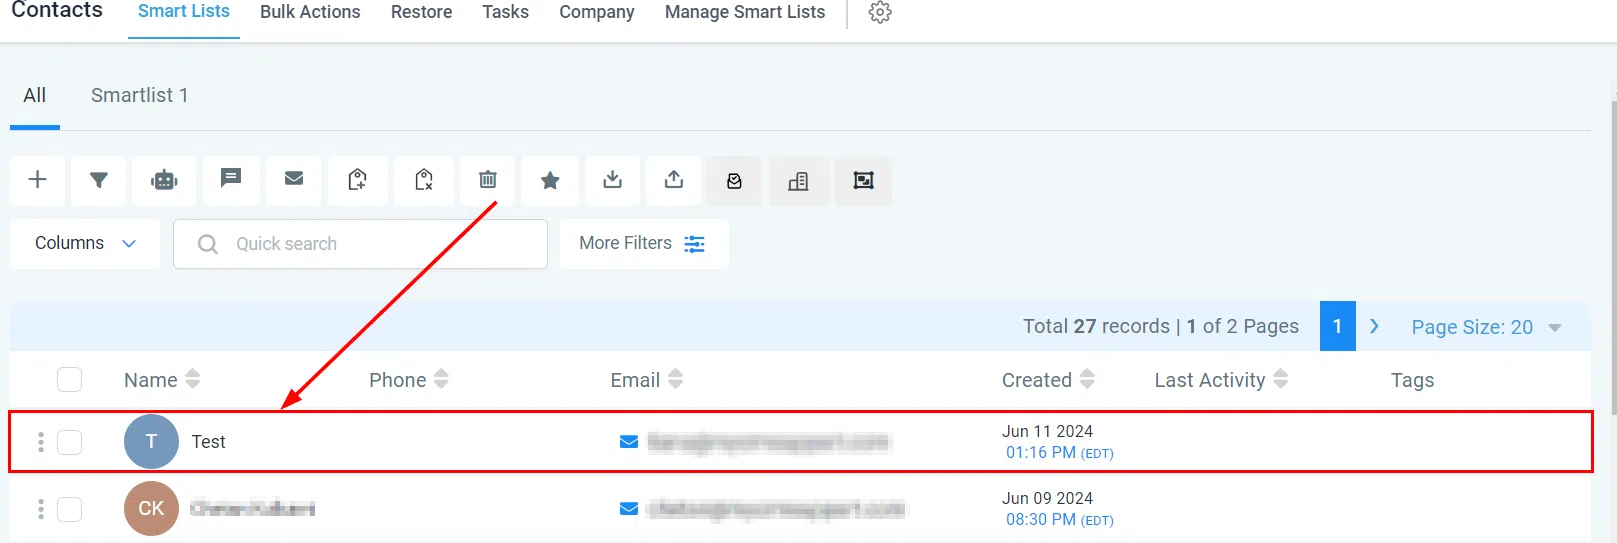
Click on the contact to open their details.
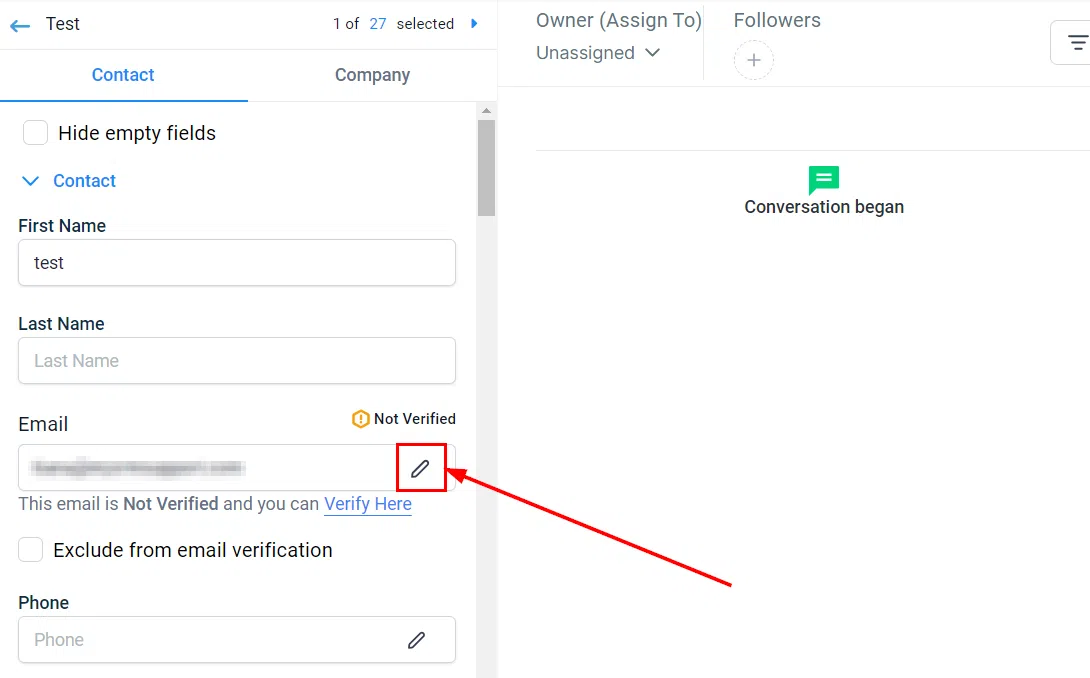
Click the pencil icon next to the email field to enter edit mode.
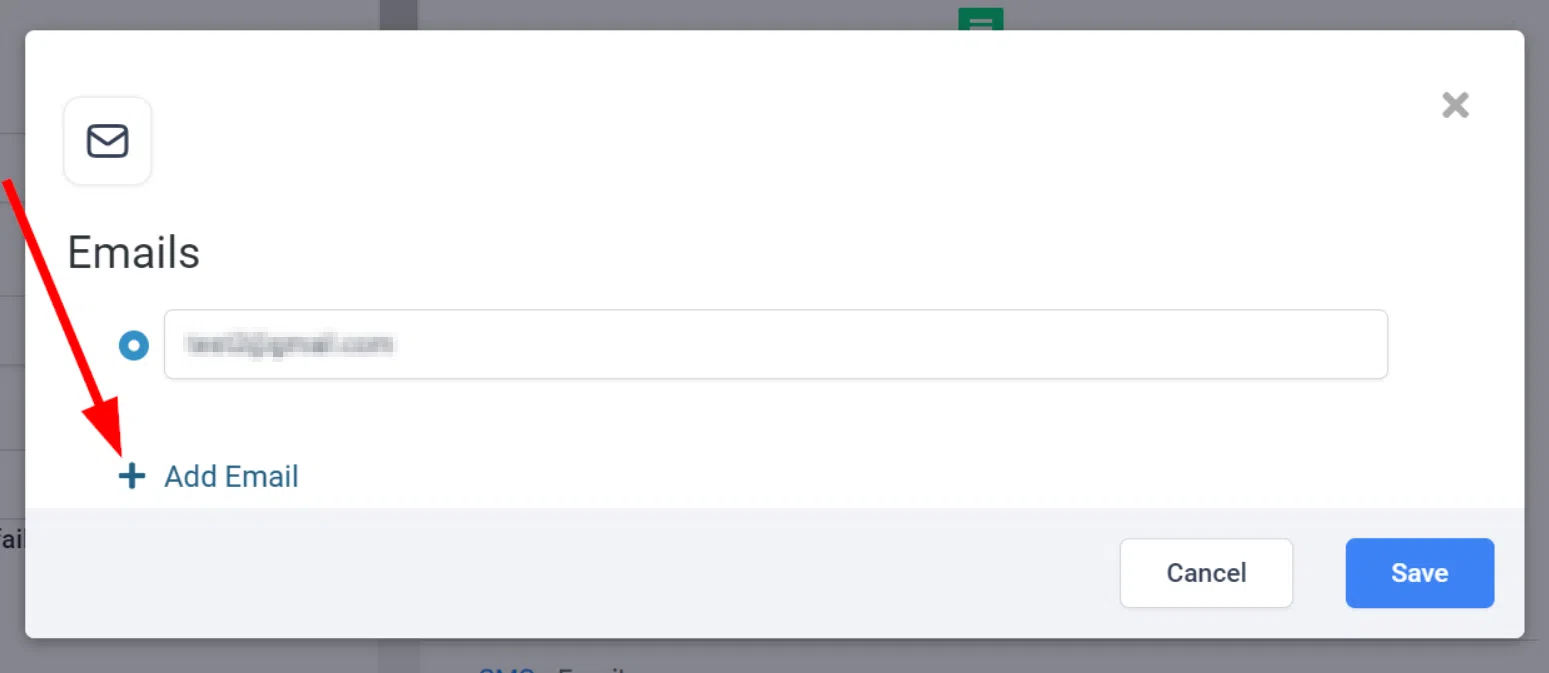
Click Add Email to add another email address. The option disappears once you reach the eleven-address limit.
Setting the Primary Email
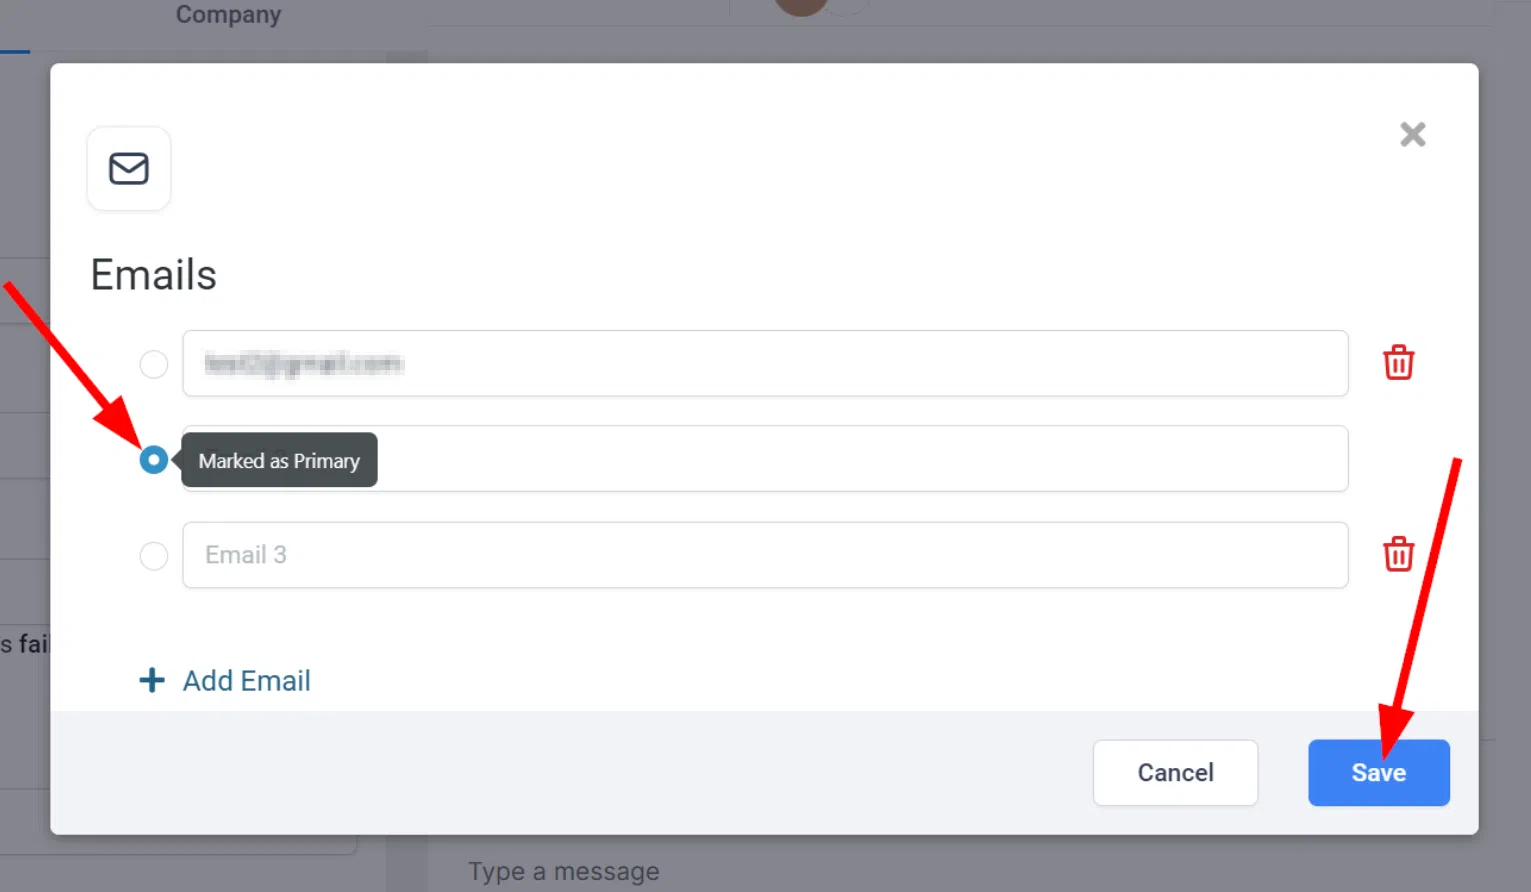
Click the circle next to any email address to designate it as the primary. The primary email is used automatically for all actions and communications with the contact. Click Save to apply.
Choosing an Email When Sending
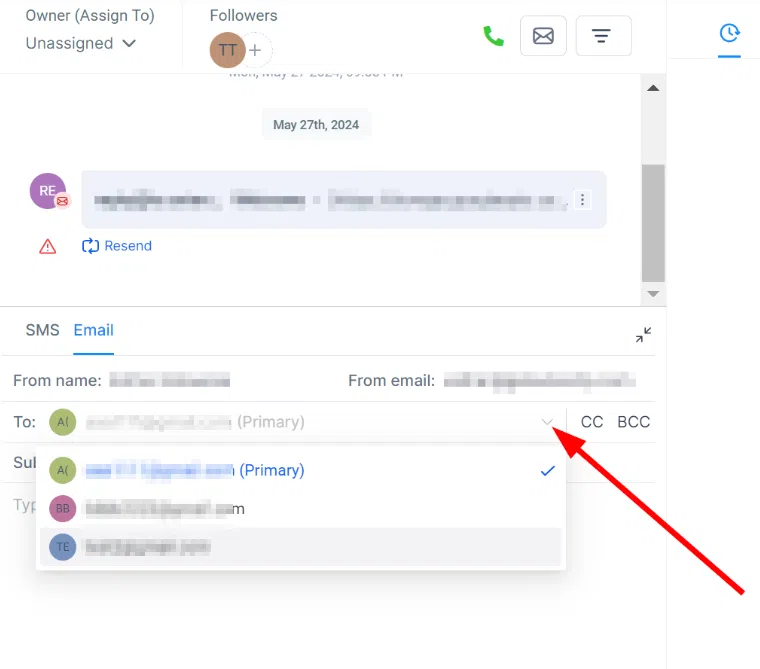
When composing an email to a contact with multiple addresses, you can select which email to send to from a dropdown. The primary email is selected by default.
Tags
Tags let you categorise contacts by any criteria – sales stage, lead type, campaign, and more. Once applied, tags power Smart Lists, workflow triggers, and bulk actions.
Adding and Removing Tags
Open a contact and scroll to the Tags section.
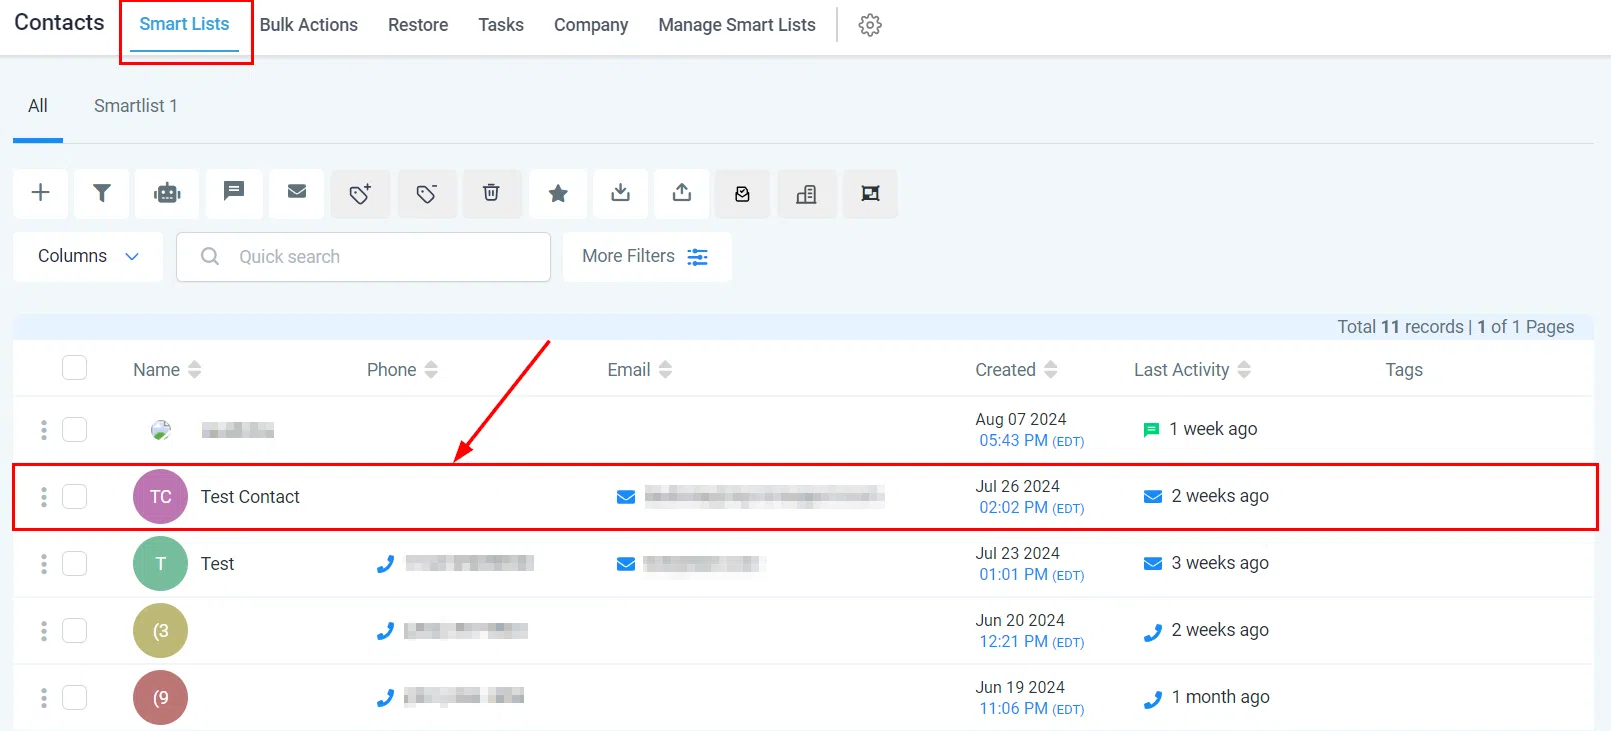
To add a new tag, type the tag name and press Enter.
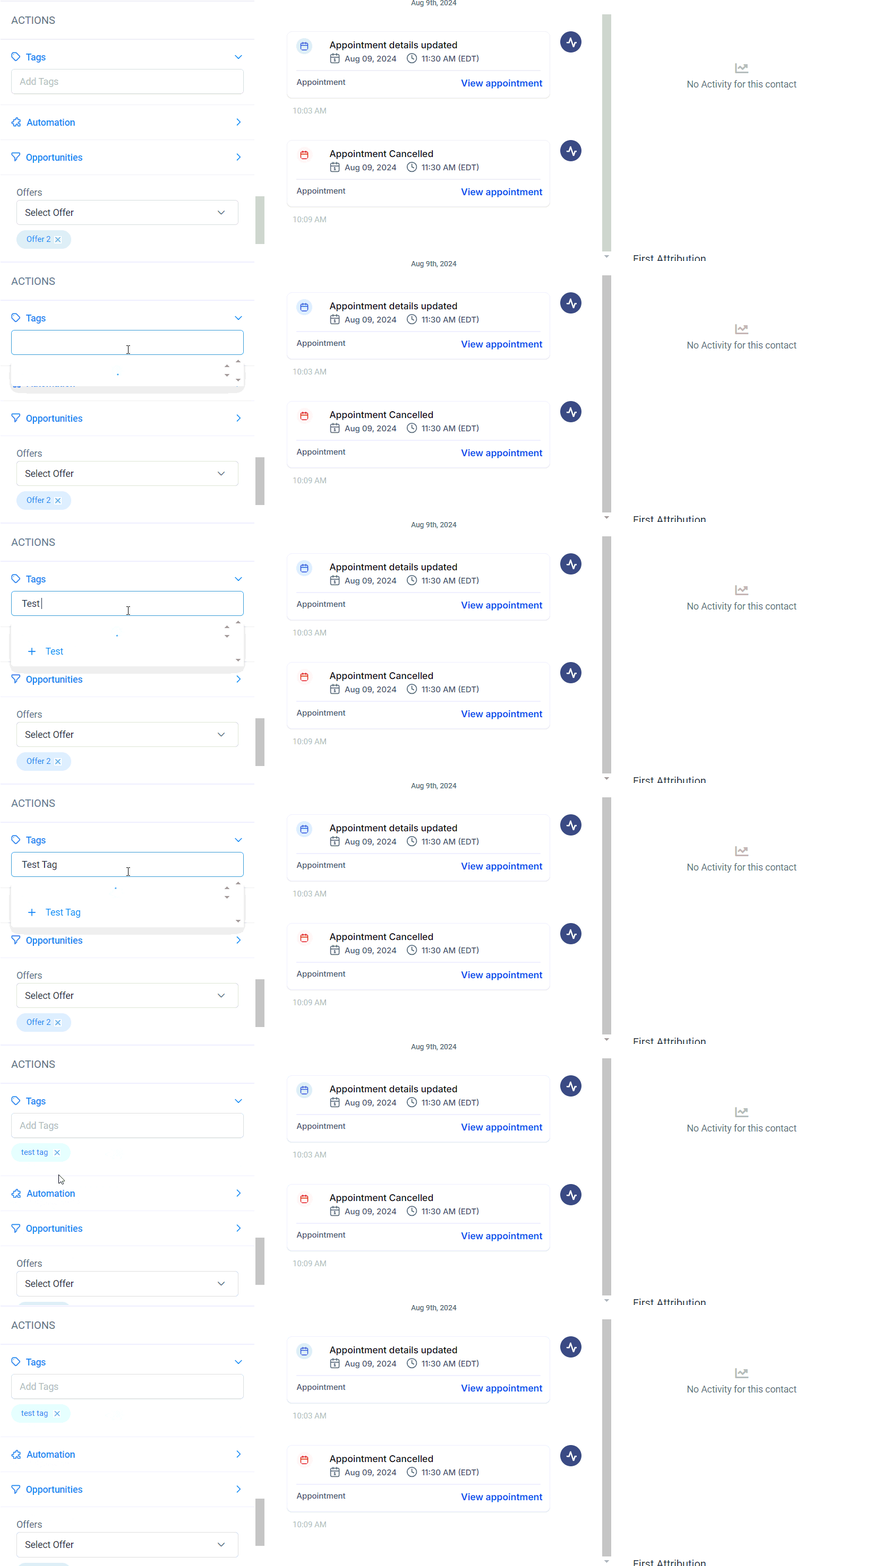
To apply an existing tag, start typing and select it from the dropdown that appears.
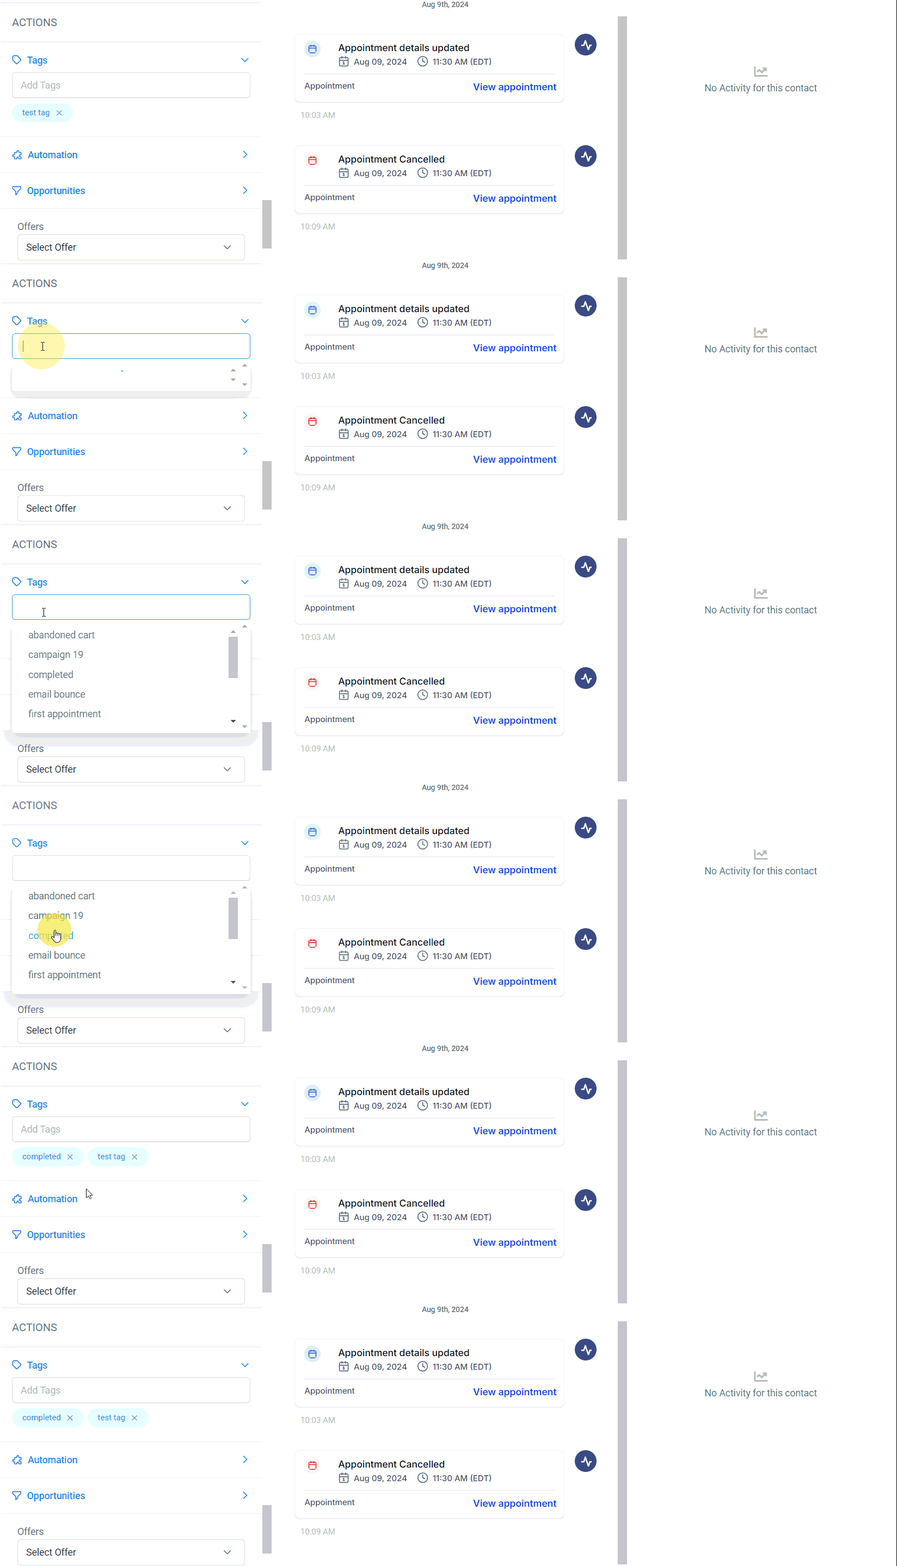
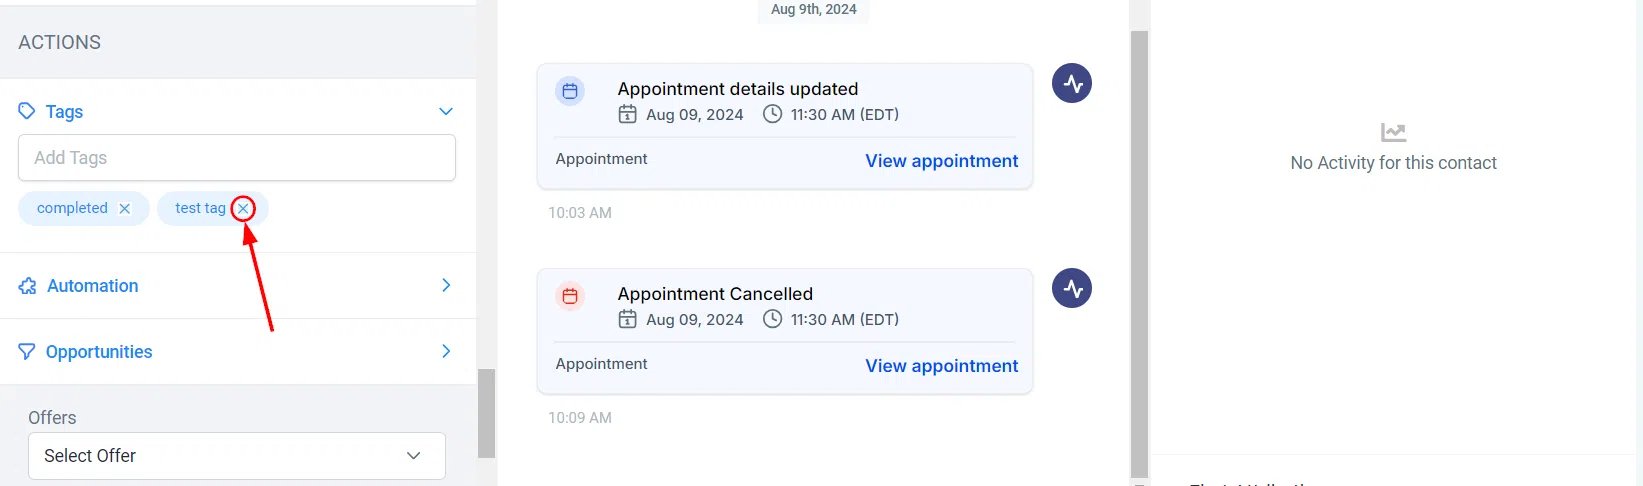
To remove a tag, click the X next to it.
Bulk Tag Management
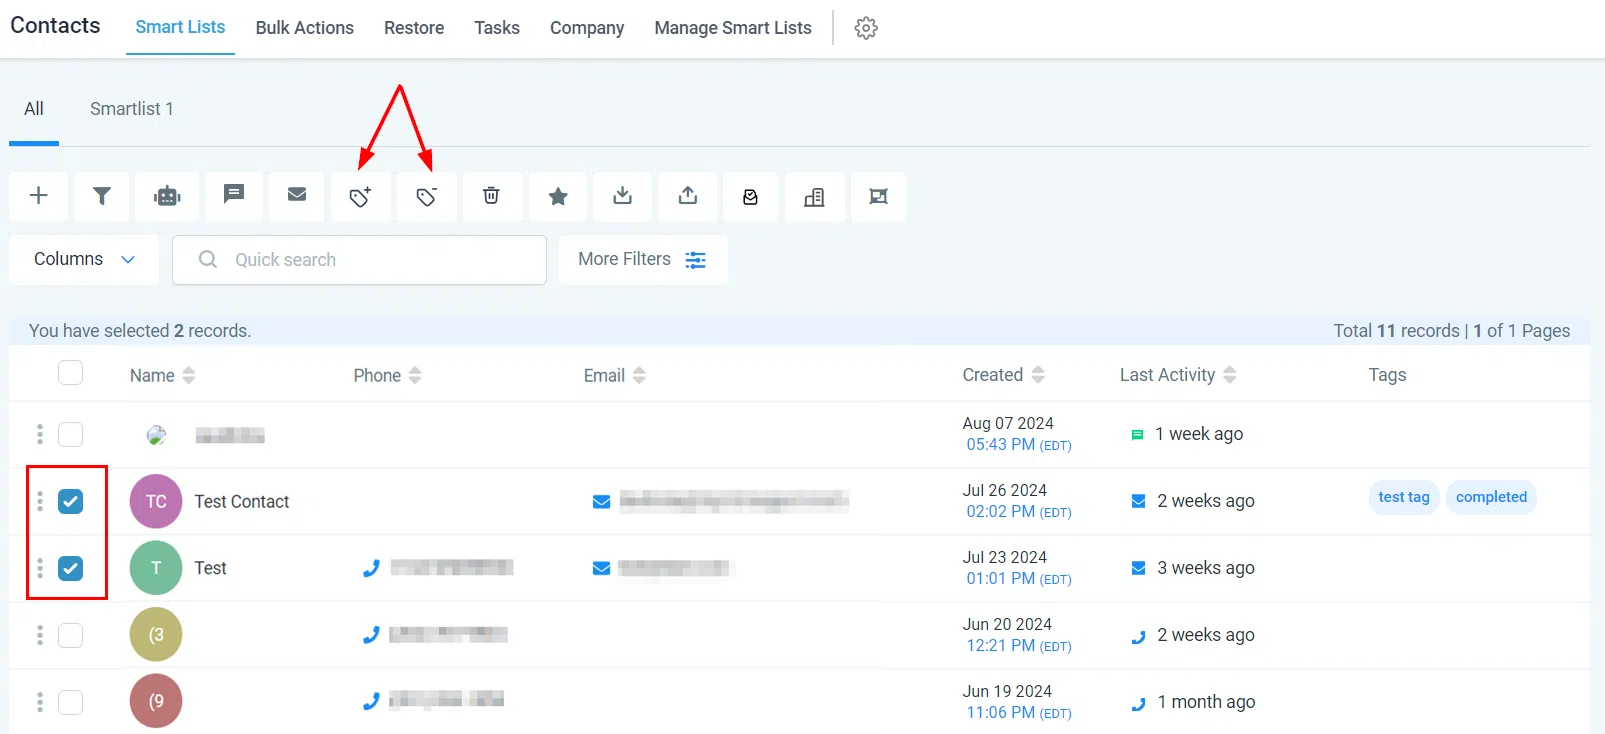
Select multiple contacts from Smart Lists, then click the Add Tag or Remove Tag icon in the Bulk Actions panel. Choose the tags to apply or remove and confirm – all selected contacts will be updated at once.
Automating Tags with Workflows
Workflows can automatically apply or remove tags based on triggers – such as a contact moving to a new pipeline stage or a new contact being added. This keeps your tagging consistent without manual effort.
Common Questions
How do I create a new tag?
Type the tag name in the Tags field on a contact record and press Enter. You can also go to Settings > Tags and click Create.
Can a contact have multiple tags?
Yes – contacts can have as many tags as needed. Keep tagging logical to maintain a well-organised system.
What happens if I delete a tag?
Deleting a tag removes it from every contact it was applied to. Use caution to avoid losing important categorisation.