Growth360 gives you three ways to control who receives your email campaigns: Smart Lists for pre-saved audience groups, Build Segments for on-the-fly targeting, and email verification to ensure your sender address is authenticated.
Sending to Smart Lists
Smart Lists are saved contact groups filtered by tags, properties, or behaviours. Once you’ve created a Smart List, you can send campaigns directly to it in two ways.
Option 1: Via a Campaign
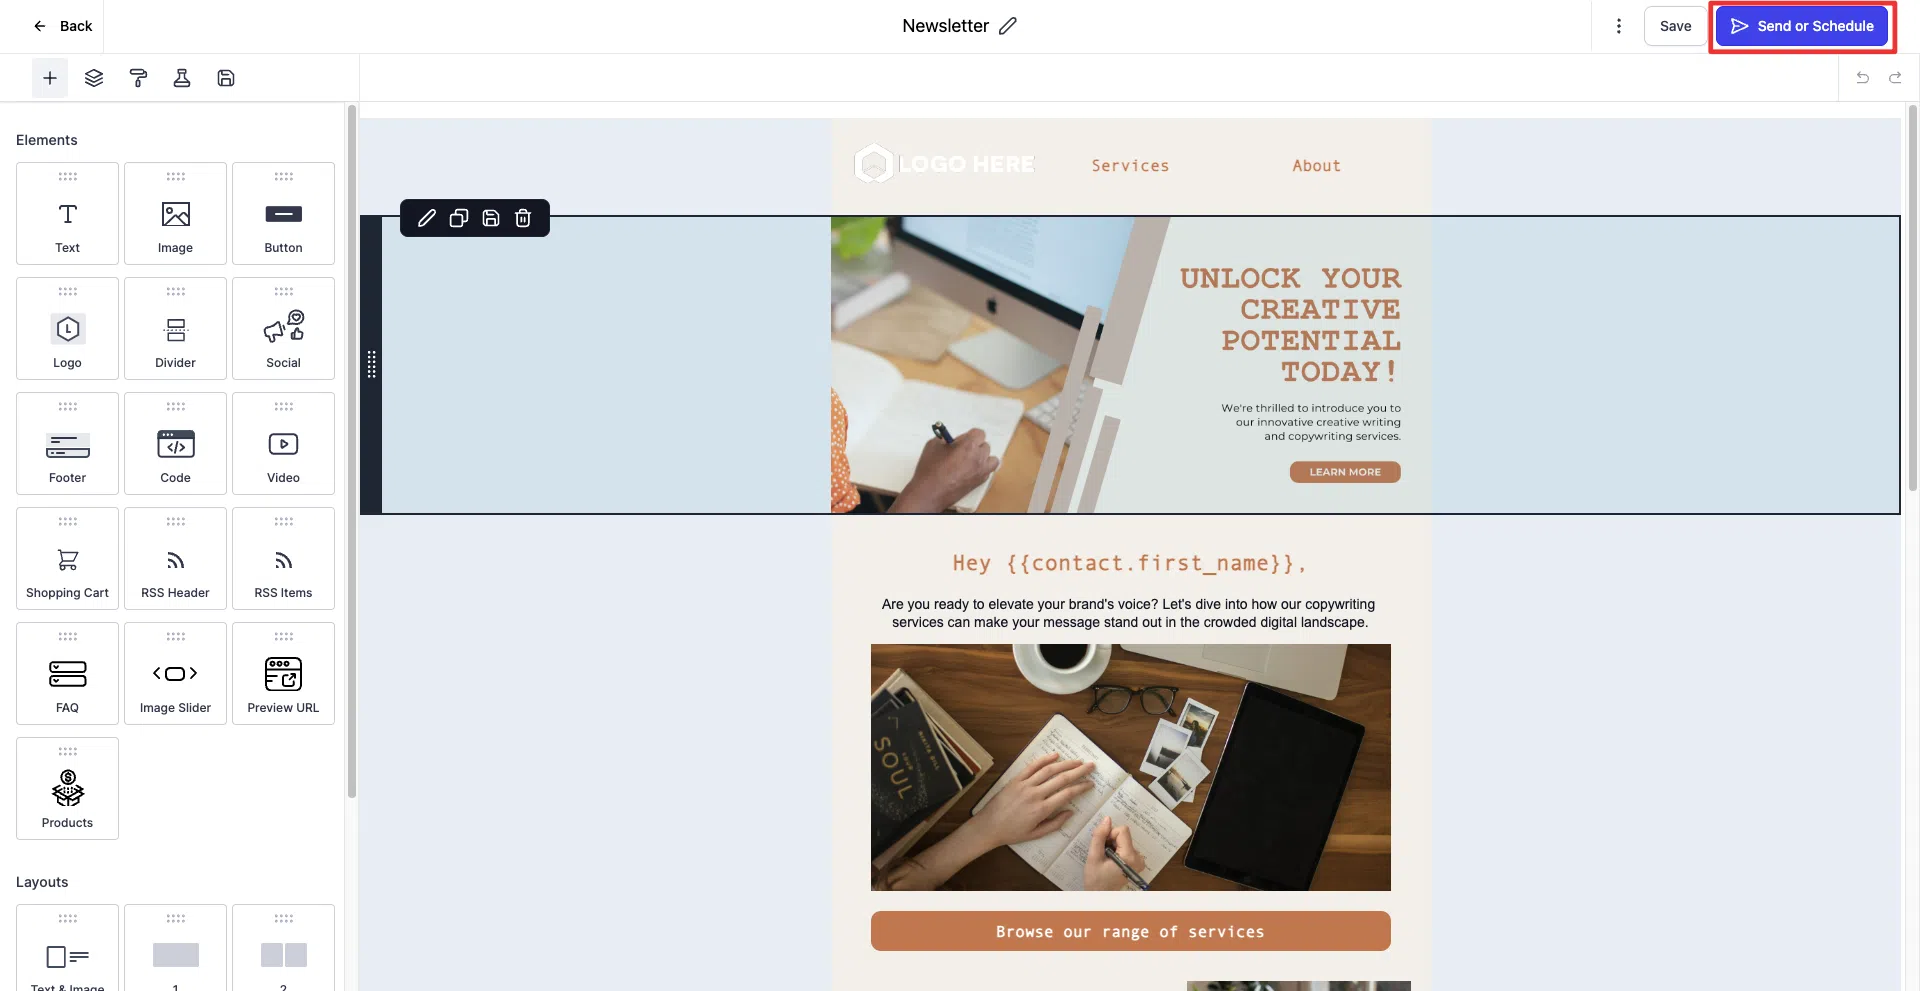
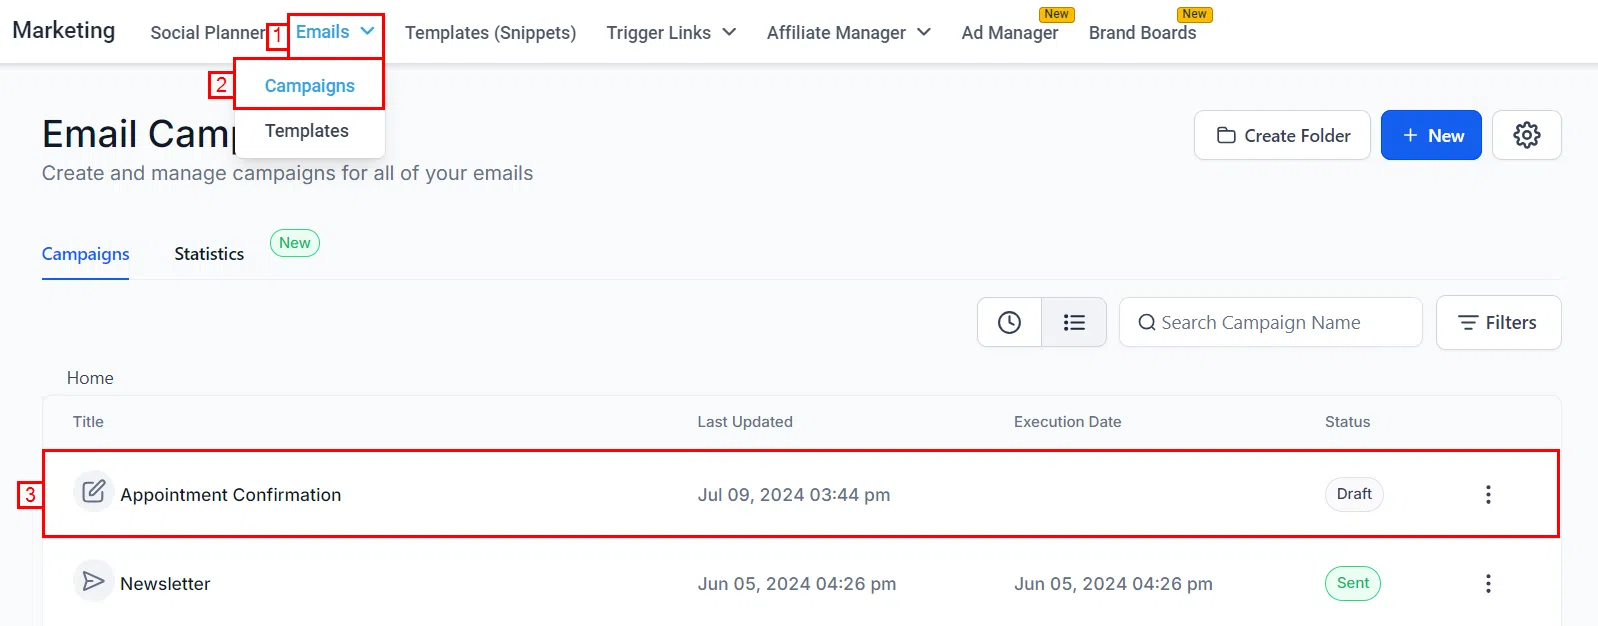
Go to Marketing > Emails > Campaigns and create a new campaign or open an existing draft.
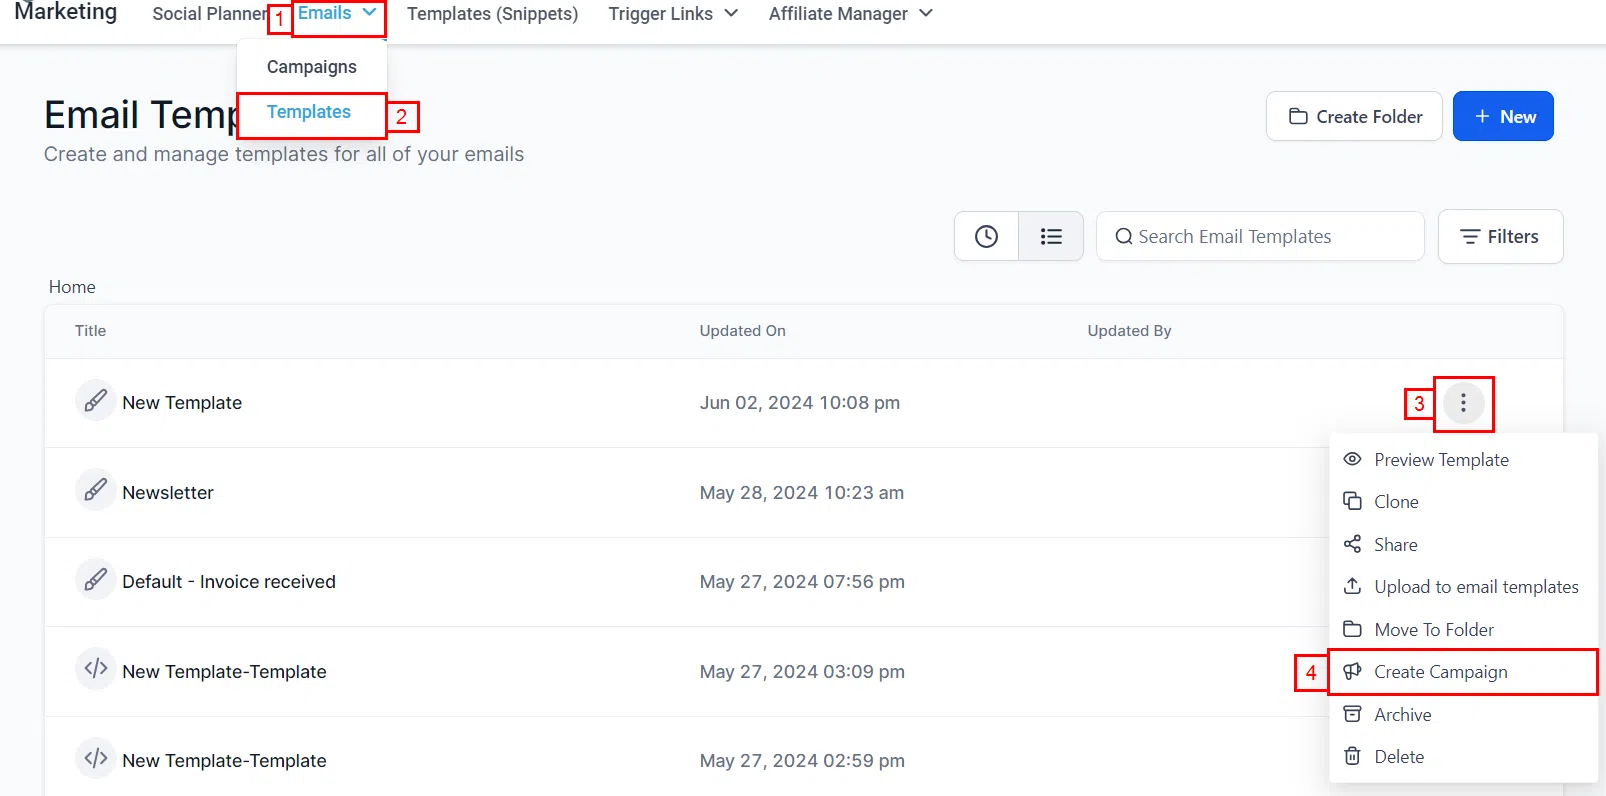
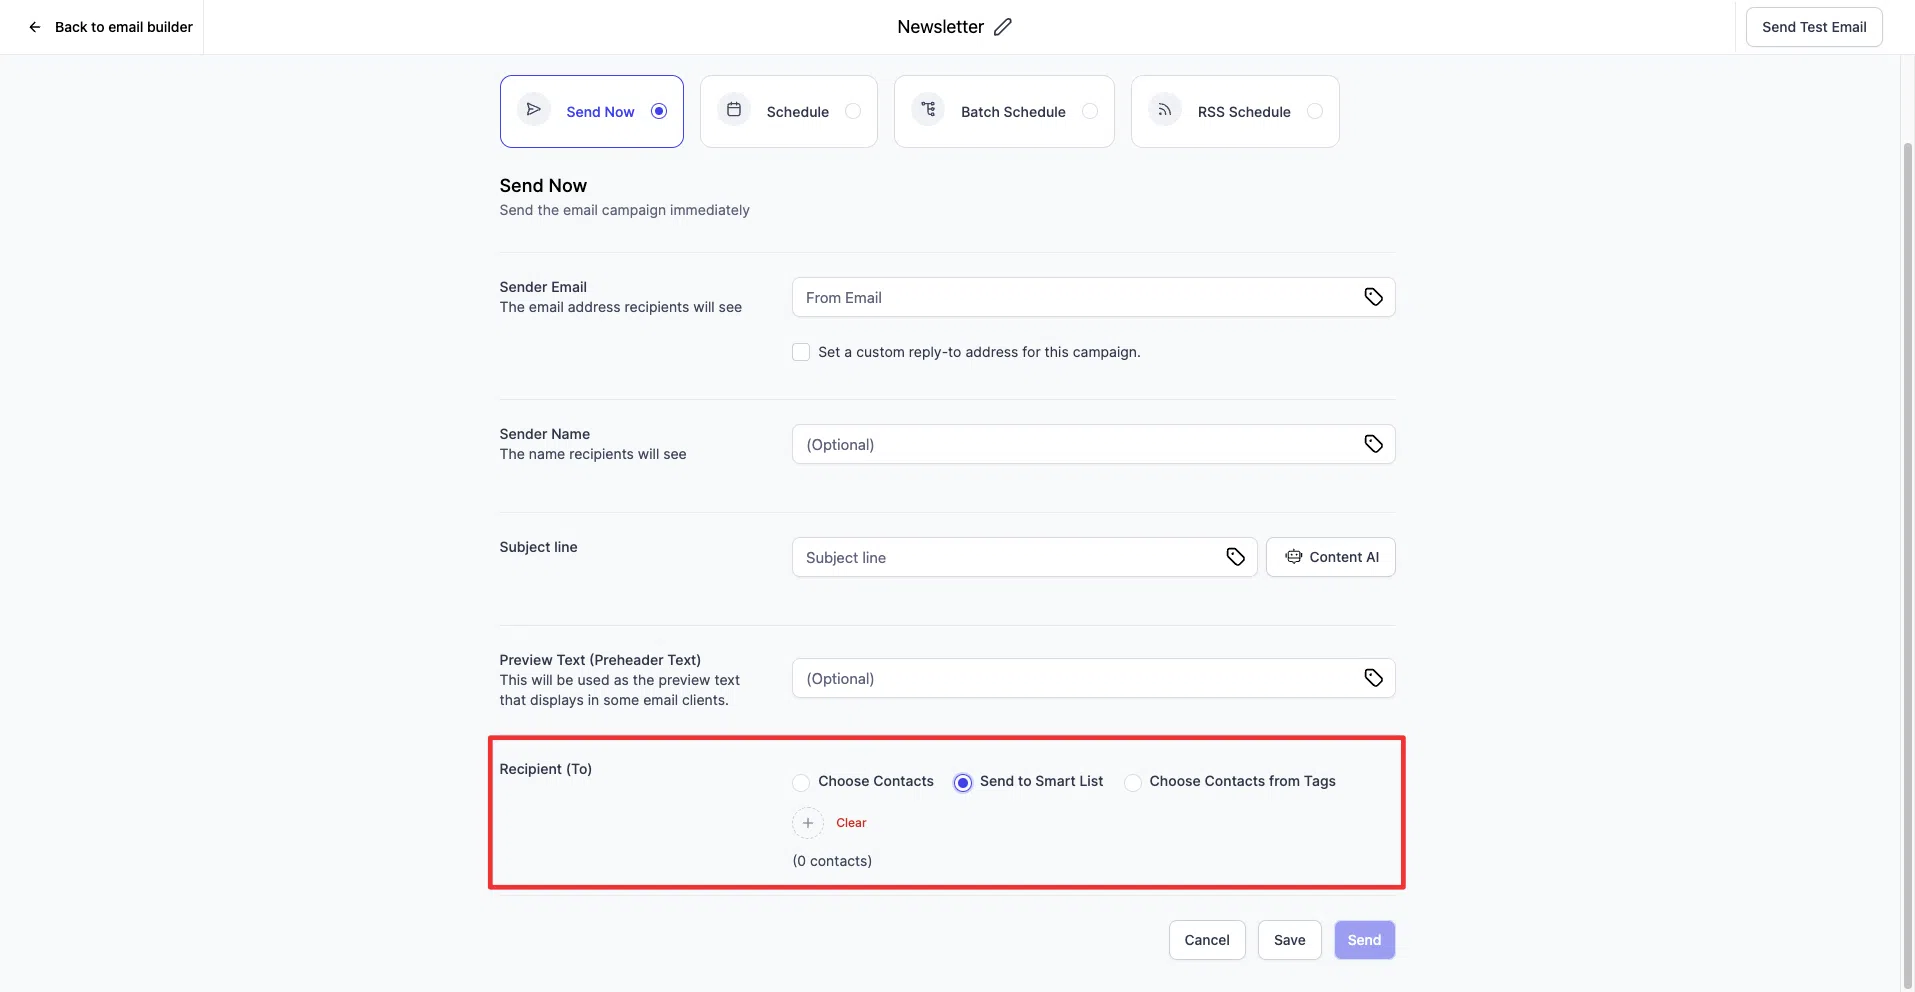
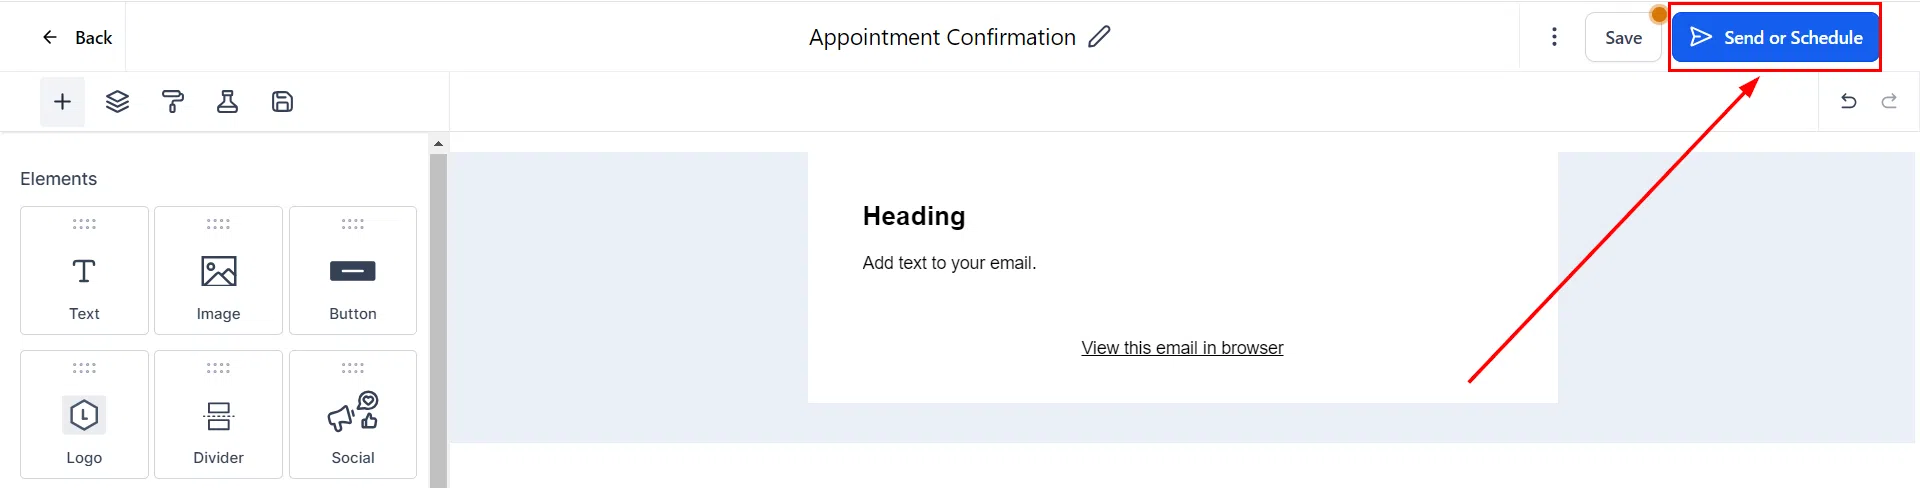
After designing your email and clicking Send or Schedule, locate the Recipient field. Choose Send to Smart List and select the Smart List you want to target.
Option 2: Directly from a Smart List
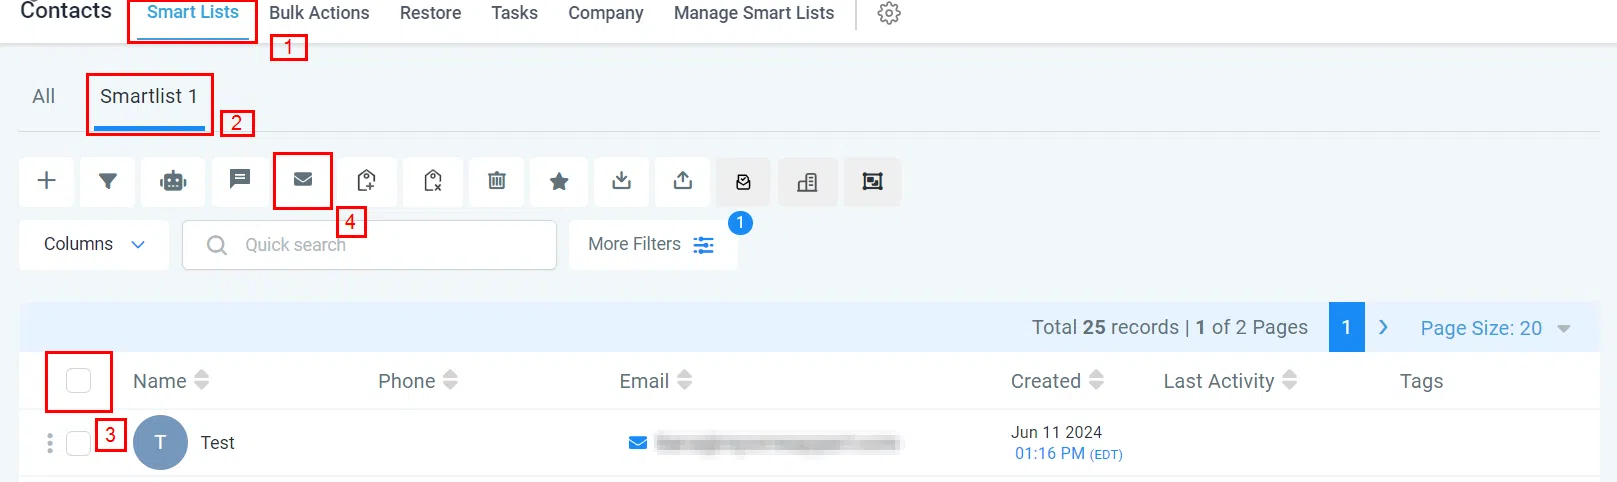
Navigate to your Smart List and click Send Email. Pull in your email template, fill in the sender and subject details, and choose your send time from there.
Tips
- List not updating? Check that tags are correctly applied to your contacts. A refresh or short wait can resolve syncing delays.
- Multiple Smart Lists: You can select multiple Smart Lists as recipients within a single campaign, as long as the content is relevant to all of them.
Build Segments
Build Segments lets you define a custom audience on the spot – without creating a saved Smart List. It’s ideal for one-off sends where you need specific targeting or want to exclude certain contacts without cluttering your Smart Lists tab.
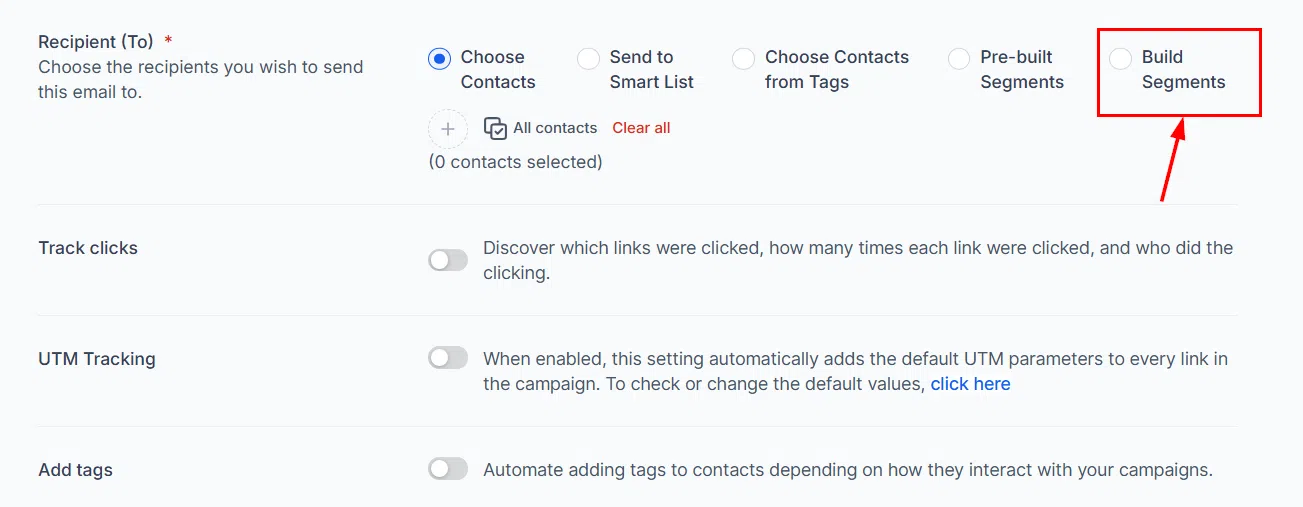
The Build Segments option appears in the Recipient (To) section whenever you’re sending or scheduling a campaign. You can add conditions based on Contacts, Smart Lists, Tags, and more.
Adding Conditions
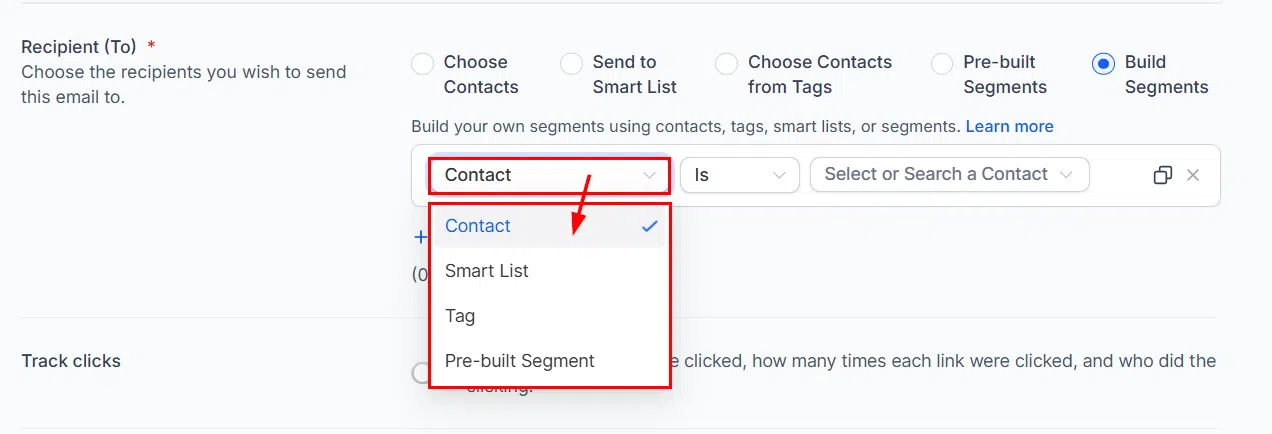
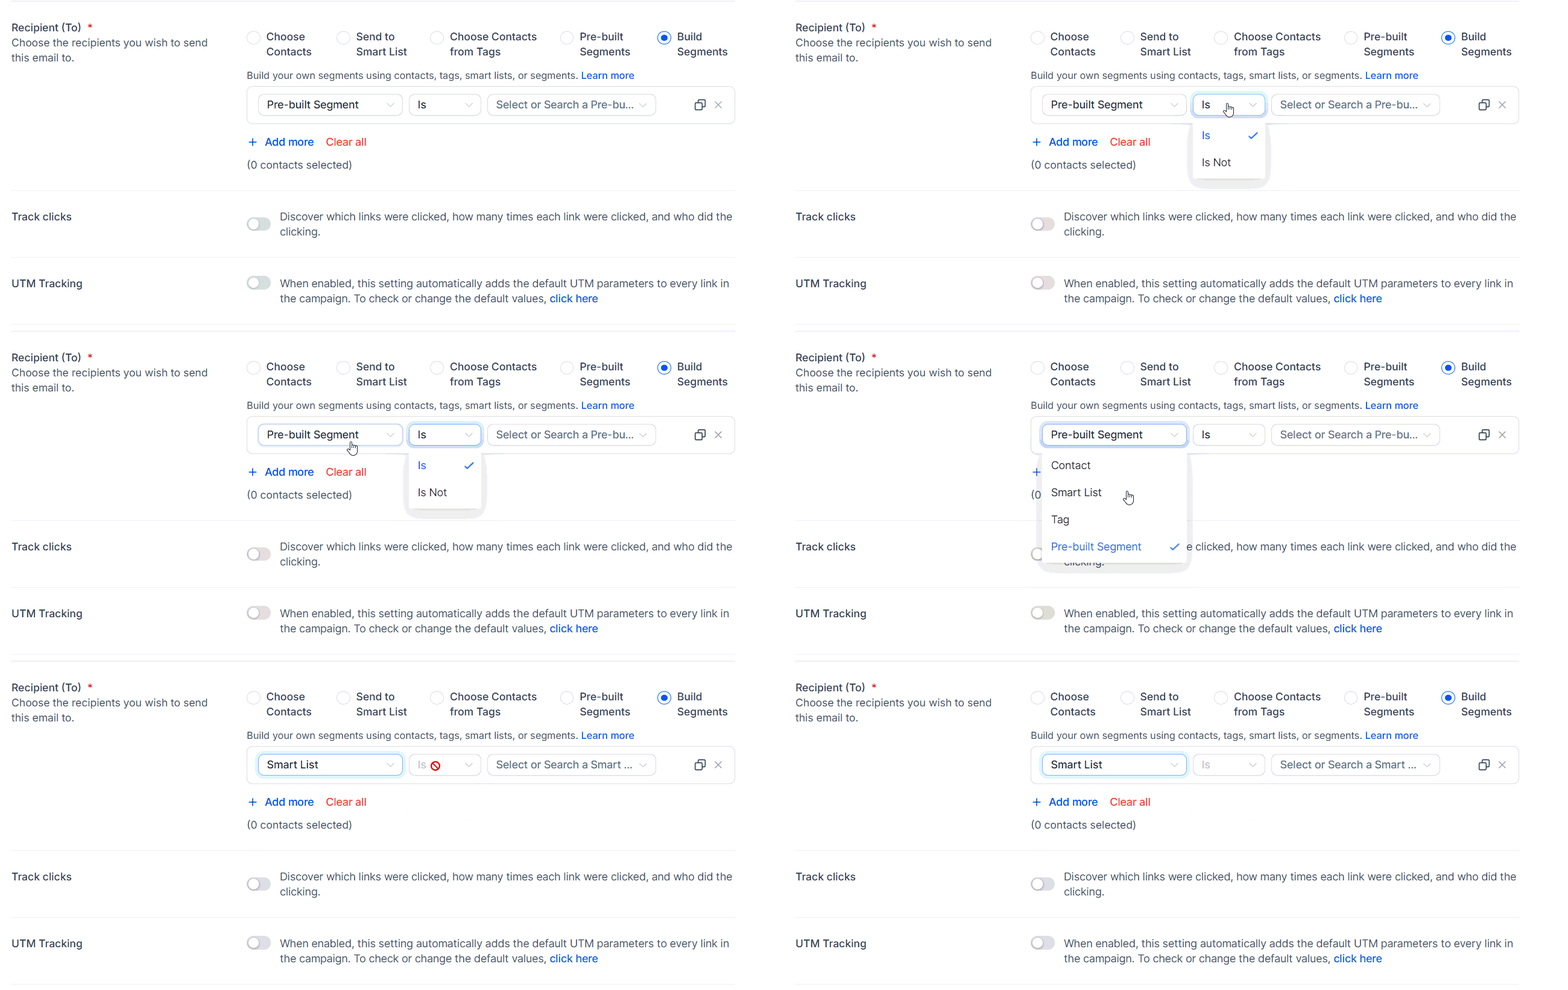
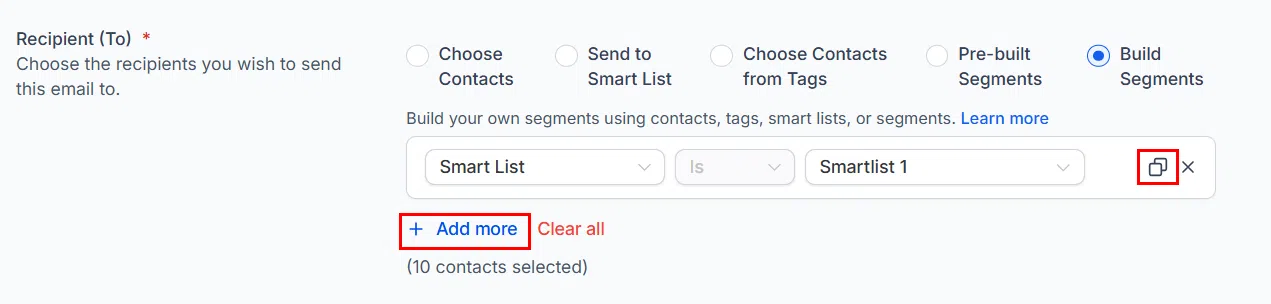
Use the Copy button to duplicate existing condition rows quickly.
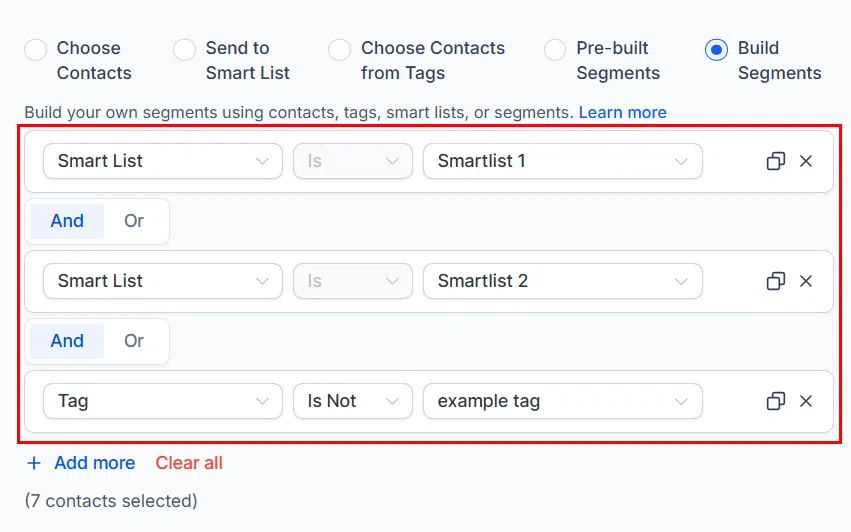
Each condition uses an operator (such as “is” or “is not”) to include or exclude contacts. Combine conditions with AND/OR logic to refine your audience.
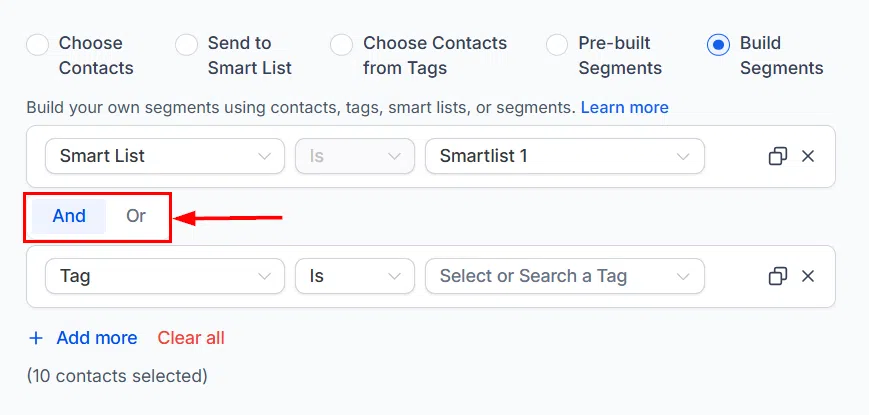
Example
To send to contacts in Smart List 1 and Smart List 2, but exclude those with Tag 3:
- Smart List is Smart List 1
- AND Smart List is Smart List 2
- AND Tag is not Tag 3
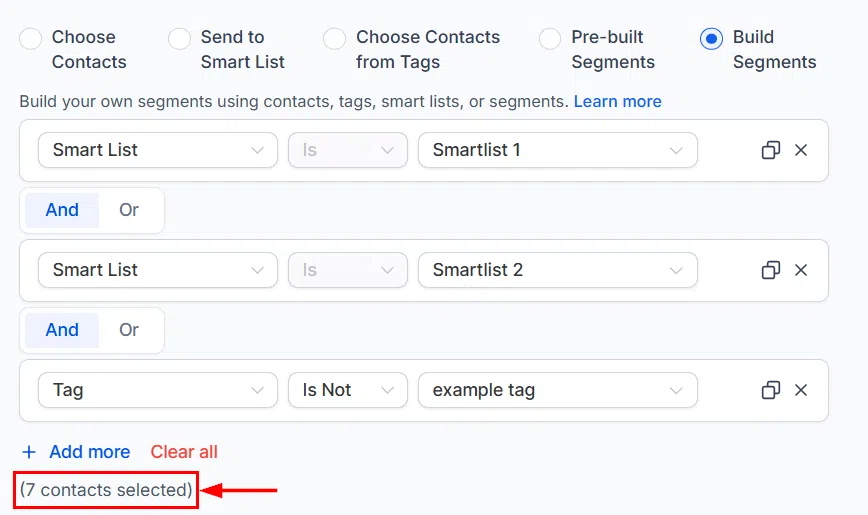
Once conditions are set, Growth360 shows the number of matching contacts before you send.
Important Notes
- Smart List exclusions: You cannot currently add a condition where a Smart List “is not” selected. Tag exclusions work, but Smart List exclusion is not supported.
- Contact list is generated at send time: The final recipient list is calculated when the campaign executes, not when you set it up. Contacts added after configuration but before the send time may be included.
Email Verification
Growth360 requires your From Email address to be verified before it can be used to send campaigns. This protects your brand from unauthorised use and spoofing.
Verification is not required if you’re using a custom domain set up under LC Email, or if the location admin email is already configured in settings.
How to Verify Your Sender Email
Create or open an existing campaign and
Click Send or Schedule.
In the Sender Email field, enter your email address.
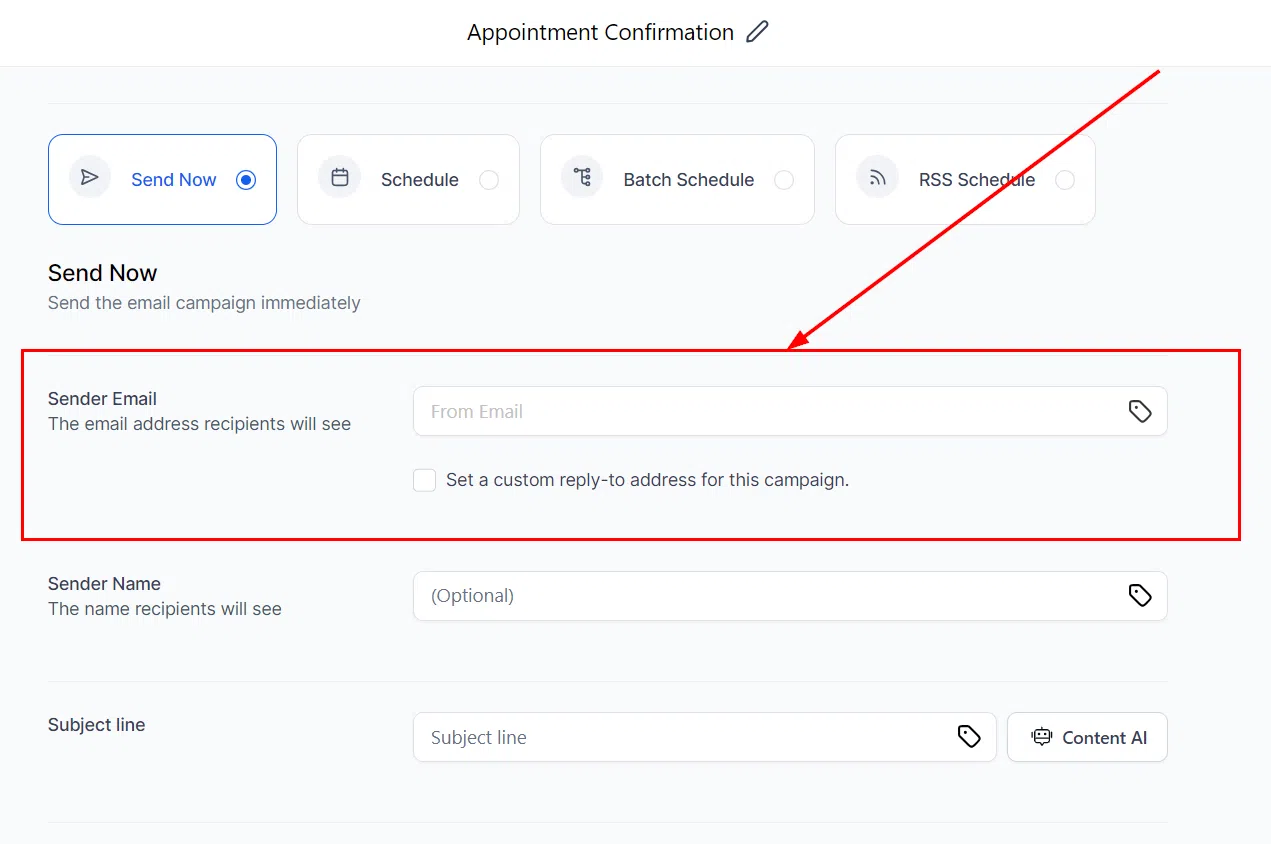
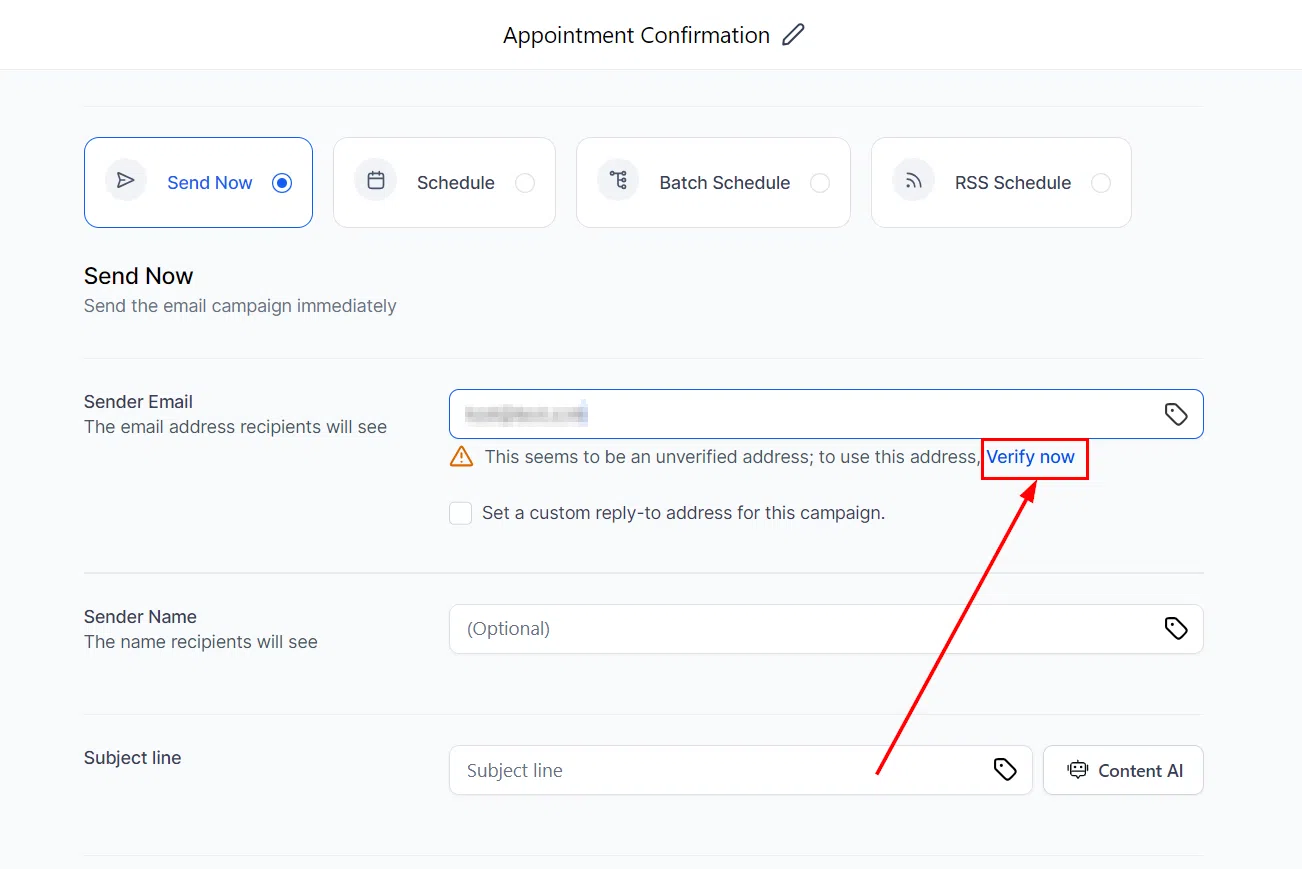
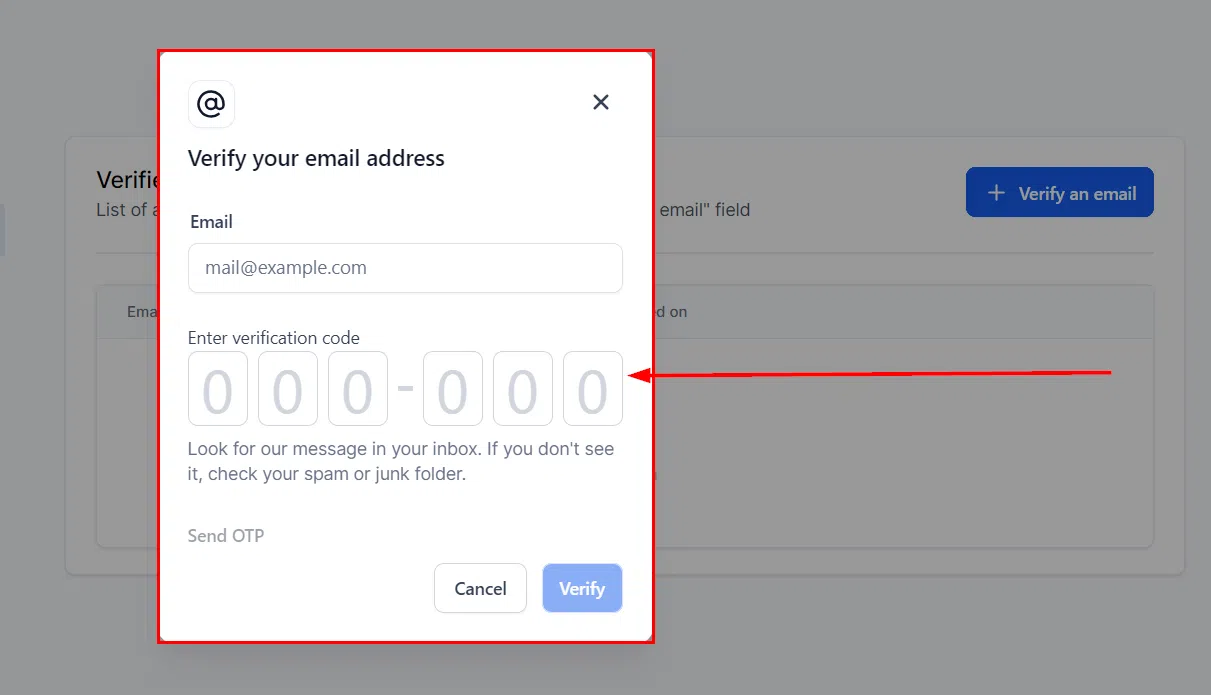
If the address is unverified, a Verify Now prompt appears. Click it – Growth360 sends a 6-digit OTP to your email address.
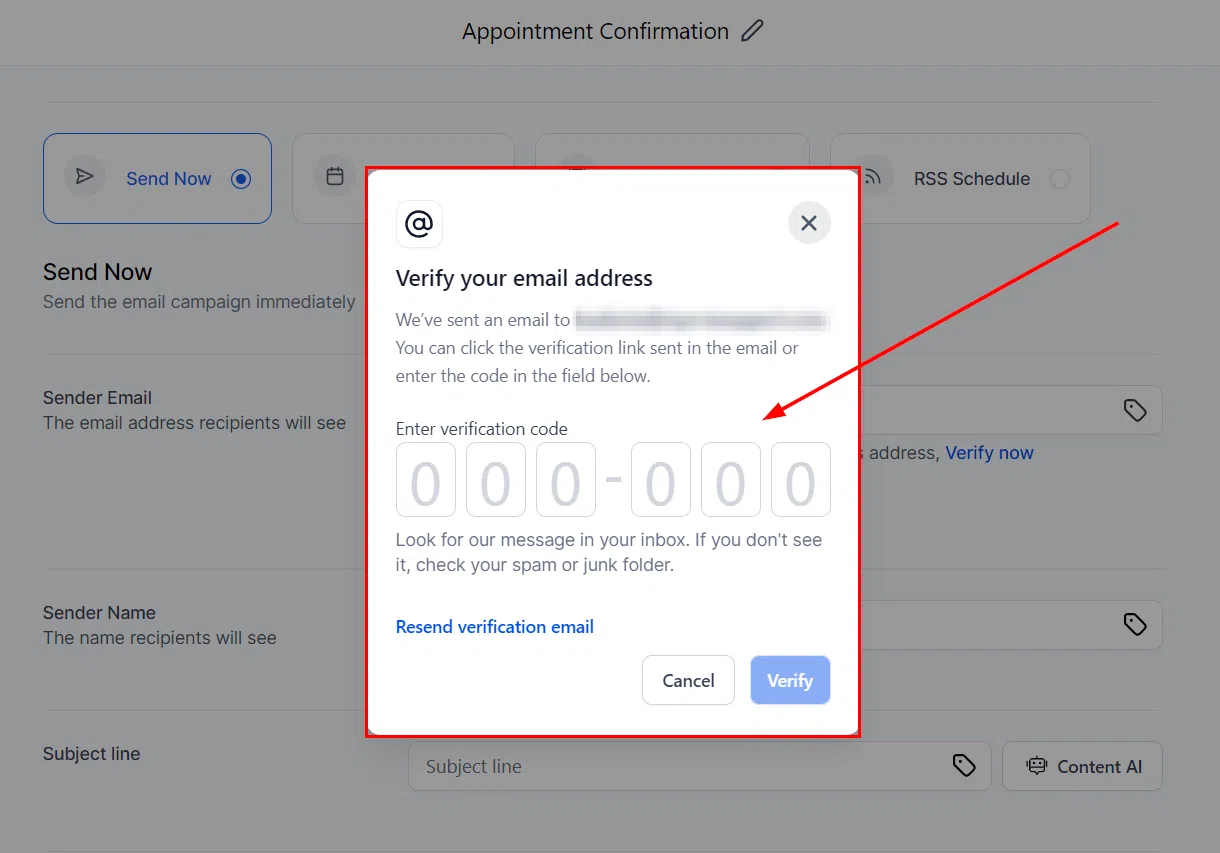
Enter the OTP into the verification prompt to authenticate the address. Once verified, it’s ready to use across all future campaigns.
Verifying via Campaign Settings
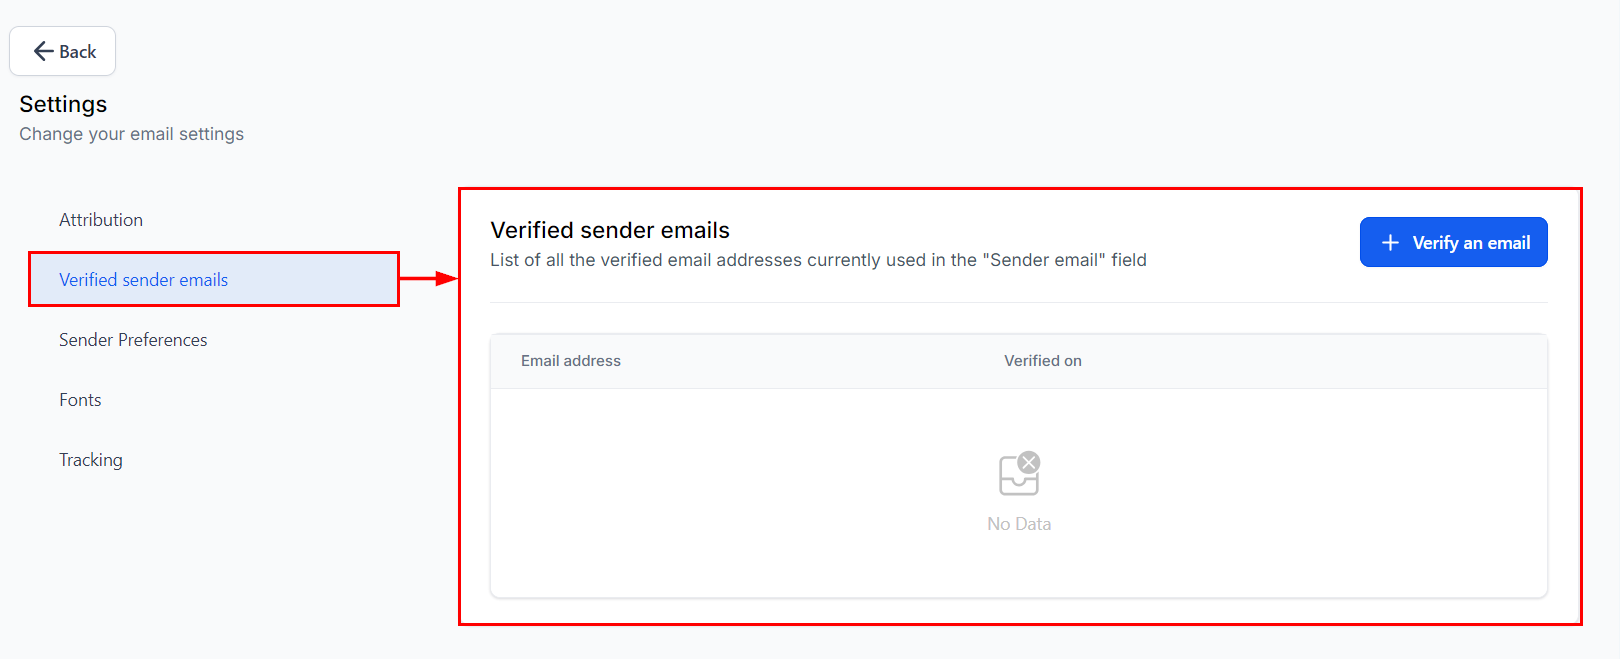
You can also verify sender emails through the Campaign Settings page. Click the gear icon from the Campaigns view.
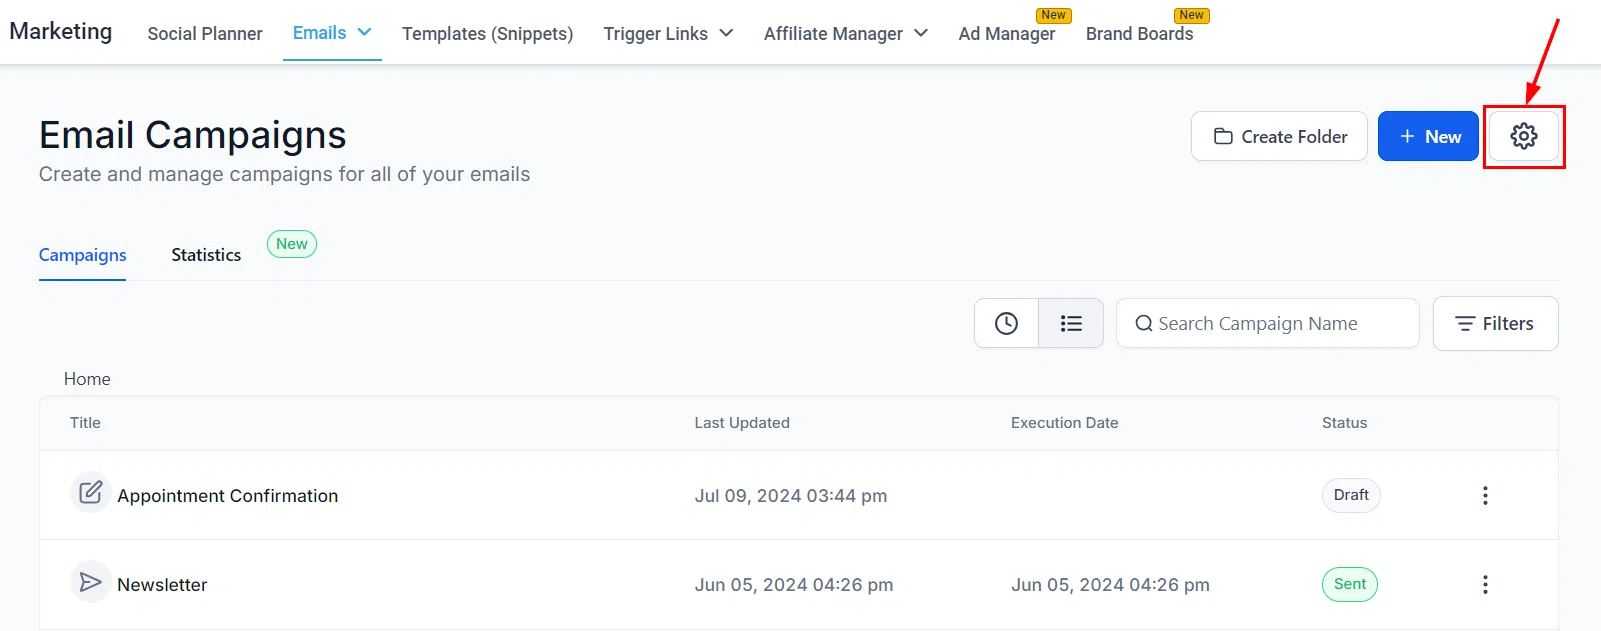
In the Verify Sender Emails section, click Verify an email, enter the address, then enter the OTP when it arrives.
Troubleshooting
- OTP not arriving: Check your spam or junk folder first.
- OTP expired: Use the resend option to request a new code.