The All-in-One Chat Widget in Growth360 lets you manage Live Chat, Email, and WhatsApp conversations through a single unified interface – giving visitors the freedom to choose their preferred communication channel without you needing separate widgets for each.
What Is the All-in-One Chat Widget?
The All-in-One Chat Widget consolidates multiple communication channels into one widget on your website. Instead of juggling separate widgets for Live Chat, Email, and WhatsApp, your team manages everything from a single interface, while visitors seamlessly choose how they want to reach you.
Key benefits include:
- Unified Management: Handle Live Chat, Email, and WhatsApp conversations from one place.
- Consistent Branding: A single, unified colour scheme maintains a cohesive brand experience across all channels.
- Enhanced Engagement: Personalise the welcome message to boost visitor interaction from the start.
- Easy Setup: Only active communication channels are displayed – inactive channels stay hidden until configured.
Setting Up the All-in-One Chat Widget
Step 1: Create a New Widget
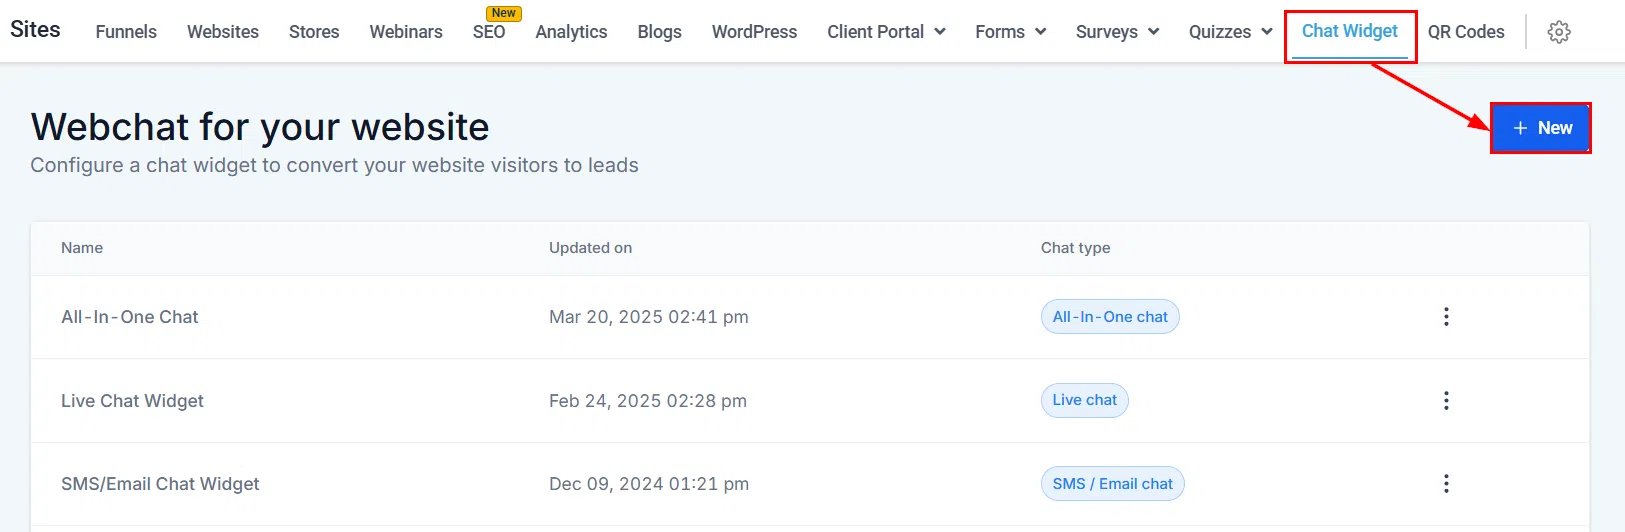
Navigate to Sites and open the Chat Widget section. Click + New to start creating a widget.
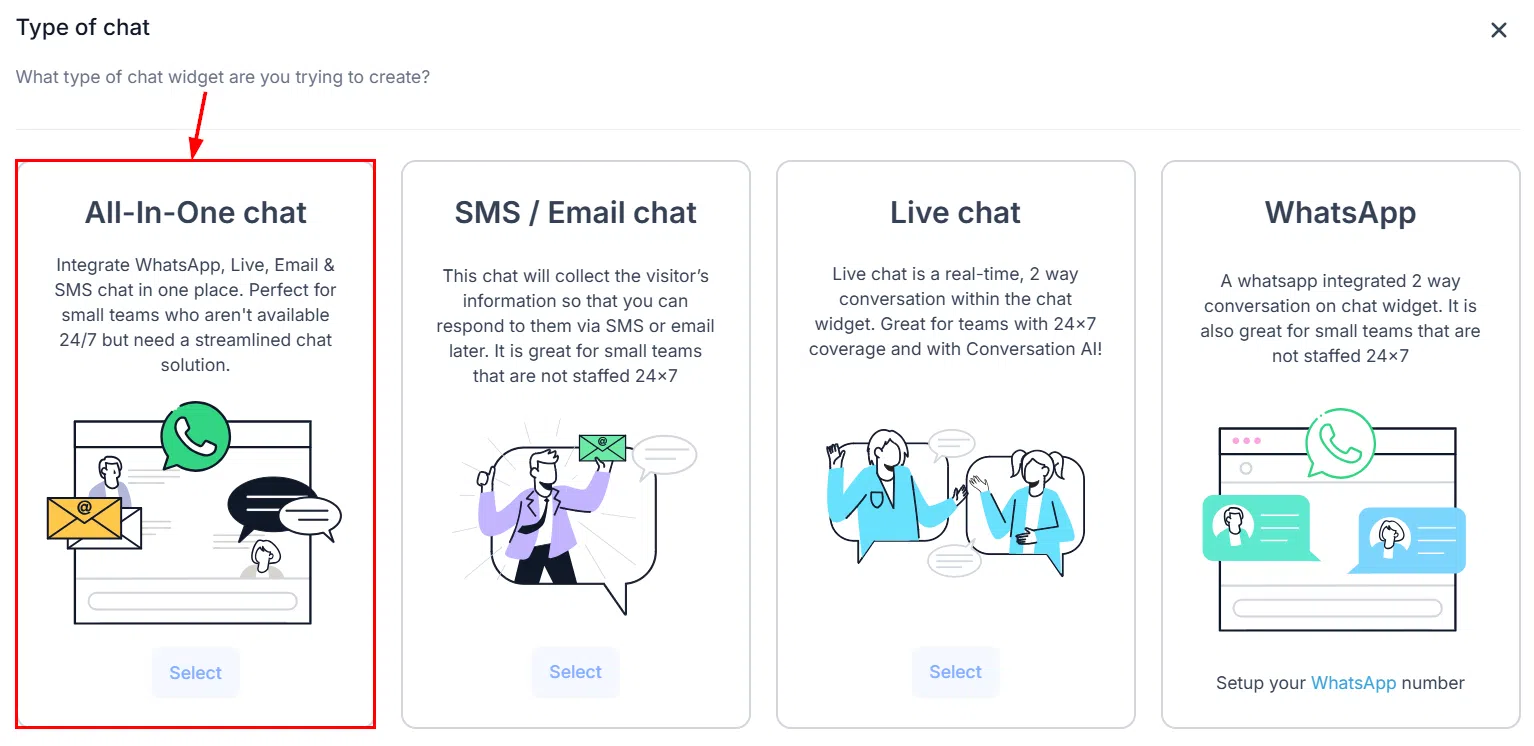
When prompted to choose a widget type, select All-In-One.
Step 2: Configure the Widget Type
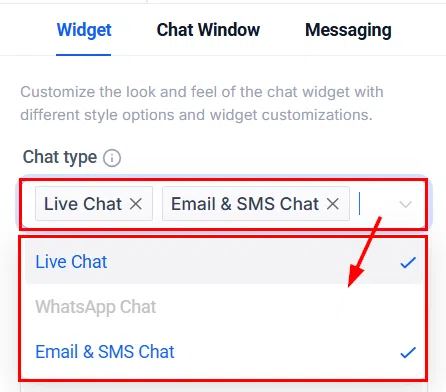
Choose which communication channels to include in the widget. Only channels that are active in your account will be available to select.
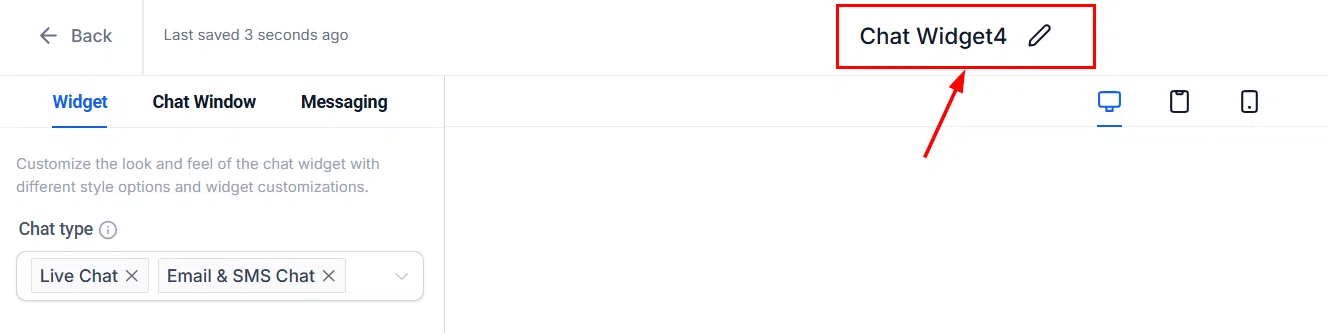
Step 3: Set the Widget Name and Welcome Message
Give your widget a descriptive name to identify it in your account – this is internal only and not visible to visitors.
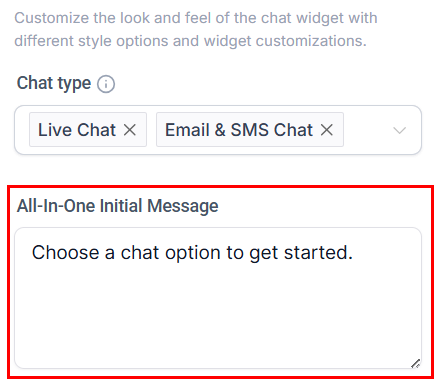
Personalise the welcome message that visitors see when they open the widget. A warm, inviting message encourages engagement.
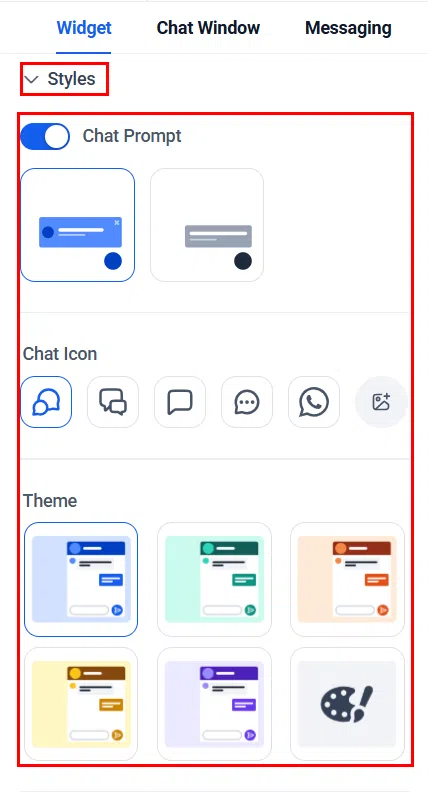
Step 4: Customise Styles
Configure the widget’s colour scheme and visual styling. Because the All-in-One widget uses a unified design across all channels, a single colour scheme applies to Live Chat, Email, and WhatsApp – ensuring a consistent brand experience.
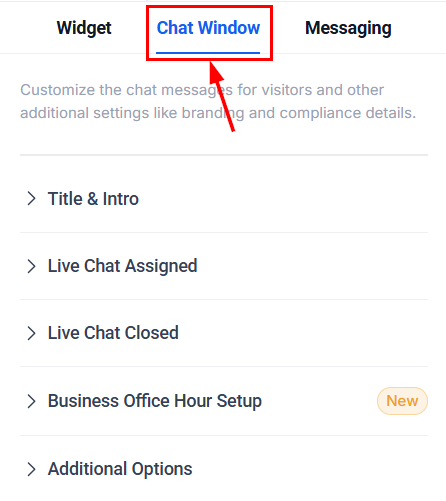
Step 5: Configure the Chat Window
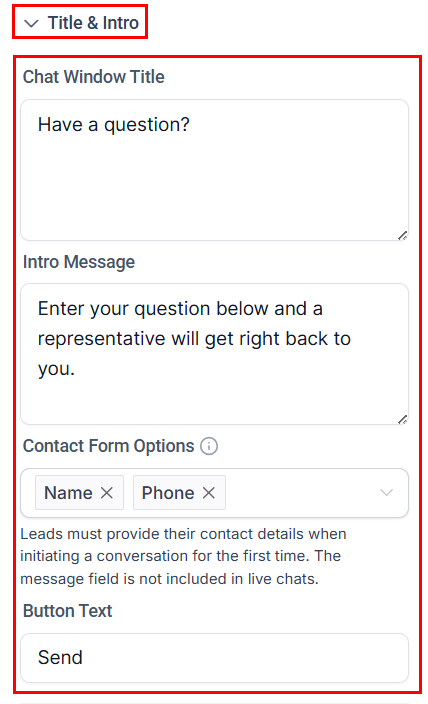
Set up the chat window title and intro message. These are displayed to visitors when they open the widget.
Step 6: Configure Each Channel
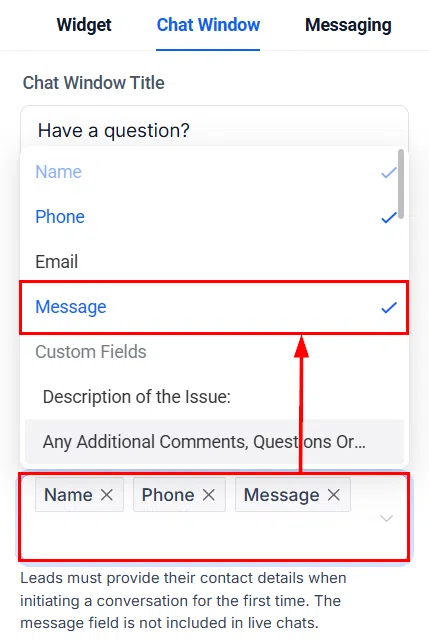
Configure the Email channel settings, including the routing email address and any contact form fields to collect visitor information.
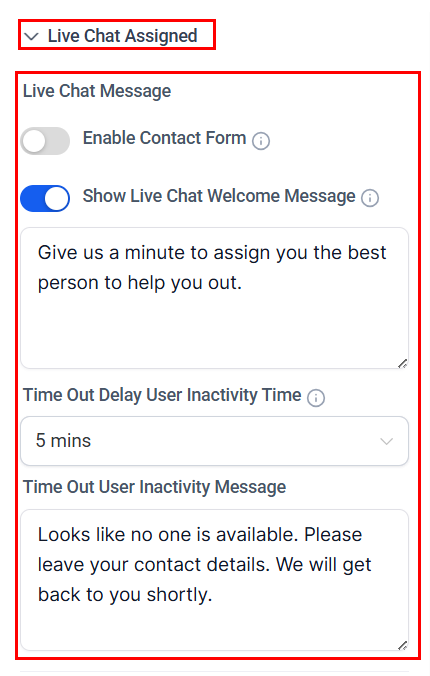
Configure the Live Chat channel settings, including agent assignment and availability options.
Step 7: Save the Widget
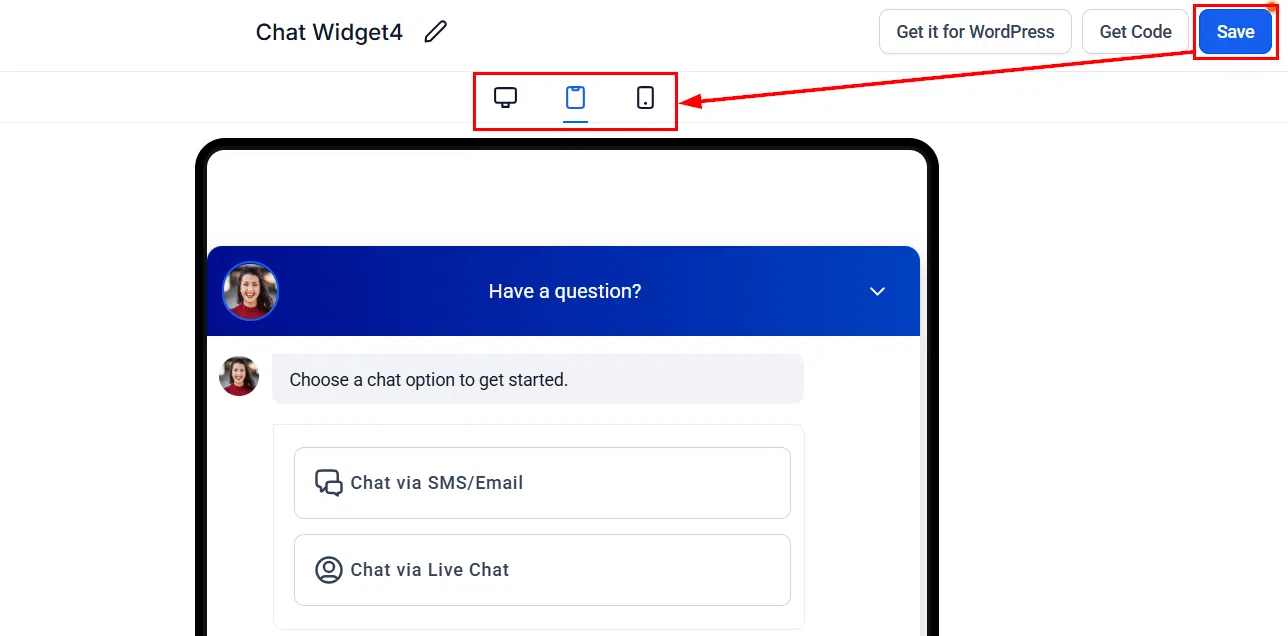
Once all channels and settings are configured, click Save to create the widget. You can then install it on your website using the embed code or via the LeadConnector WordPress plugin.
Using the Widget
Switching Between Channels
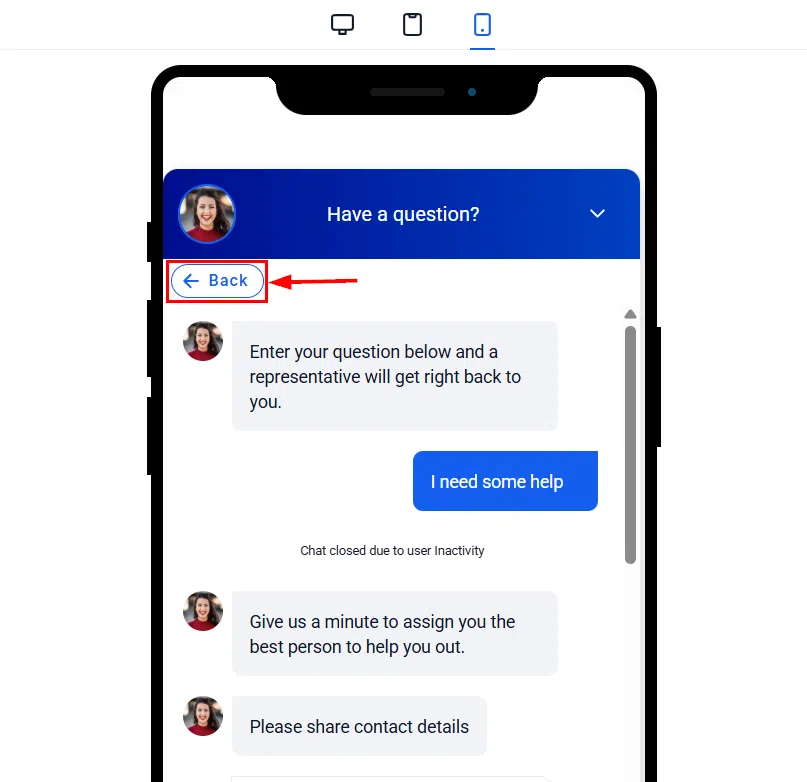
Visitors can switch between Live Chat, Email, or WhatsApp at any time by clicking the Back button in the chat header to return to the channel selection screen.
Contact Form Fields
For Email, SMS, and WhatsApp chats, a standard contact form is displayed to capture visitor information before the conversation begins.
Active Conversations
Chat sessions remain open until manually ended by a team member, or closed automatically based on the widget’s inactivity timeout settings.
Frequently Asked Questions
What if I do not have a WhatsApp number? You can still use the All-in-One widget with just Live Chat and Email. WhatsApp will remain hidden until a valid WhatsApp number is added to your account.
Can I use different colours for each channel? No – the All-in-One widget uses a single unified colour scheme across all channels to maintain brand consistency.
How do I end a Live Chat session? Sessions can be closed from the Conversations panel, or will automatically end after the configured inactivity timeout period.
Troubleshooting
Widget not showing on your site: Verify the widget has been correctly added to your funnel, website, or external site code. For external sites, check that the embed code is in place and saved.
WhatsApp not appearing: Ensure your WhatsApp number is active and correctly configured in your account’s WhatsApp integration settings.
Email not sending: Verify that your email address is properly set up and verified within your Growth360 account settings.