Add a Single Contact
Your CRM makes it simple to keep customer contacts organised. When an SMS, call, Facebook/Instagram/GMB message, or email is received from a potential client, the system automatically adds them to your contacts. However, you can manually input contact information by clicking the + button at the top left of the Contacts page.
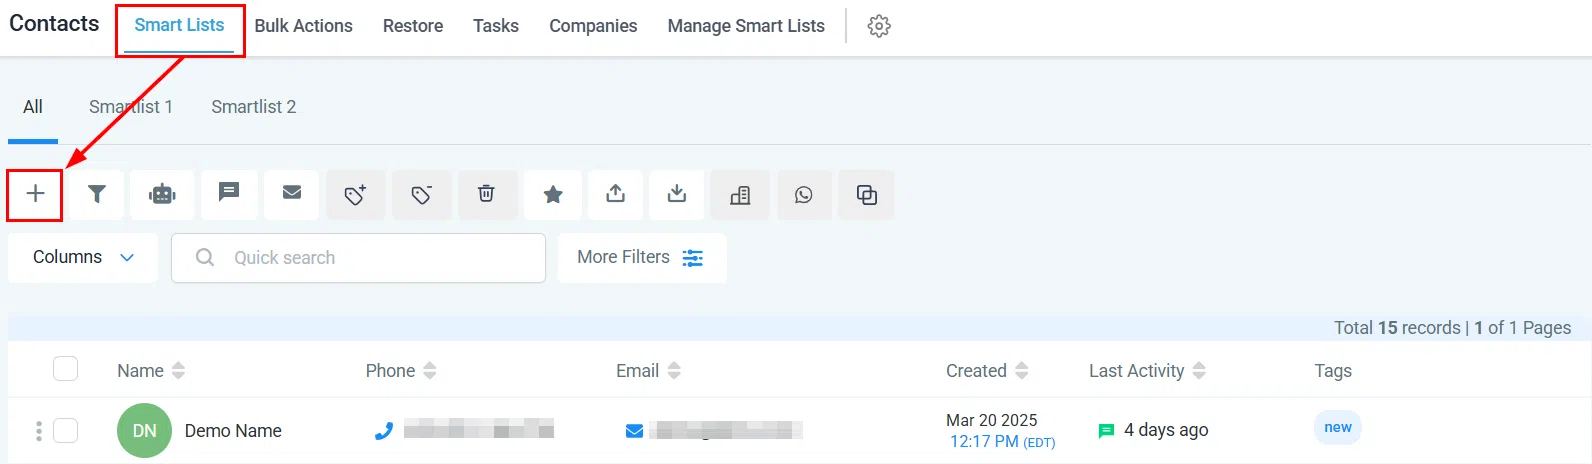
Once you click the button, a page will appear for you to input the contact details.
Adding New Contacts
Personal Logo: Upload the business logo of each contact as a way to identify them, especially if you have clients with the same name. The proposed size is 512×512px and no bigger than 2.5MB.
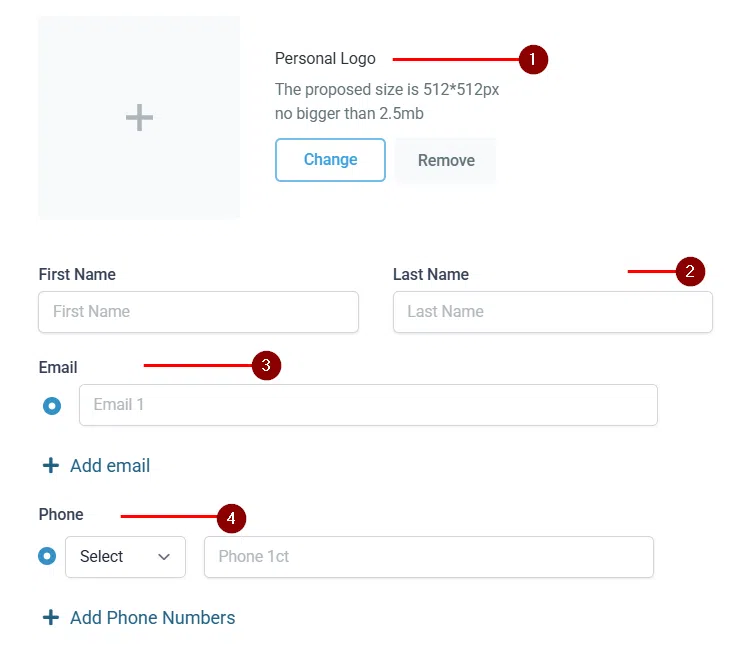
First and Last Name: Enter the contact’s first and last name to easily identify them.
Email: Enter the contact’s primary email address. Add multiple email addresses by clicking the + Add Email button.
Phone: Enter the contact’s primary contact number. Include multiple phone numbers by clicking the + Add Phone Numbers button.
Contact Type: Assign the contact as either a Lead or Customer to segment them based on their current status within your company.
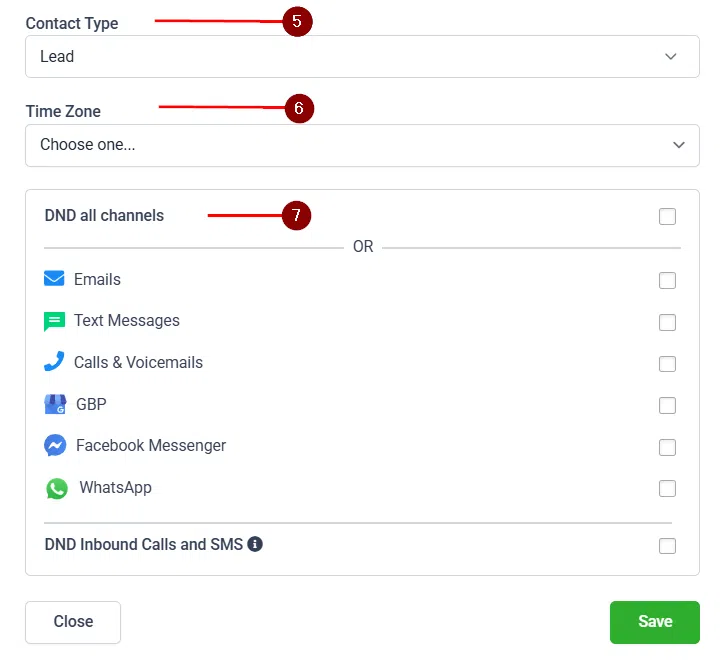
Time Zone: Choose the time zone your contact is in. This helps you and your team know the best time to reach them.
DND (Do Not Disturb): Enable Do Not Disturb for all channels or specific channels based on the contact’s preferred mode of communication.
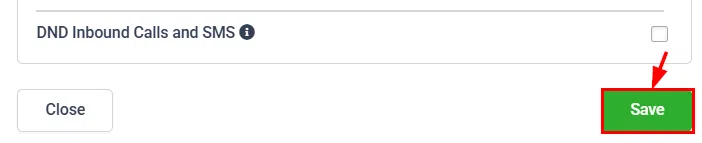
Review the contact details, then click Save to finalise the addition. Your contact will now appear in the list with their own contact card, where you can add notes, tasks, and appointments, track enrolled courses, and more.
Import Multiple Contacts
The Upload Contacts feature lets you import a single contact or an entire group of contacts from a CSV file with just a few clicks.
Preparing Your File
Before uploading, prepare your CSV file so that it is in .csv format, contains only one spreadsheet, and is under 50MB. The file should include a header row that matches the CRM fields.
- Include Essential Columns: Ensure your spreadsheet contains key columns such as name, email, and phone number.
- Assign Contact Owner: Include the user’s name in “FirstName LastName” or “LastName FirstName” format.
- Format Phone Numbers: Use E.164 format (e.g. +1 1234567890). Formats like 123-456-7890 are also acceptable when the country is set to the US.
- Acceptable Date Formats: Use mm/dd/yyyy or yyyy/mm/dd. Separators / – or . are all acceptable.
- Tag Formatting: List tags as “Value 1, Value 2, Value 3”.
Steps for Importing Contacts
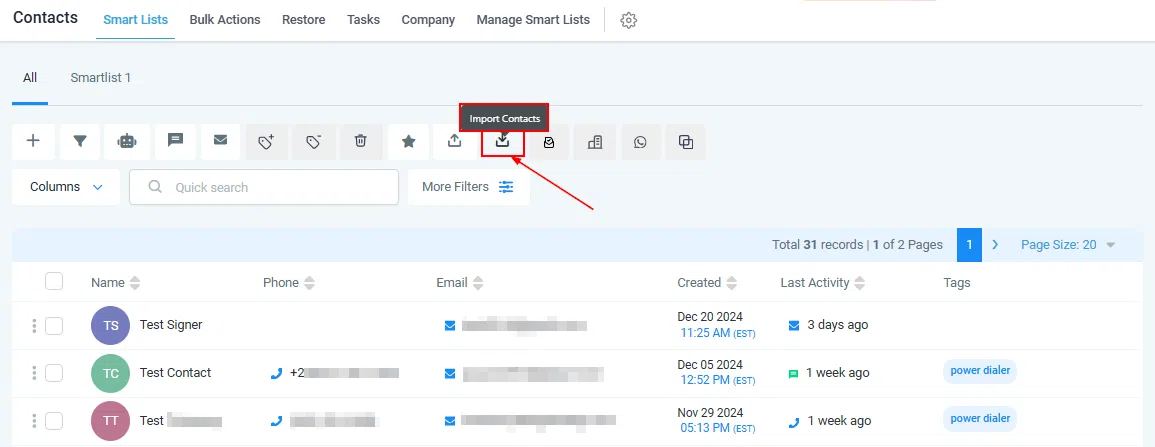
The import process involves four steps: Start, Upload, Map, and Verify. Begin by selecting the Import icon from the Bulk Actions panel within the Contacts tab.
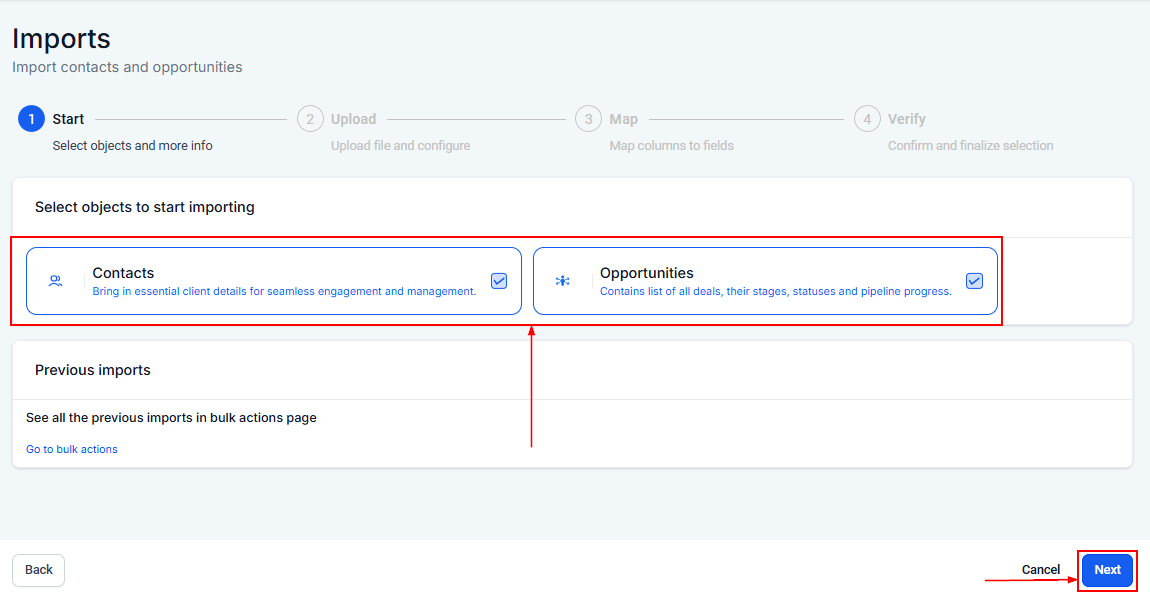
Start
Select the relevant objects (Contacts and/or Opportunities) and click Next.
Upload
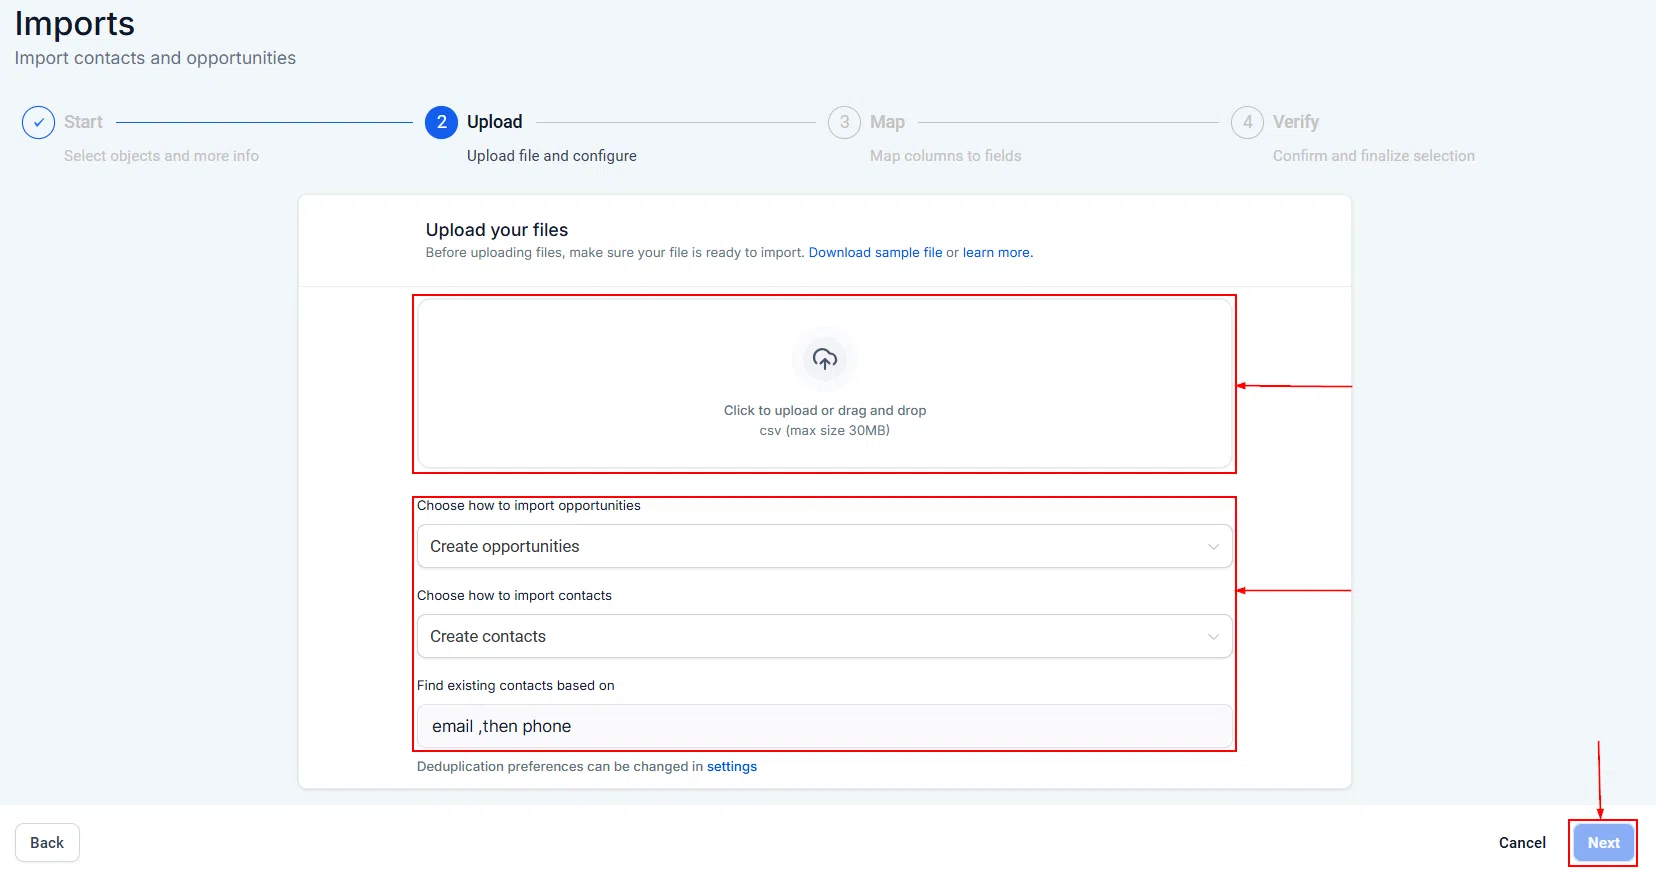
Select the Upload a File button and navigate to your file. The system uses email and then phone number as the default unique identifier for contacts. You can choose other fields for deduplication from Settings. Click Next to proceed.
Map
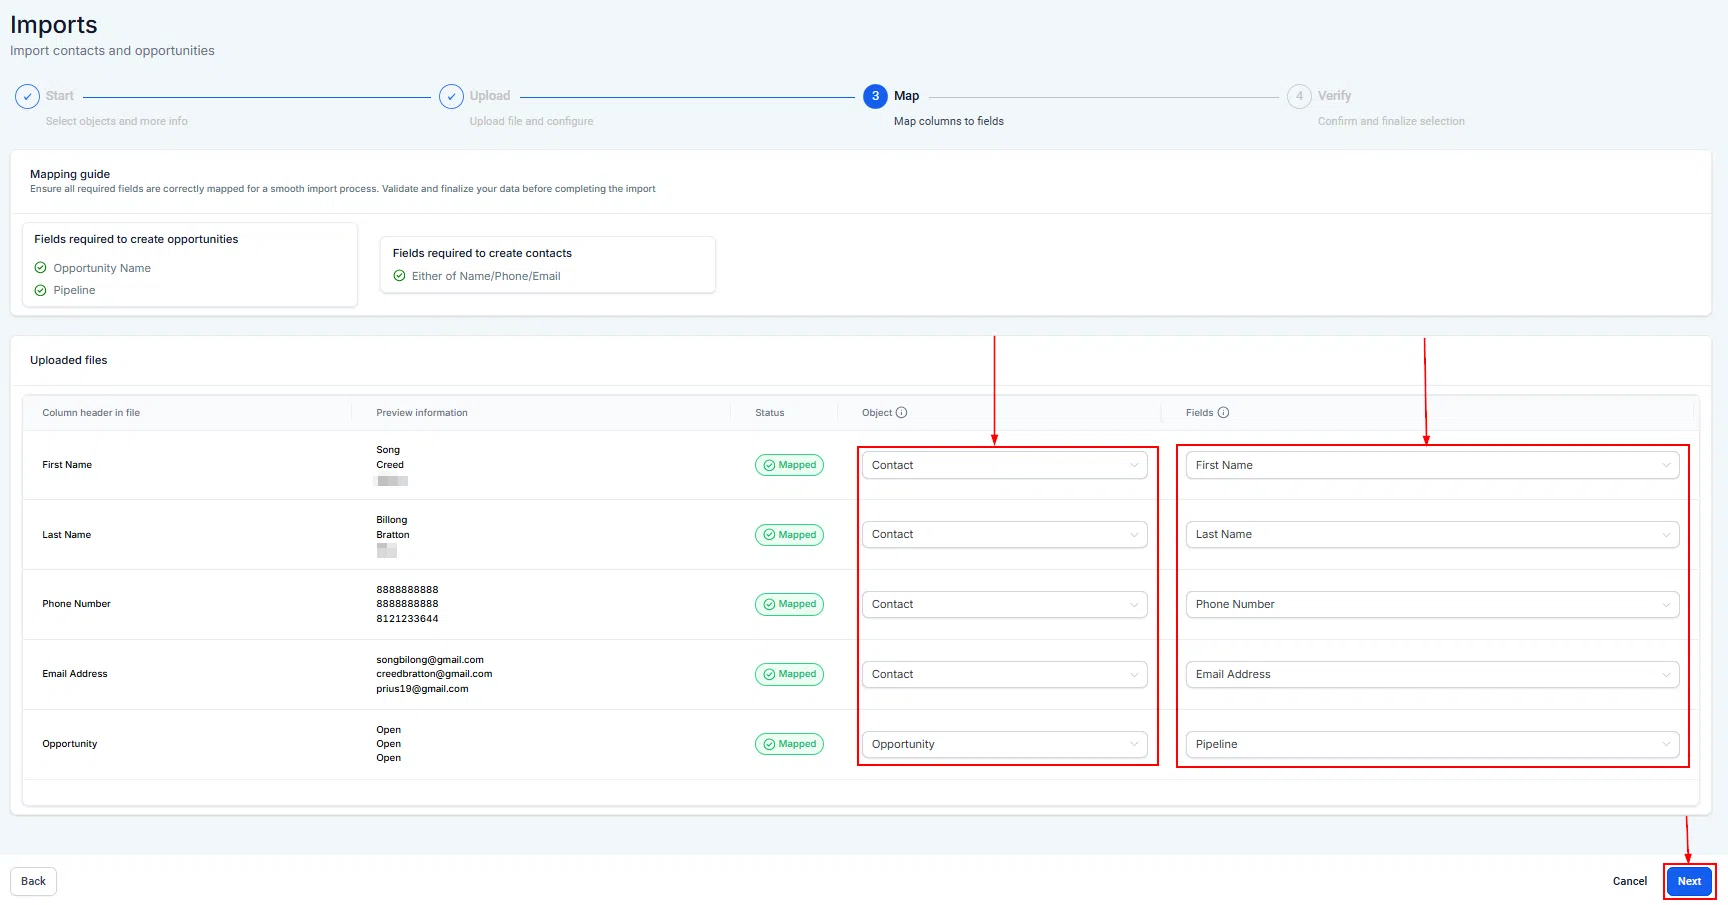
Map the columns from your CSV file to the corresponding CRM fields. Use the preview column to verify matches.
Verify
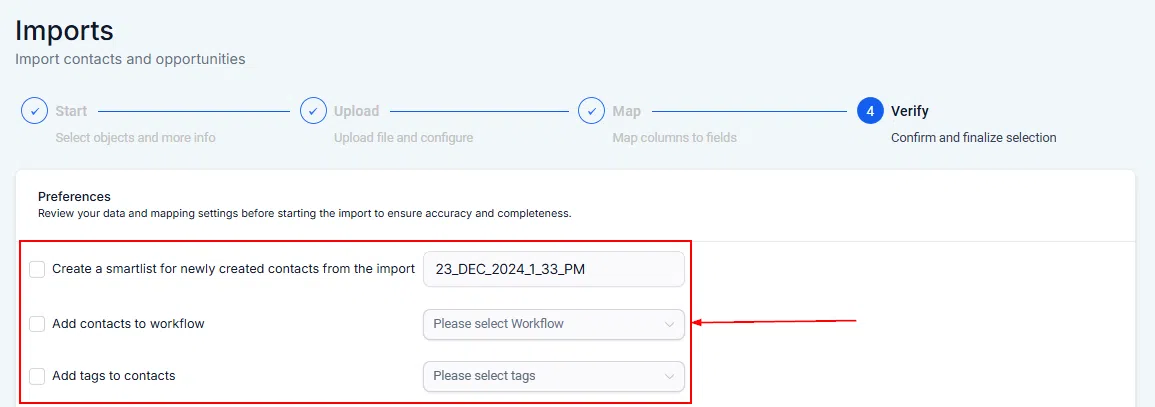
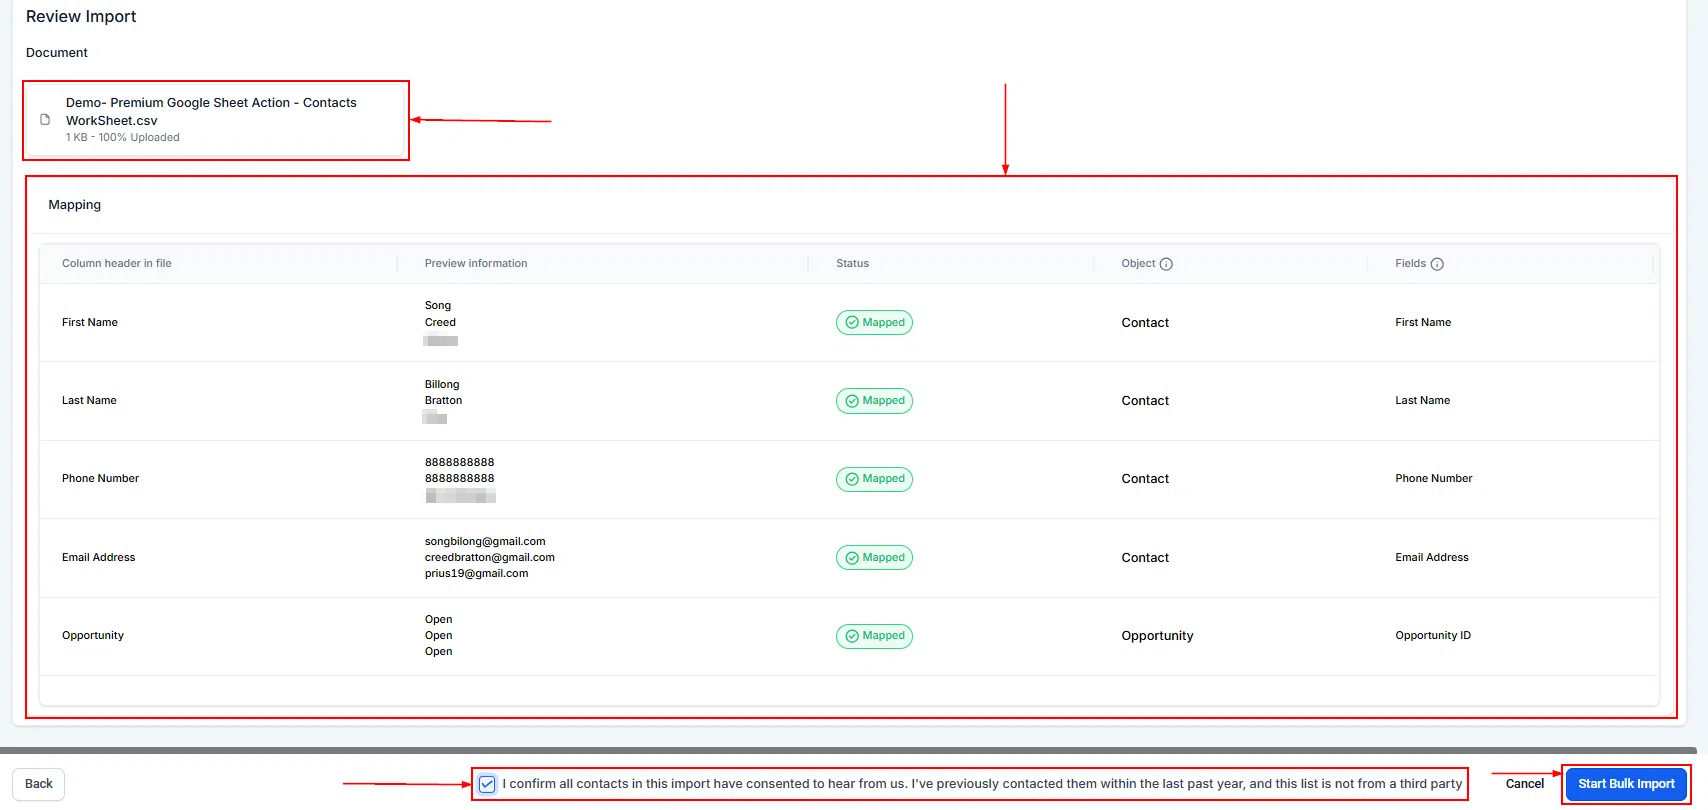
In the final step you can create a Smart List for newly created contacts, add contacts to Workflows, and add tags. Select the compliance checkbox to confirm that all contacts have explicitly opted in to receive communications, then click Start Bulk Import. Track progress in the Bulk Actions tab.
Troubleshooting Contact Imports
The Bulk Actions feature provides a streamlined way to monitor imports, including those that encountered errors.
Navigating to Bulk Actions
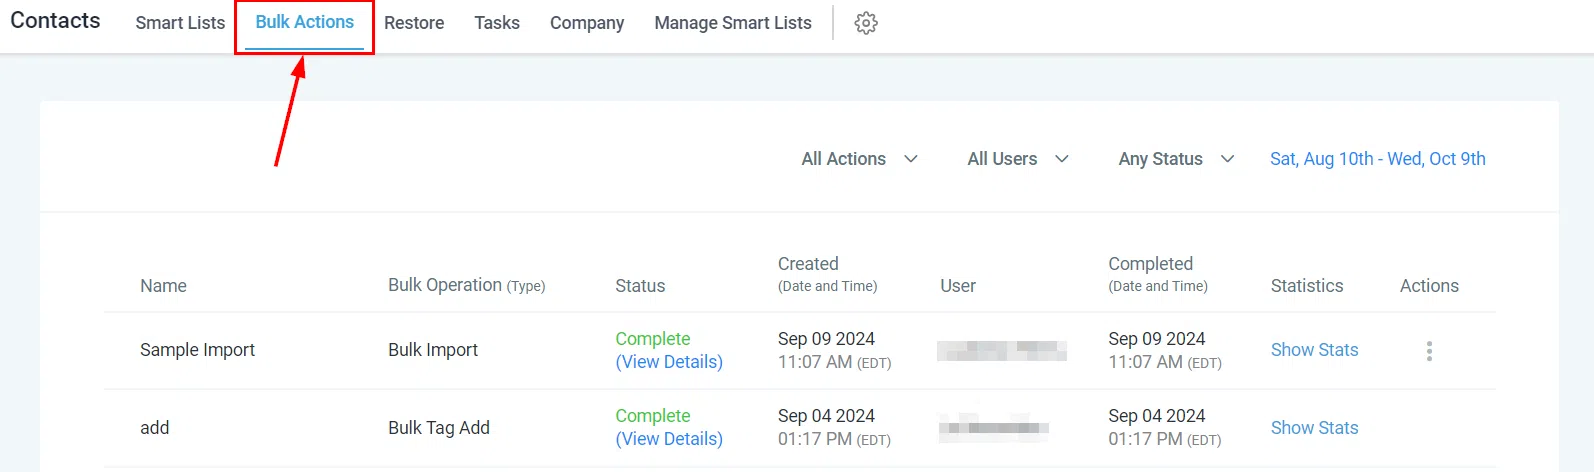
Go to the Contacts section, then the Bulk Actions tab. Here you will find a record of your recent CSV imports, including any that did not fully succeed.
Checking Import Status
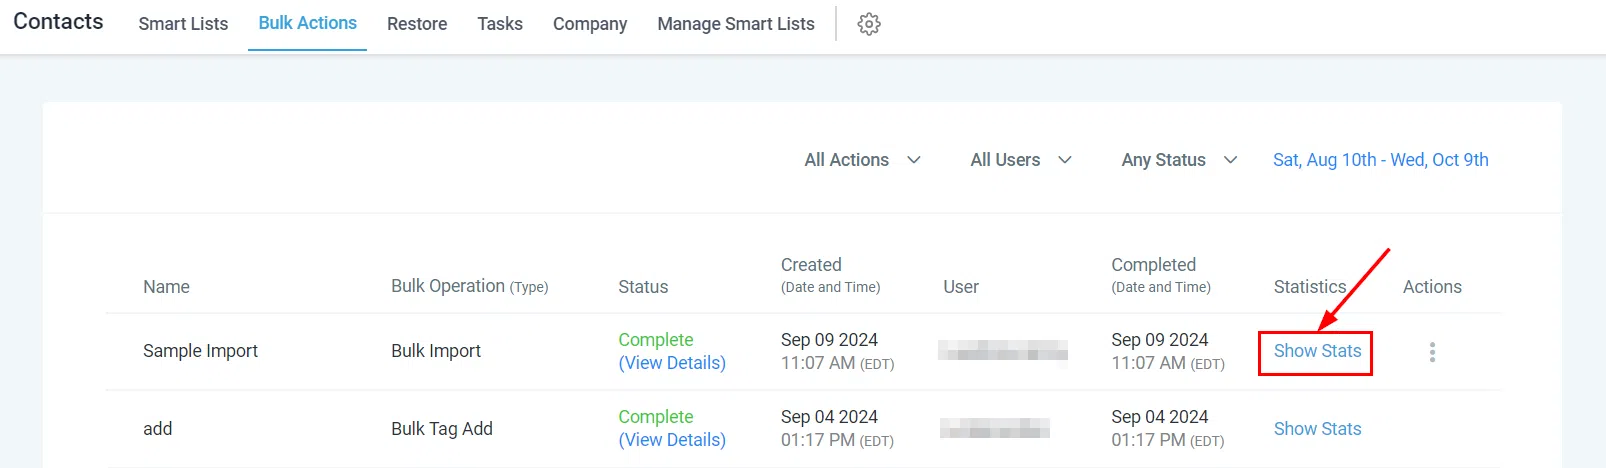
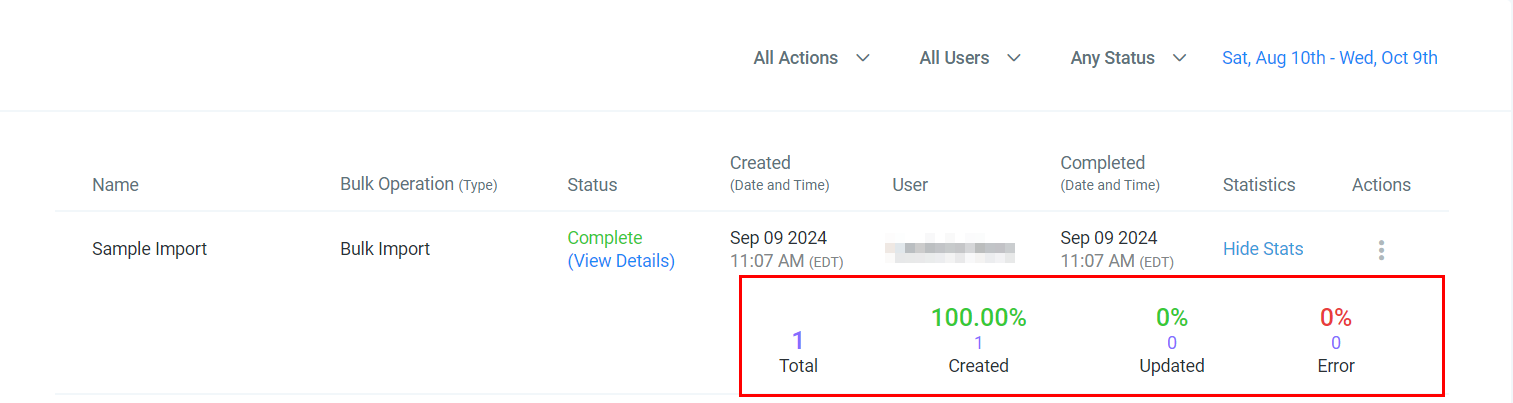
Identify the import and click Show Stats to evaluate its success.
Reviewing Error Logs
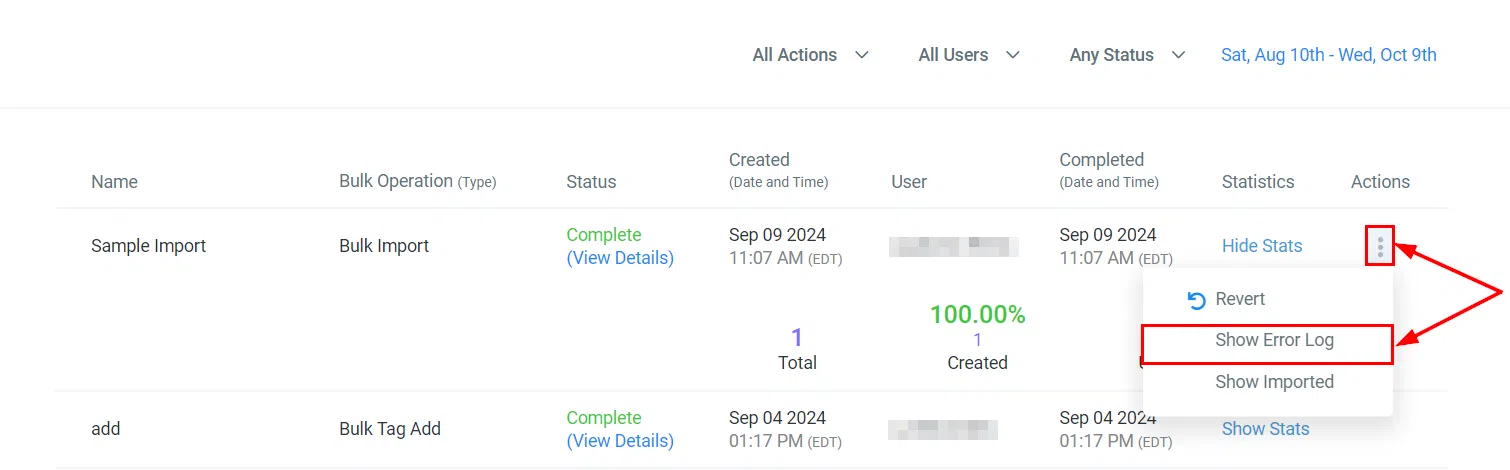
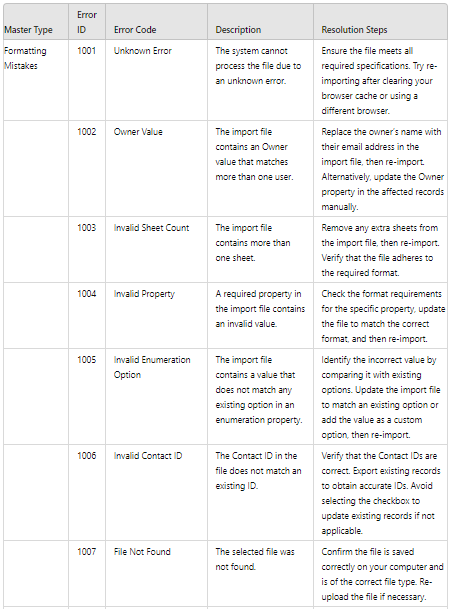
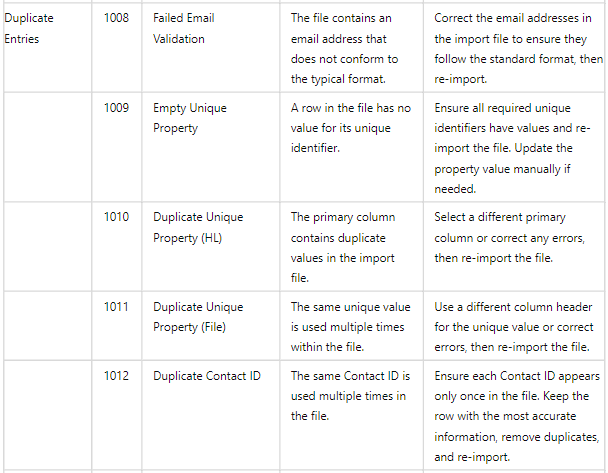
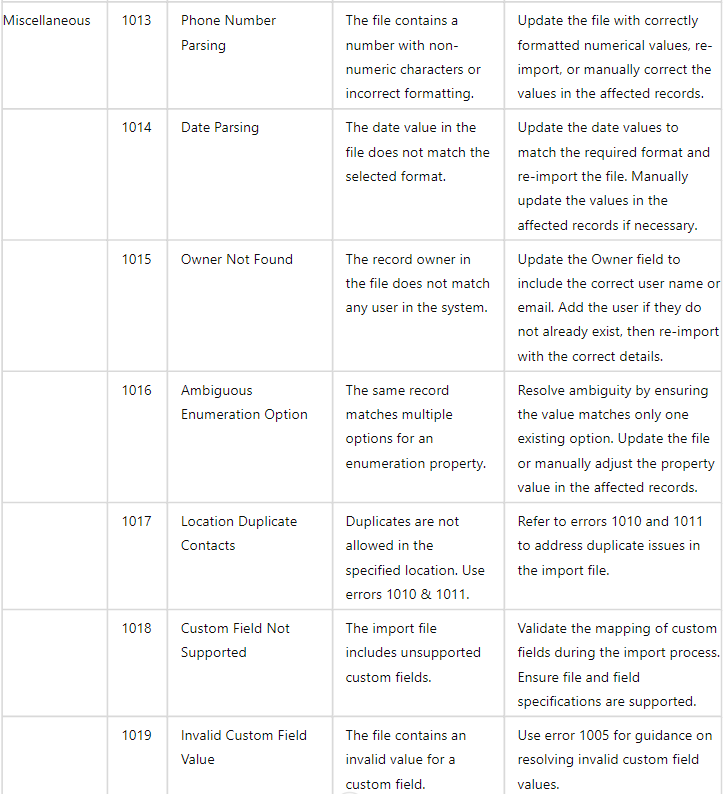
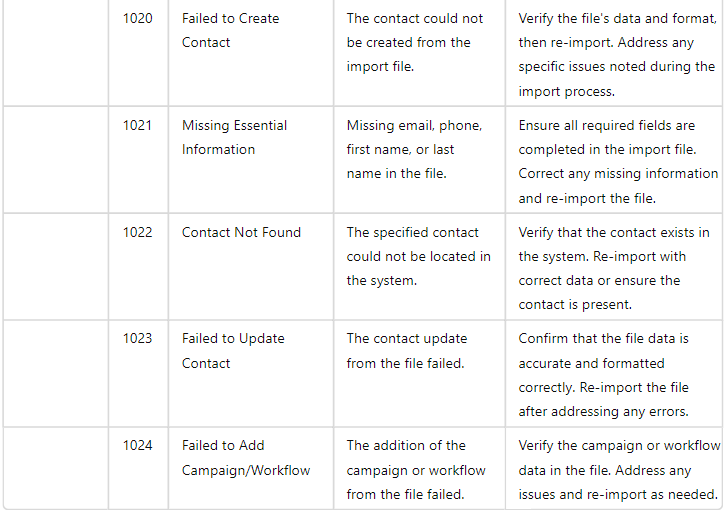
Click the three dots under Actions next to the import, then select Show Error Log. The error log lists all issues encountered, organised by line number corresponding to contacts in your CSV.
Understanding Error Logs
- Line Number: Indicates the specific contact (row in your CSV) that encountered an error.
- Error Description: Provides insight into what went wrong, such as formatting issues or missing required fields.
Common Errors and Solutions
- Formatting Errors: Ensure your CSV adheres to the required format, including correct column headers and data types.
- Missing Information: Some fields may be mandatory – check that all required information is present for each contact.
- Duplicate Contacts: The CRM may reject contacts that appear to be duplicates of existing entries.
Troubleshooting Tips
- Pre-Validation: Use spreadsheet software to clean and validate your data before importing.
- Small Batches: If you encounter persistent issues, try importing a smaller subset of contacts to isolate the problem.
Frequently Asked Questions
Q: What if my contacts still won’t import after troubleshooting?
Double-check your CSV for hidden formatting issues. If problems persist, contact support for further assistance.
Q: Can I undo a contact import if I find errors later?
Yes. You can revert the bulk imported contacts and re-import them once the errors are corrected.
Export Multiple Contacts
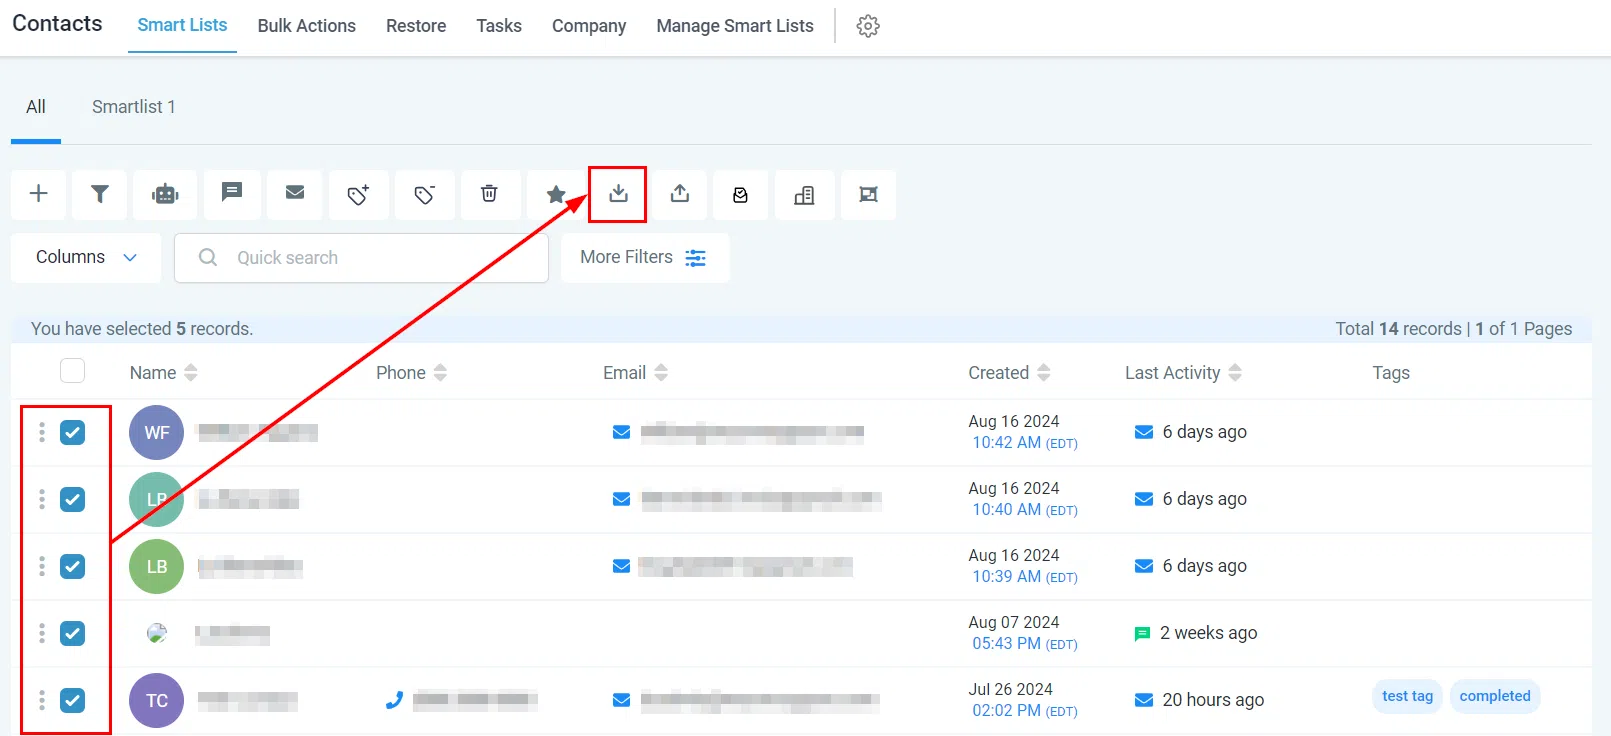
Select the contacts you wish to export within the Contacts tab and click the Export button.
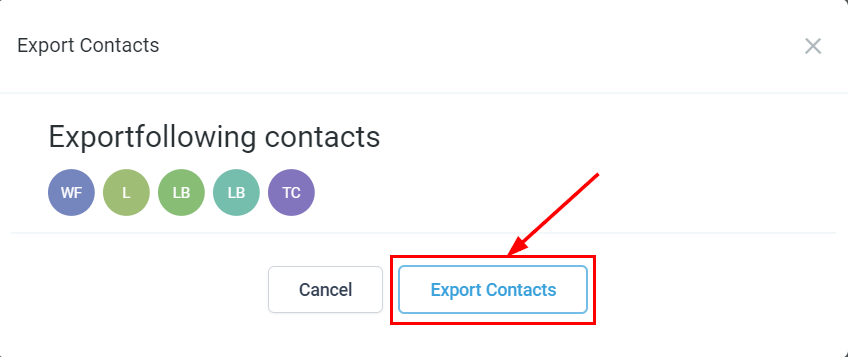
Confirm the action to initiate the download. The contacts will be downloaded as a CSV spreadsheet to your device.
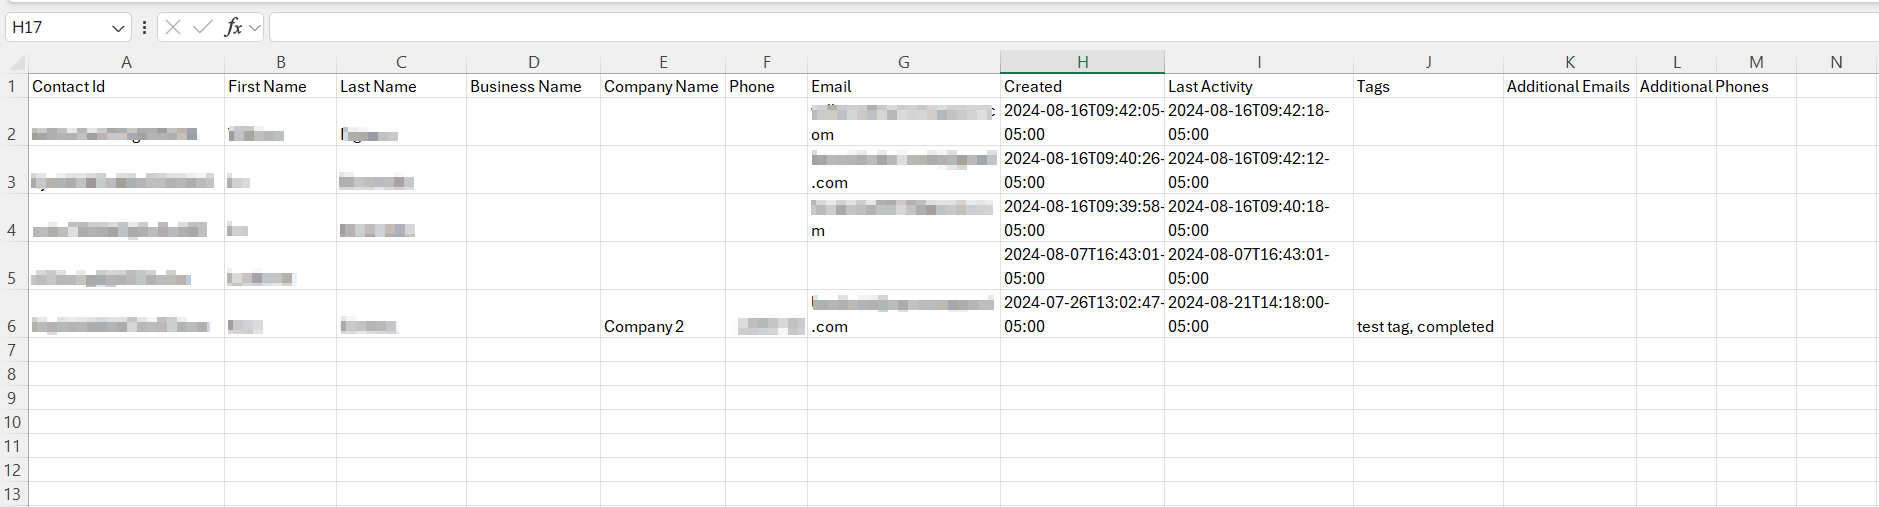
Exported Contact Fields
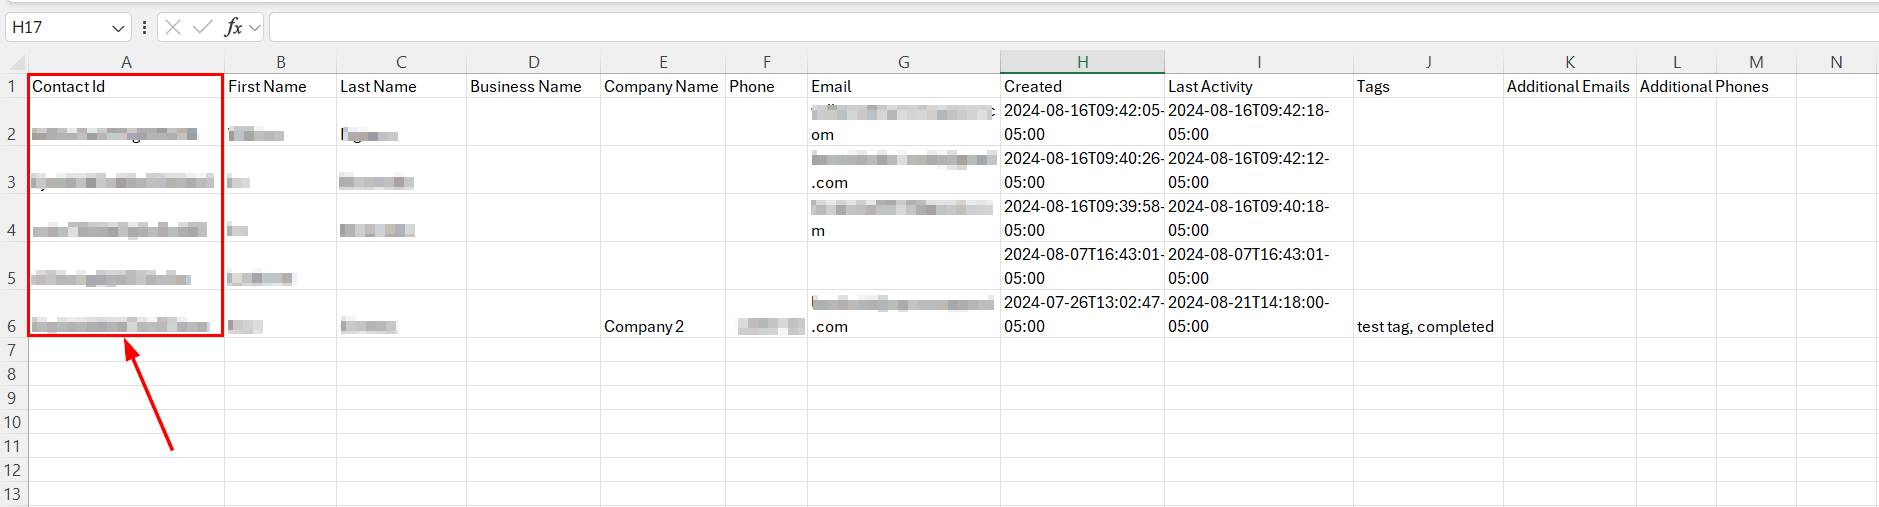
Contact ID – Each contact is assigned a unique tracking identifier.
First and Last Name – Allows you to easily identify the contact by name.
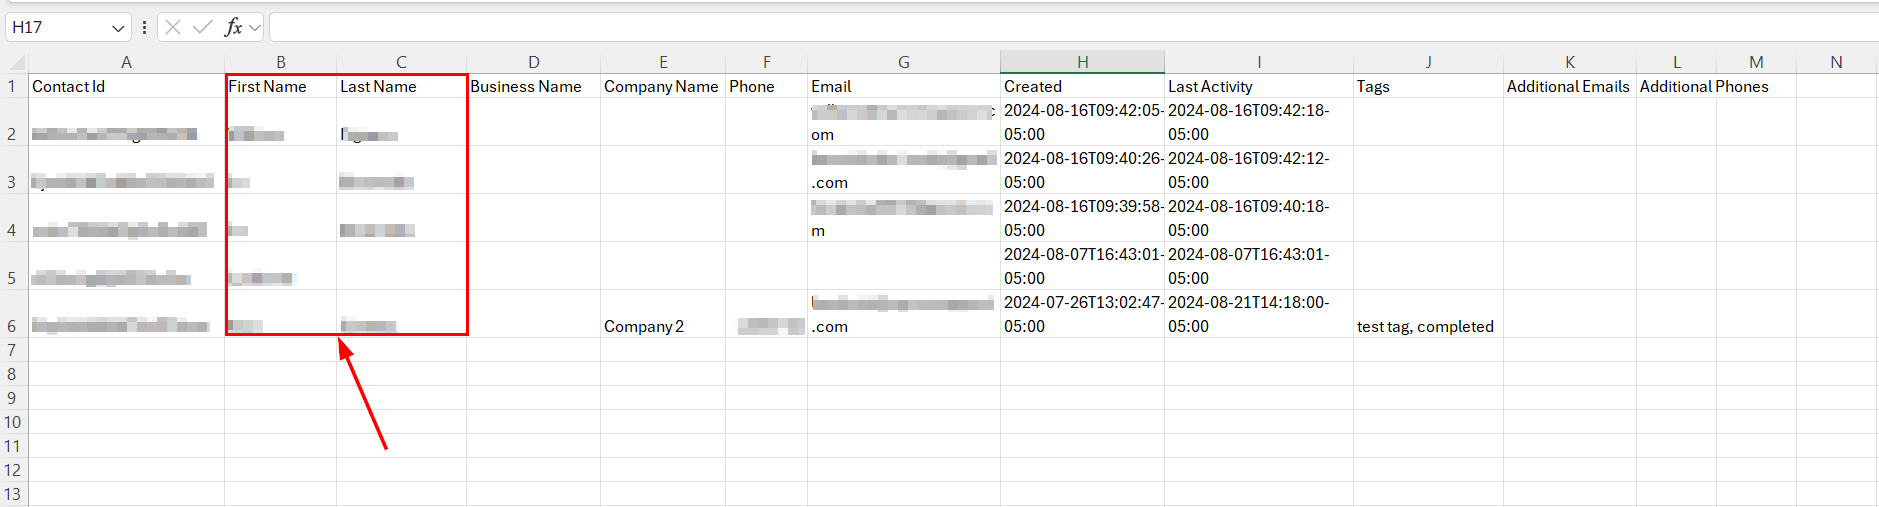
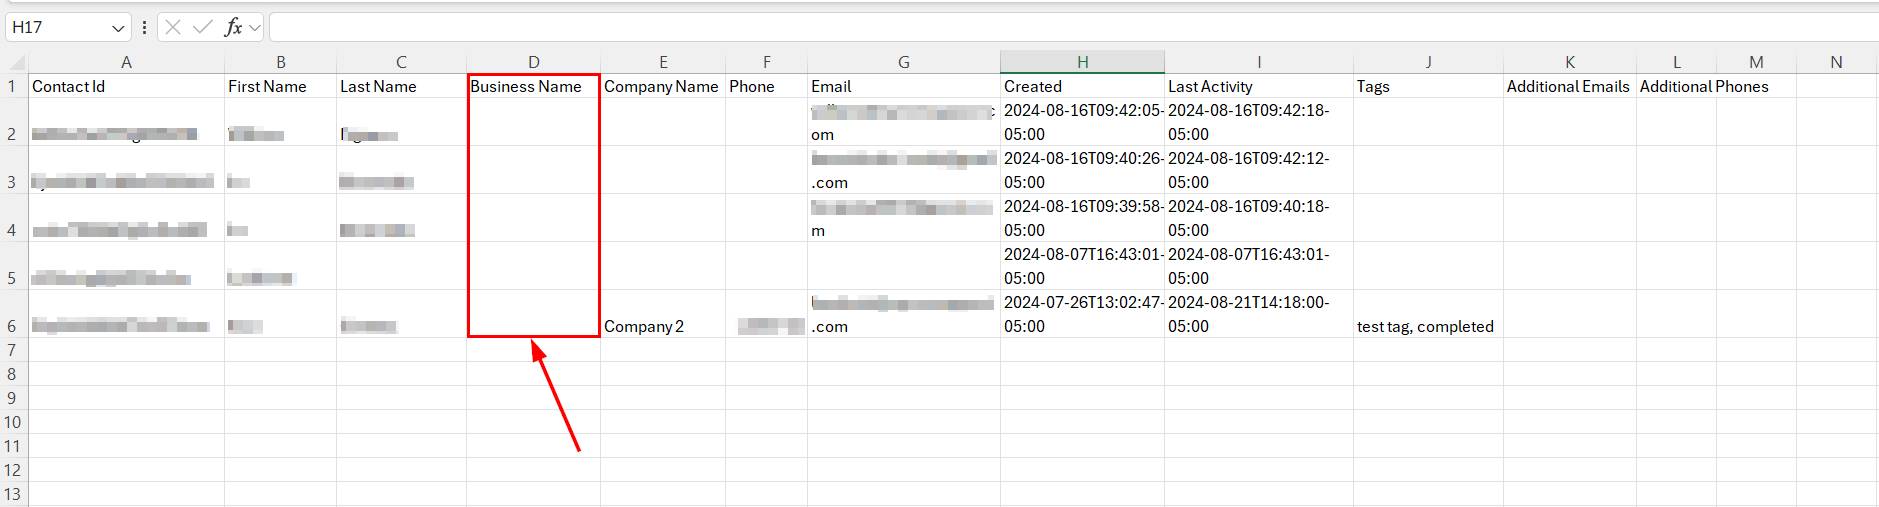
Business Name – The business associated with the contact.
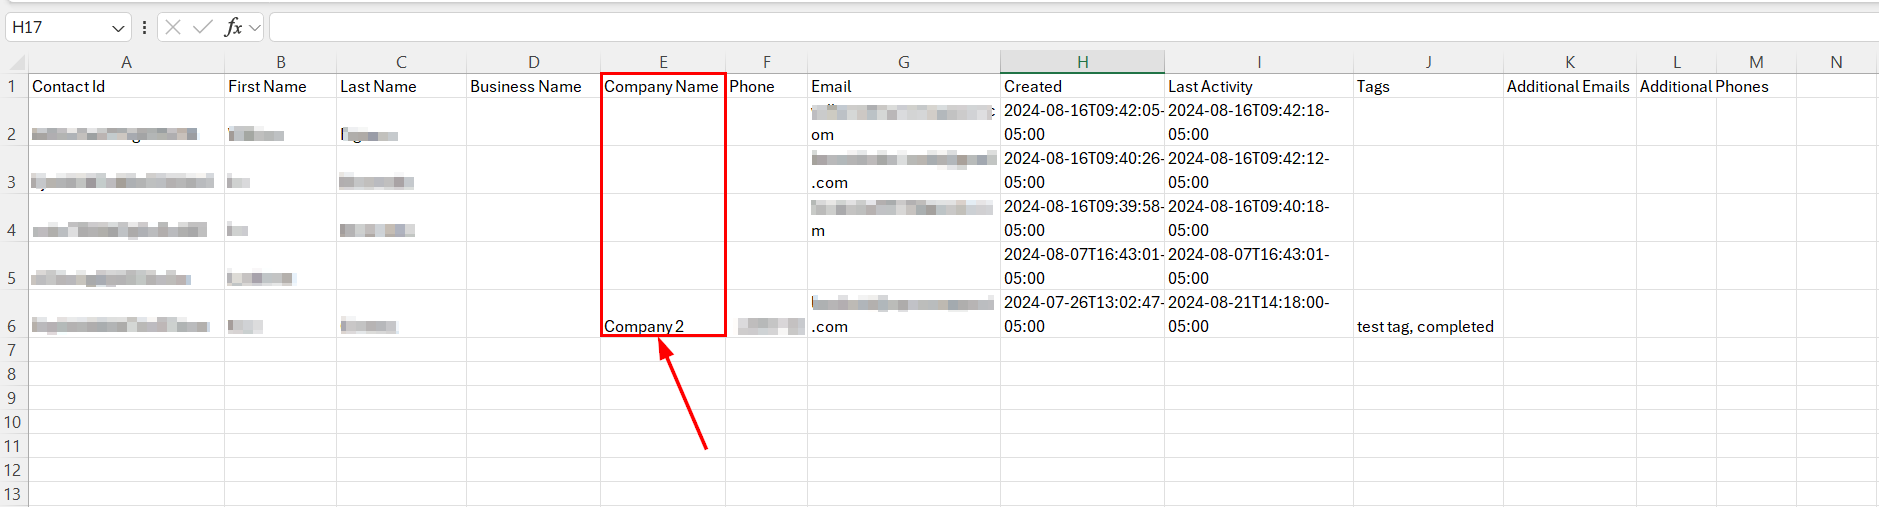
Company Name – Identifies contacts linked to a company created in the platform.
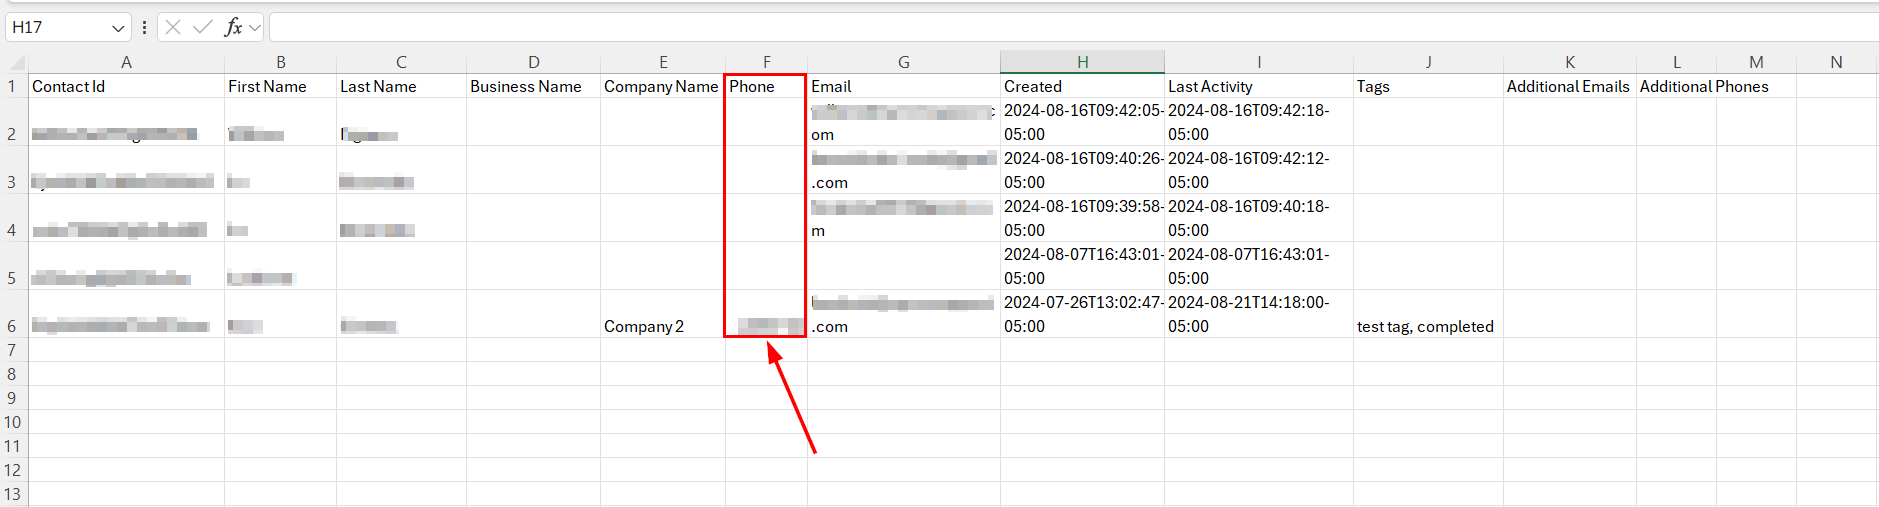
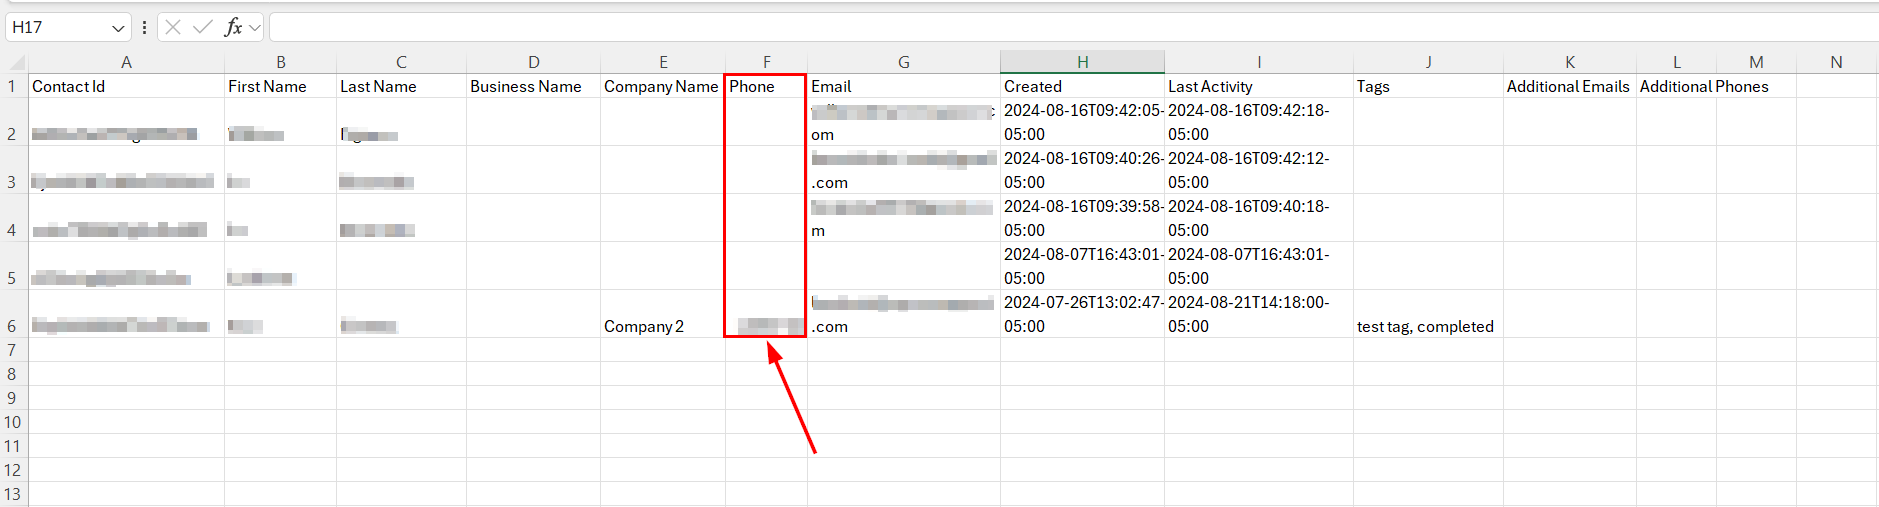
Phone Number – The contact’s primary phone number.
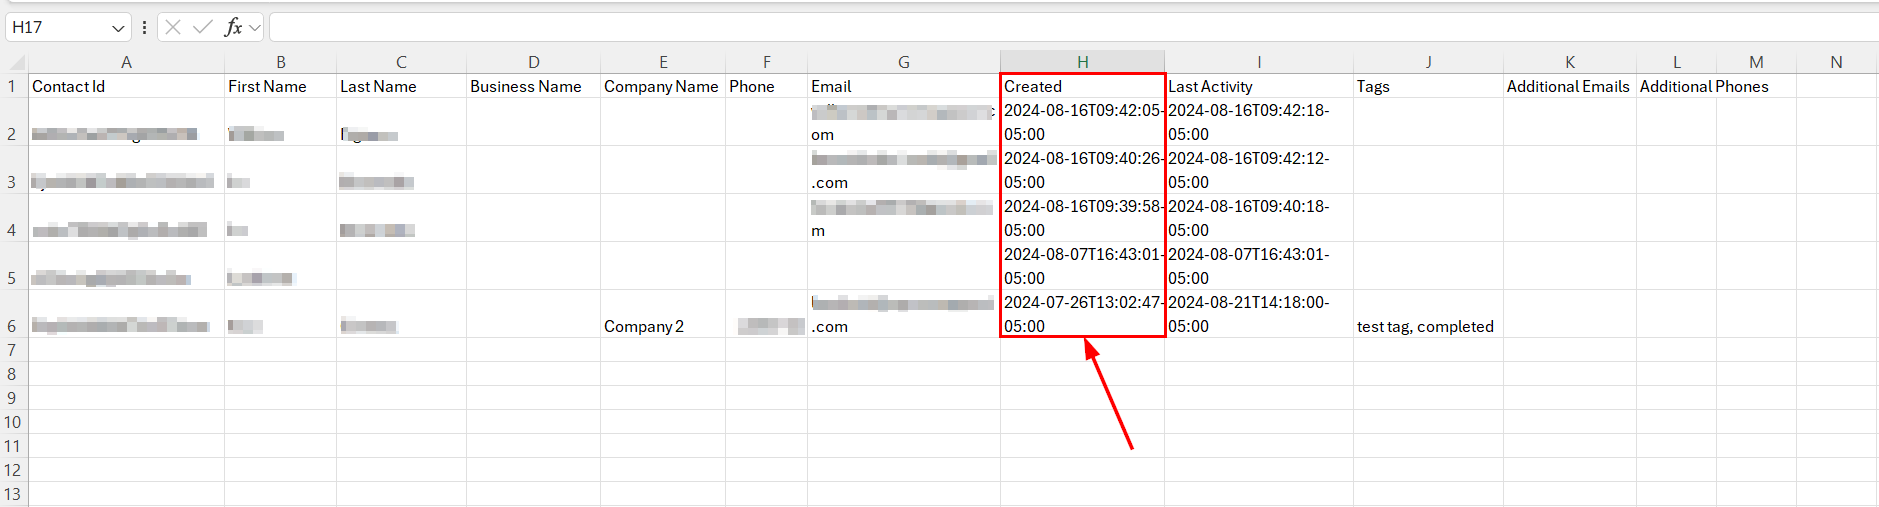
Created – Records when the contact was added, in YYYY-MM-DD THH:MM:SS format.
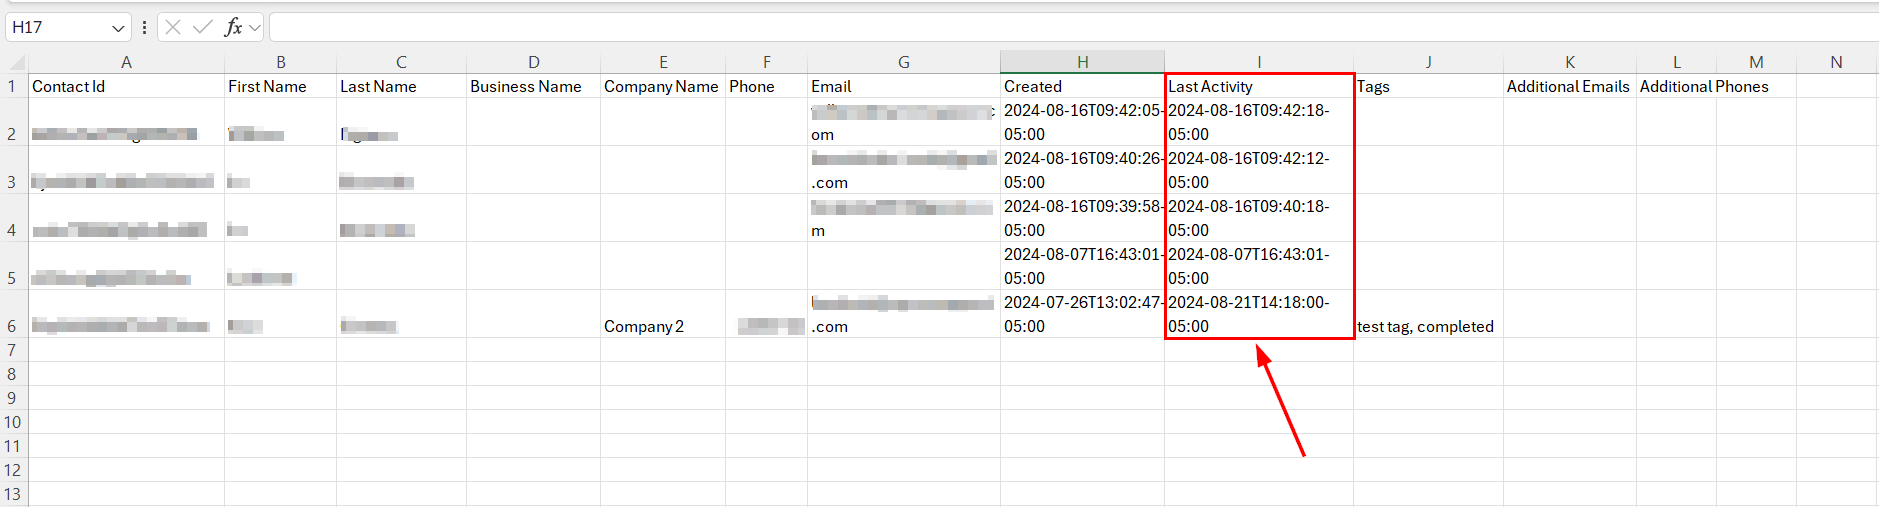
Last Activity – The most recent update to a contact’s record, including date and time.
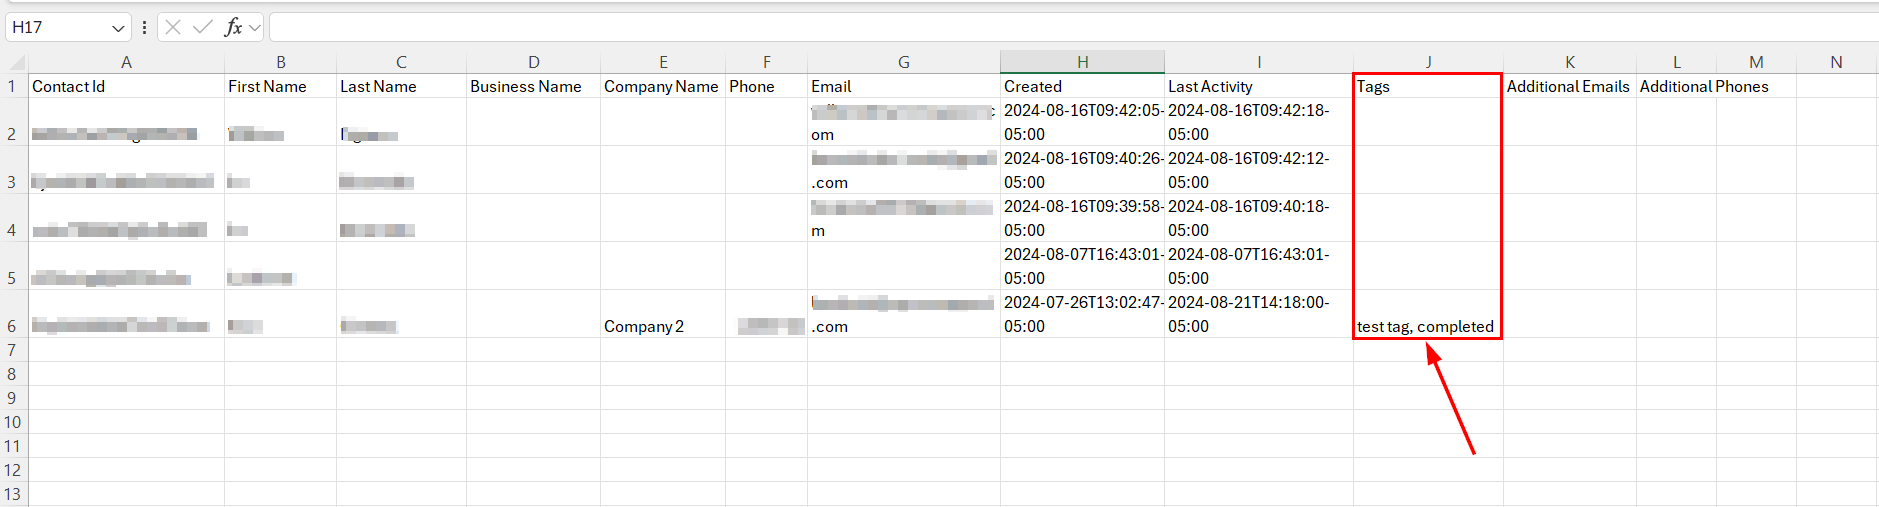
Tags – Any tags associated with the contact.
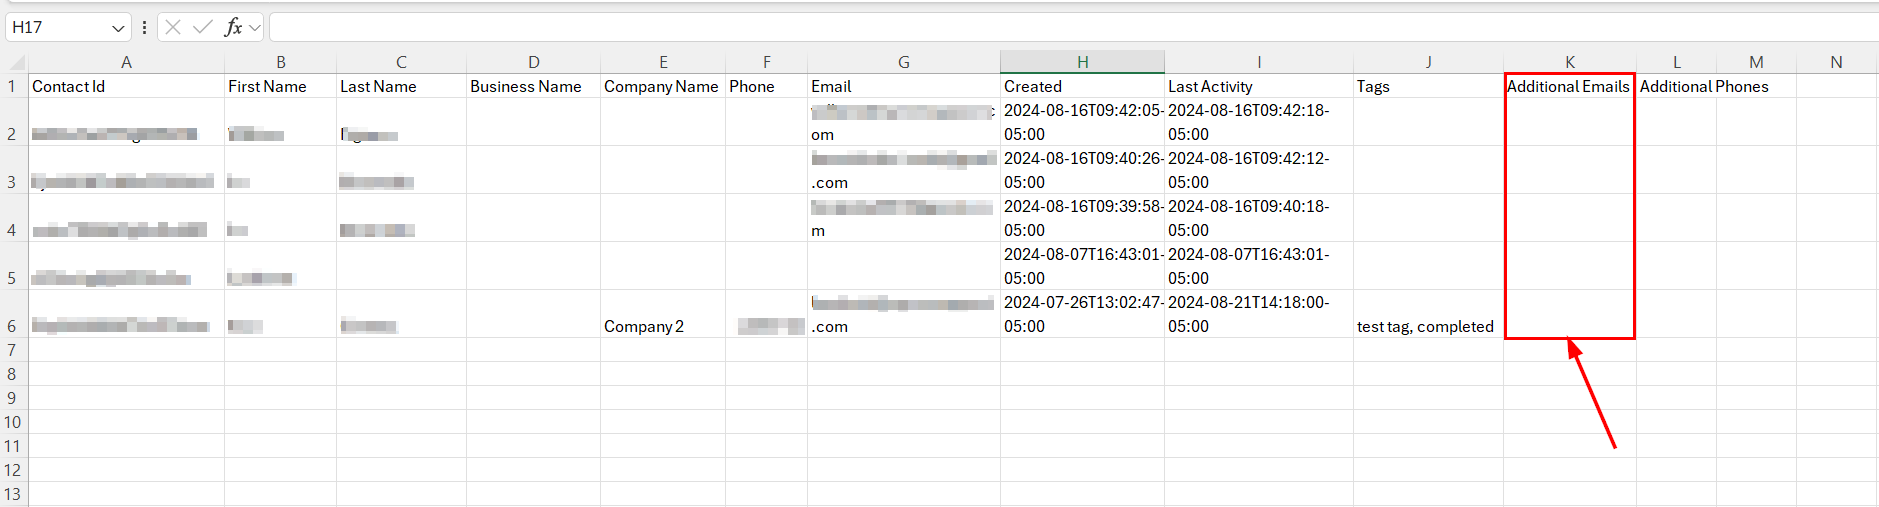
Additional Emails – For contacts with multiple email addresses, any additional emails appear here.
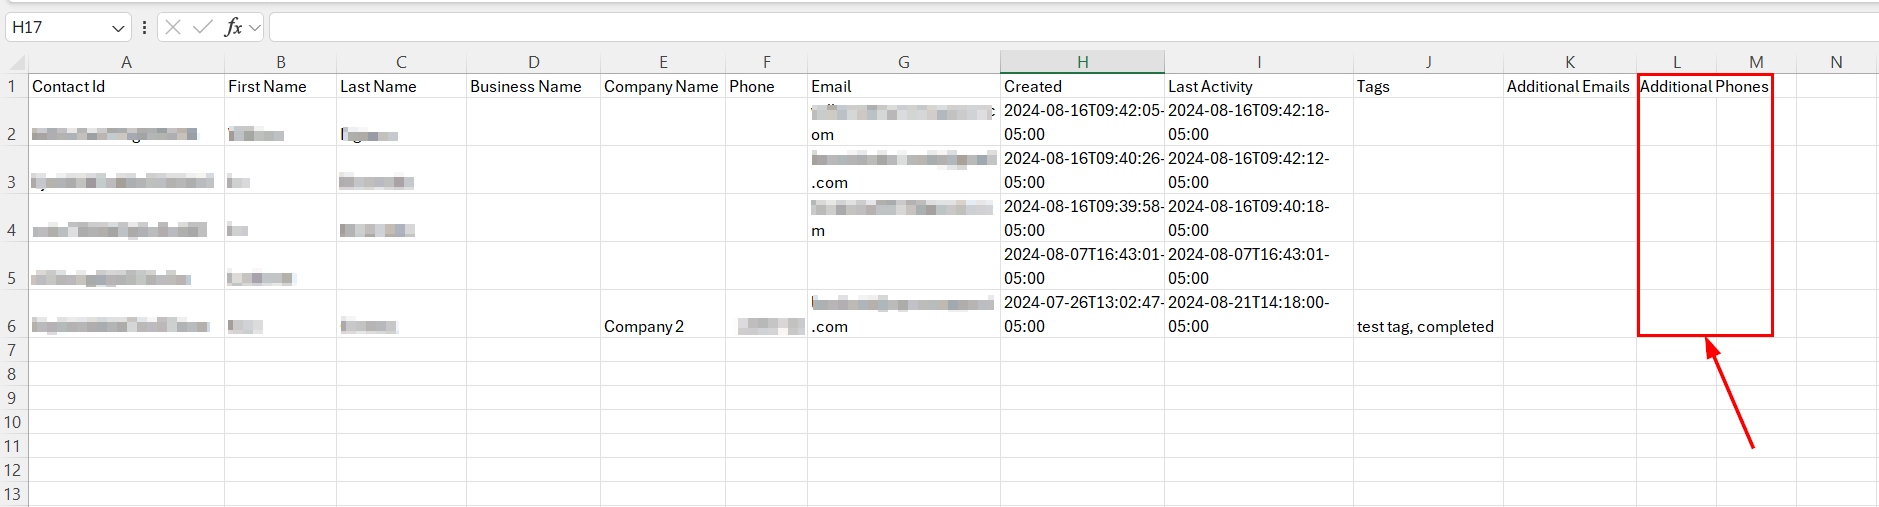
Additional Phones – For contacts with multiple phone numbers, any additional numbers appear here.
Merge Multiple Contacts
If you have multiple contact records for the same individual, you can consolidate them into a single record using the Merge Contacts bulk action.
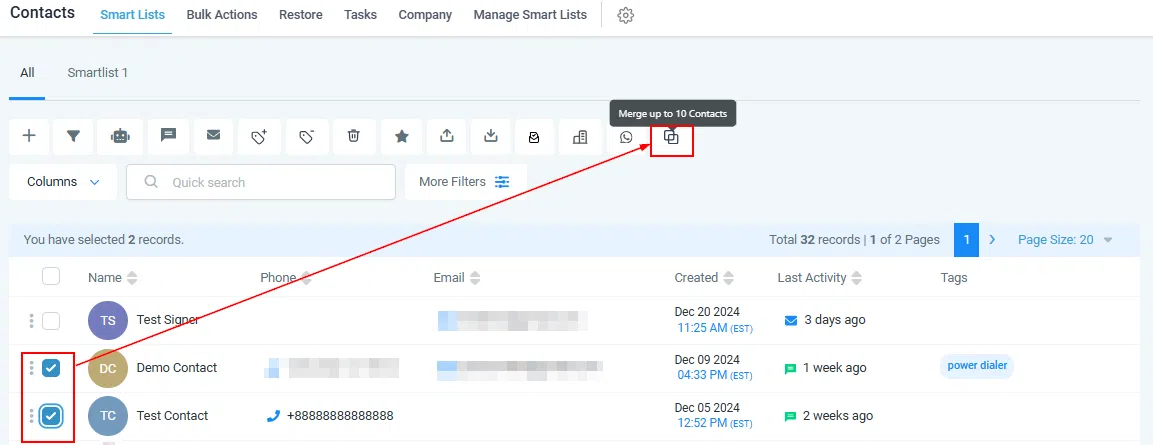
Select the records you wish to merge within the Contacts tab and click the Merge Contacts button.
📌 Note: You must select between 2 and 10 contacts to access the Merge button.
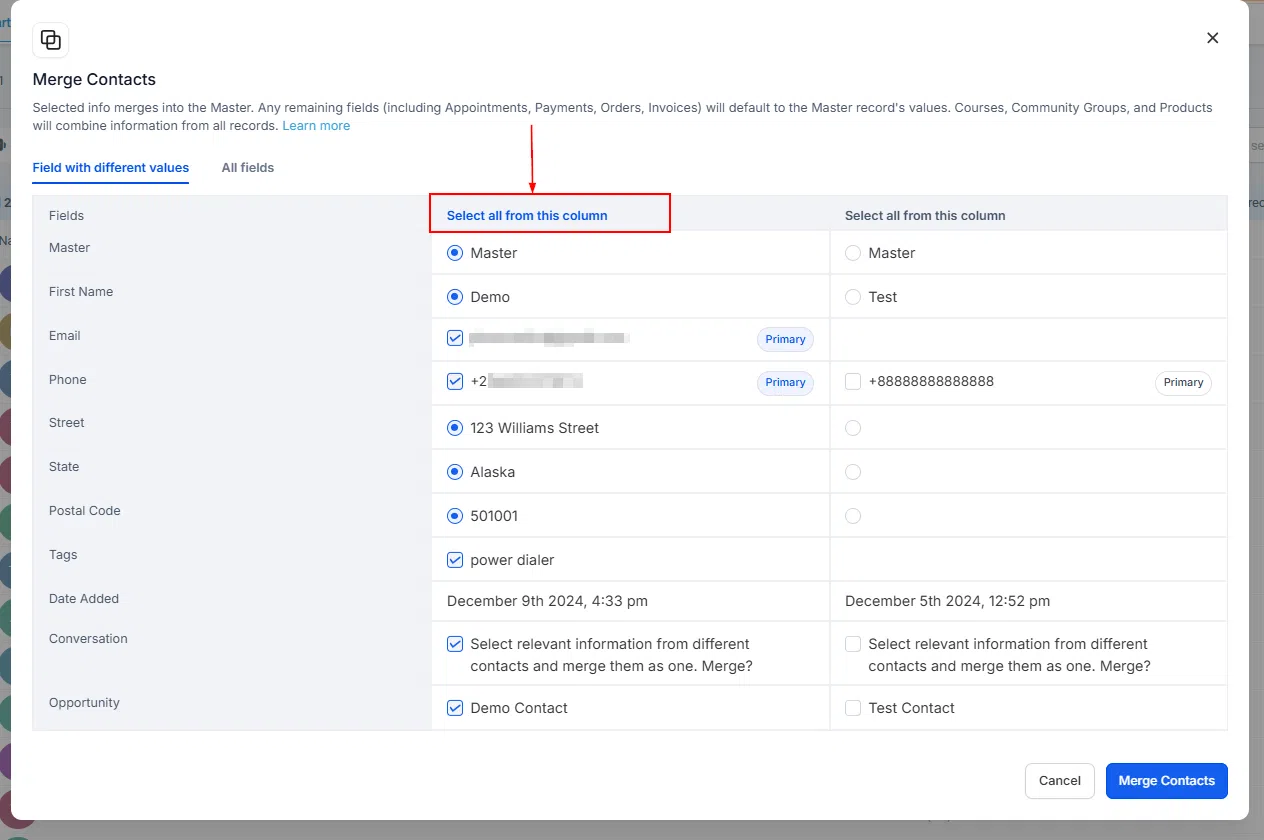
When prompted, you will have the opportunity to determine which information should be retained in the merged contact.
Select All
Use the Select All from this column button to choose all available information for a specific contact. Clicking this button automatically designates that contact as the master record.
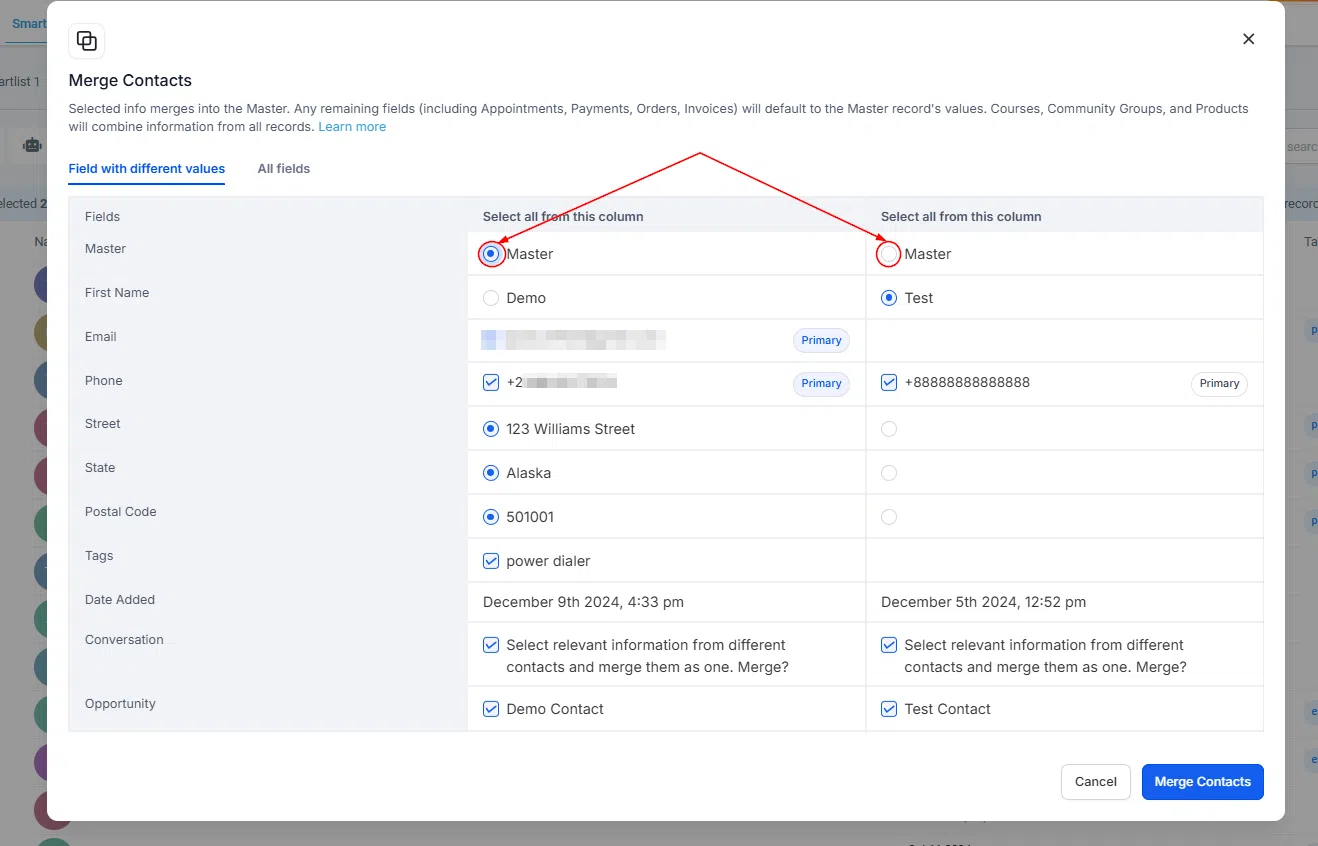
Master Record
Designate a Master Record by clicking the radio button corresponding to the contact you wish to use as the primary entry.
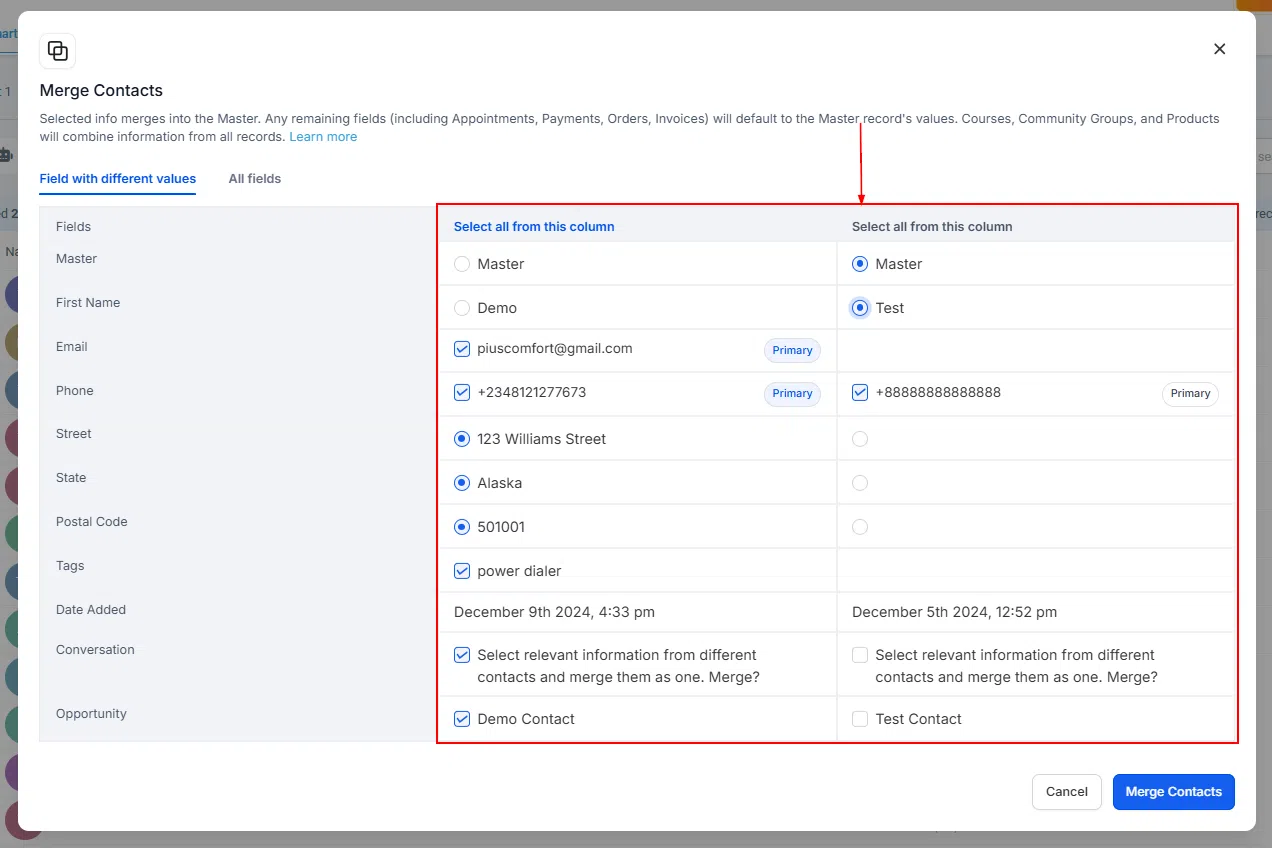
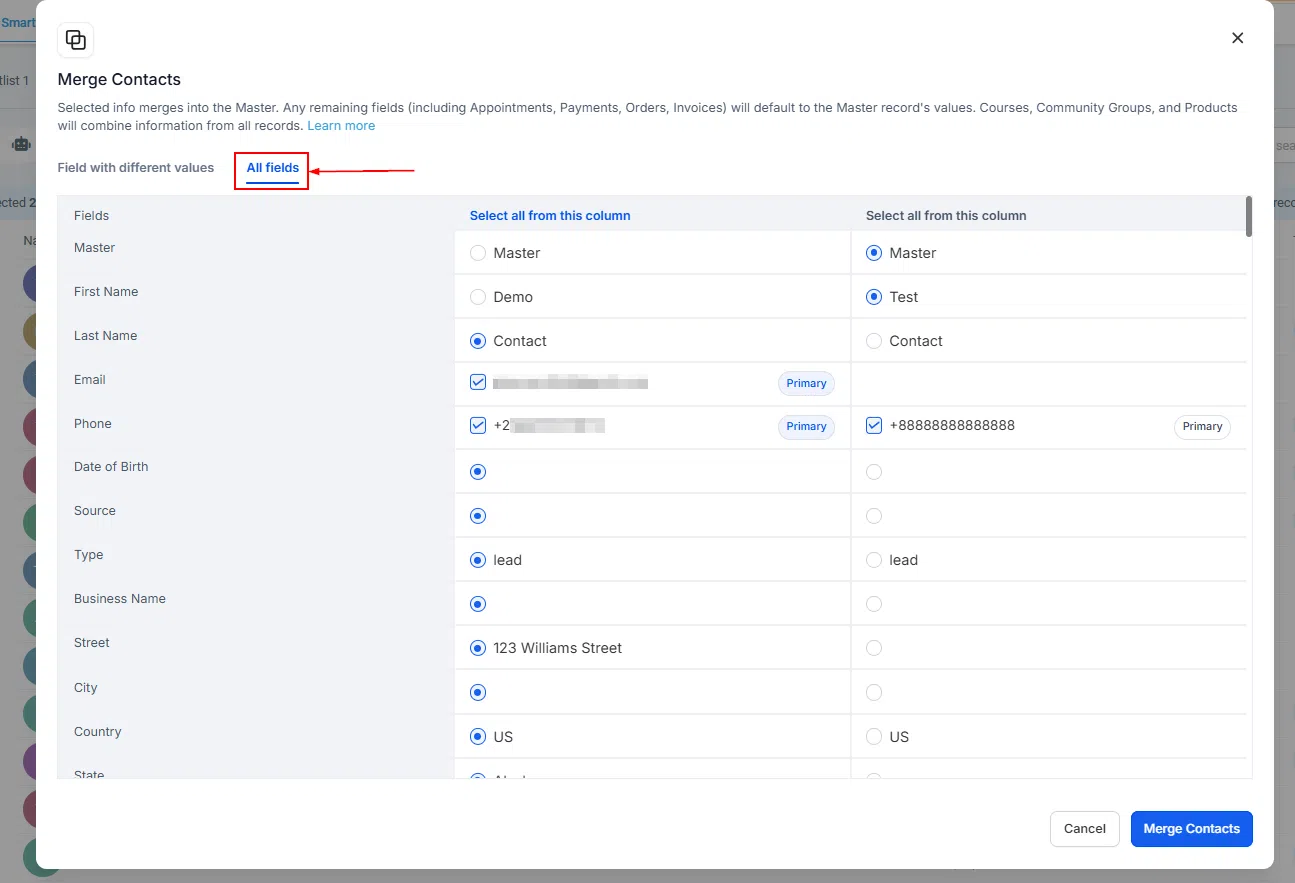
Show All Fields
By default, you can view and compare fields containing varying information. To see all fields associated with the contacts, select the All Fields option.
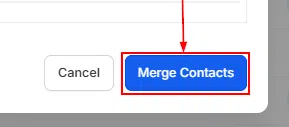
Completing the Merge
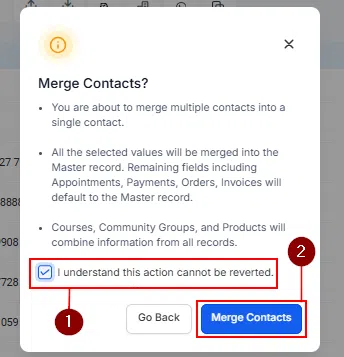
After verifying your selections, click the Merge Contact button. In the pop-up, read through the instructions and tick the consent box, then click Merge Contact to finalise.
📌 Note: This action is irreversible.
Delete Multiple Contacts
Whether it be a burnout list, spam contacts, or people who have opted out, there will come a time when you need to delete contacts from your system.
Deleting Contact(s)
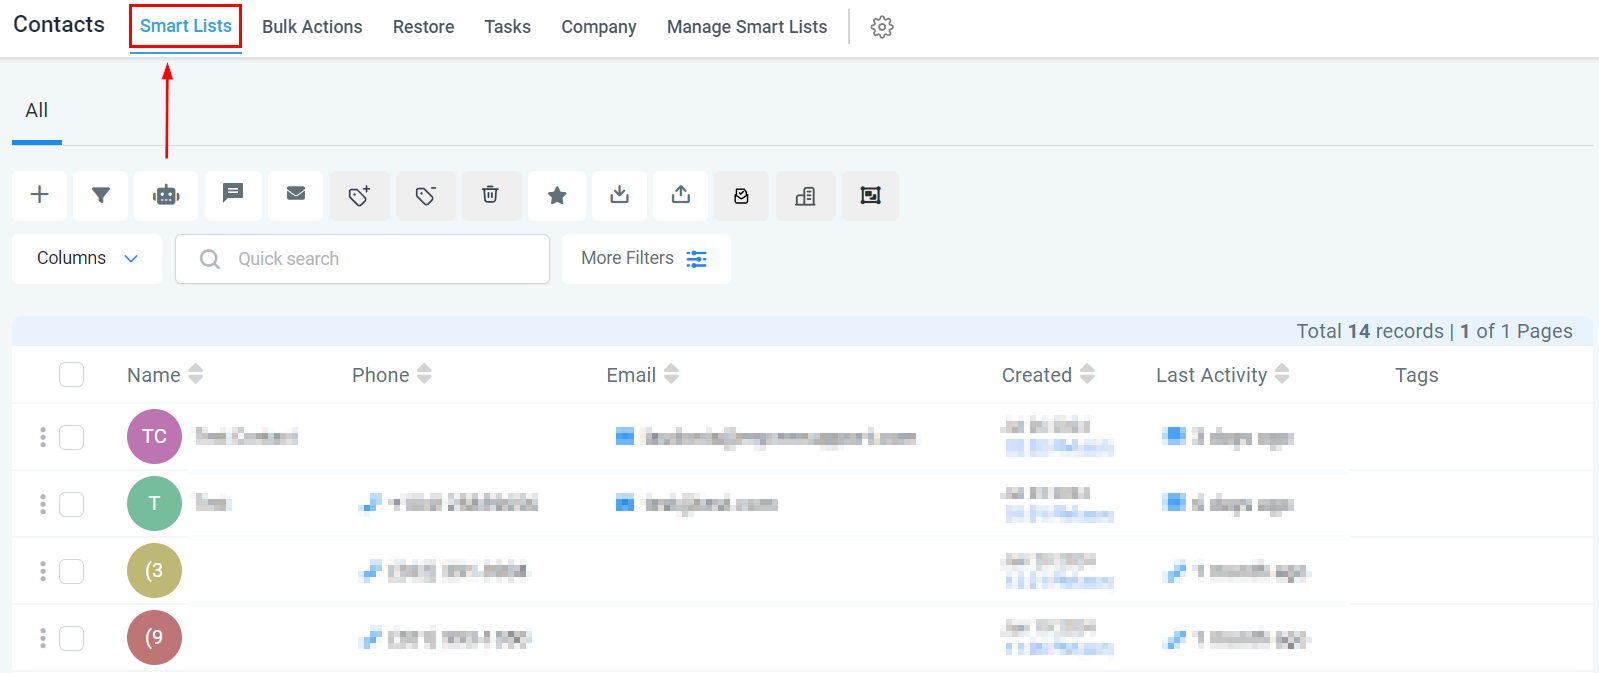
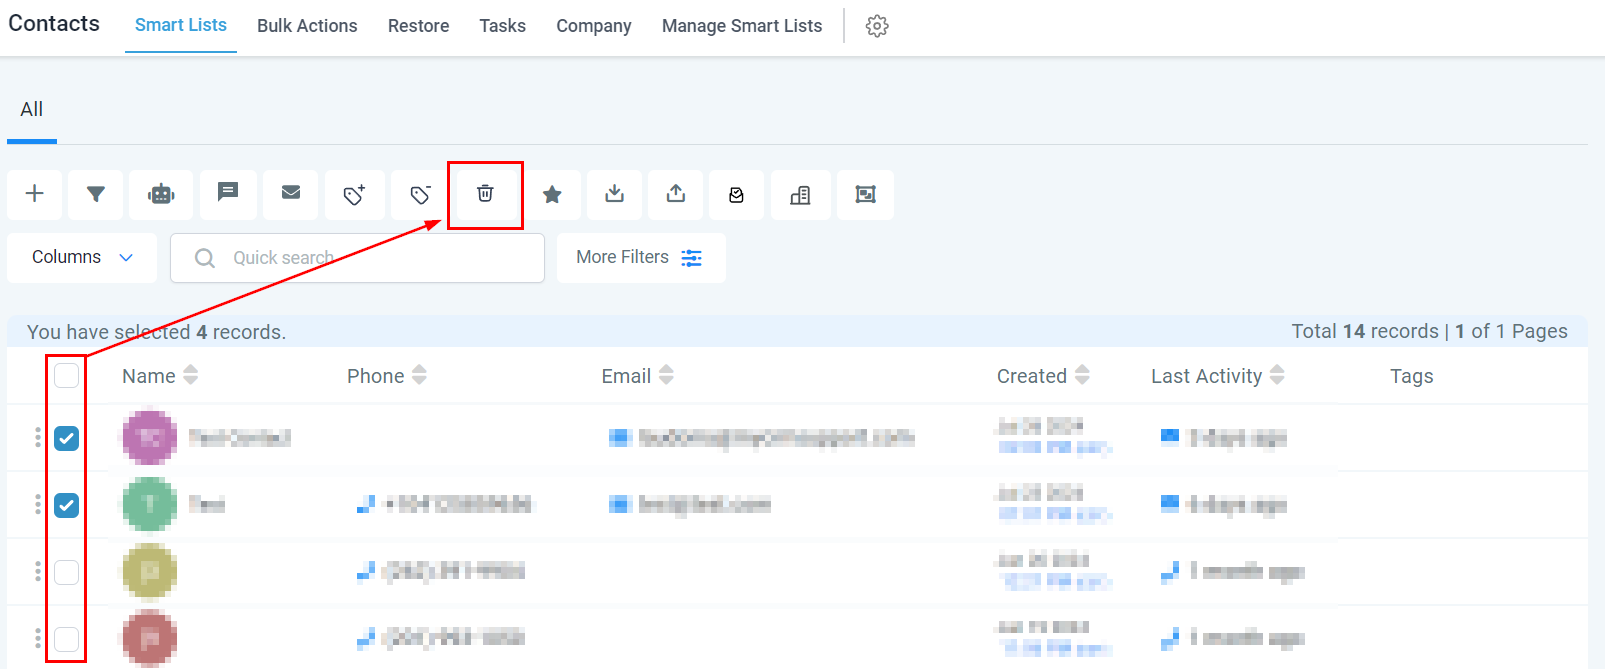
Go to the Smart Lists tab inside the Contacts section. Select the contacts by clicking the checkbox next to them, then click the Trash icon.
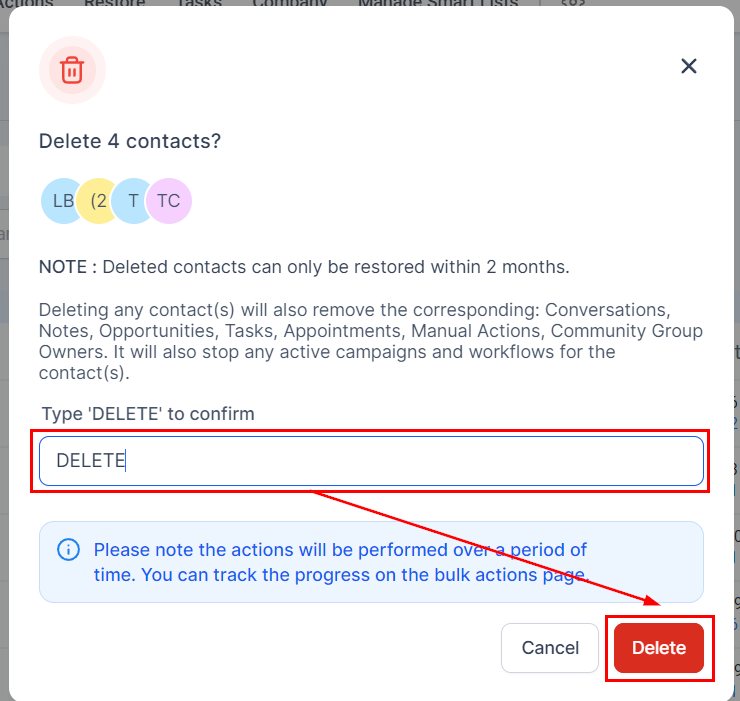
Type DELETE to confirm the action, then click Delete.
⚠️ Note: Deleting a contact will also remove all associated Conversations, Notes, Opportunities, Tasks, Appointments, and Manual Actions. It will also stop any active Campaigns and Workflows for the contact.
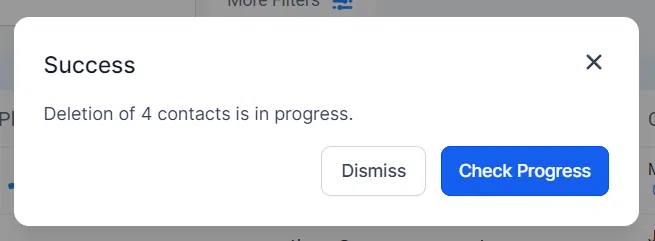
After clicking Delete, the action will start processing.
Deleted by Accident?
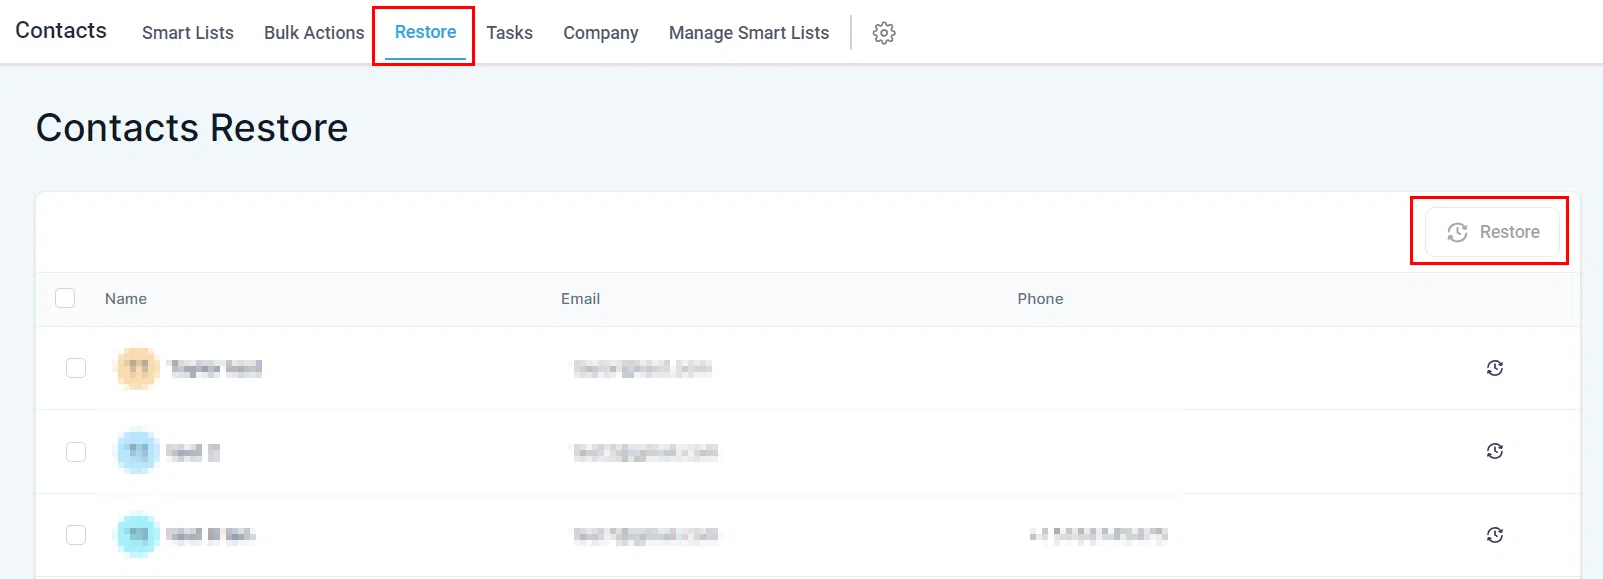
Don’t worry. Even after a contact is deleted, you can recover them by going to the Restore section of your CRM.