Growth360 lets you apply tags, remove tags, and add contacts to automations in bulk from the Smart Lists view. This article covers all three actions.
Add Tags to Multiple Contacts
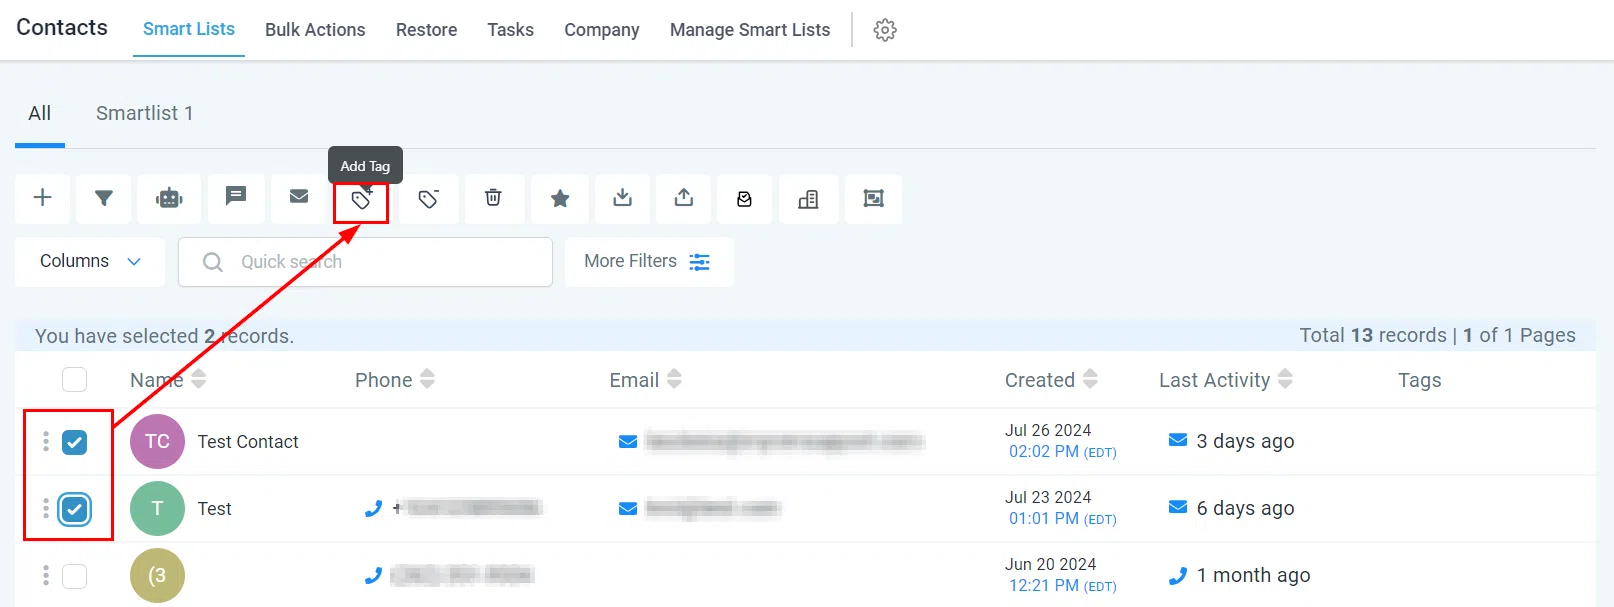
Select the contacts you want to tag, then click the Add Tag button in the bulk actions bar.
Action Name
Enter a descriptive name in the Action text box. This label appears in the tracking report under Contacts > Bulk Actions.
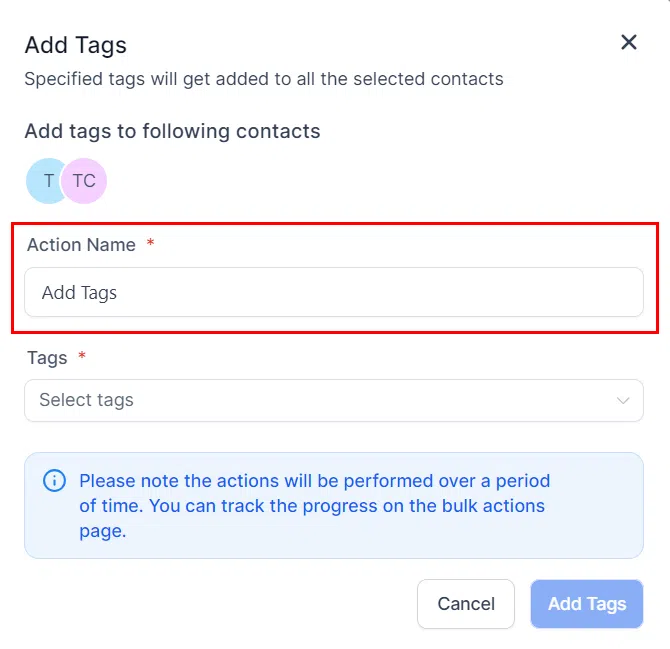
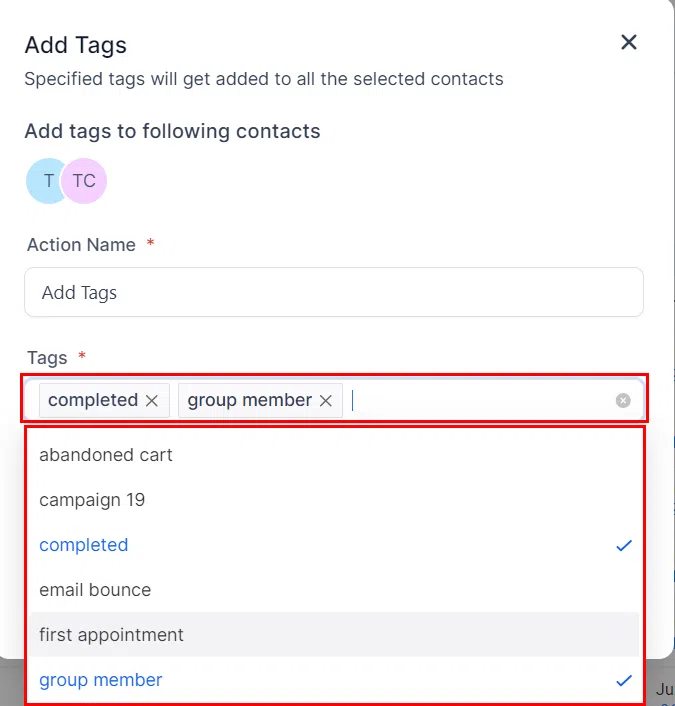
Select Tags
Click the tags field to open the dropdown and select the tags you want to apply. Tags already applied to the contact will not appear in the list. When ready, click Add Tags to queue the bulk action and monitor progress in the Bulk Actions tab.
Remove Tags from Multiple Contacts
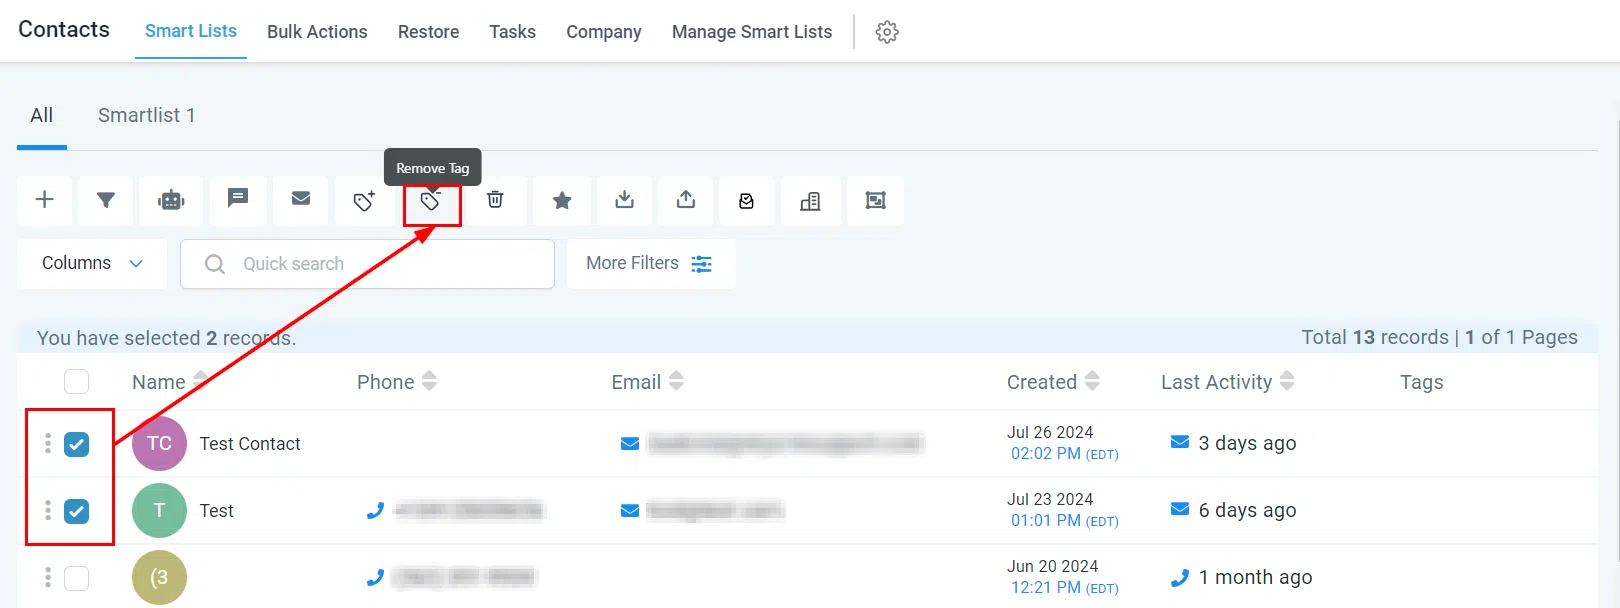
Select the contacts whose tags you want to remove, then click the Remove Tag button in the bulk actions bar.
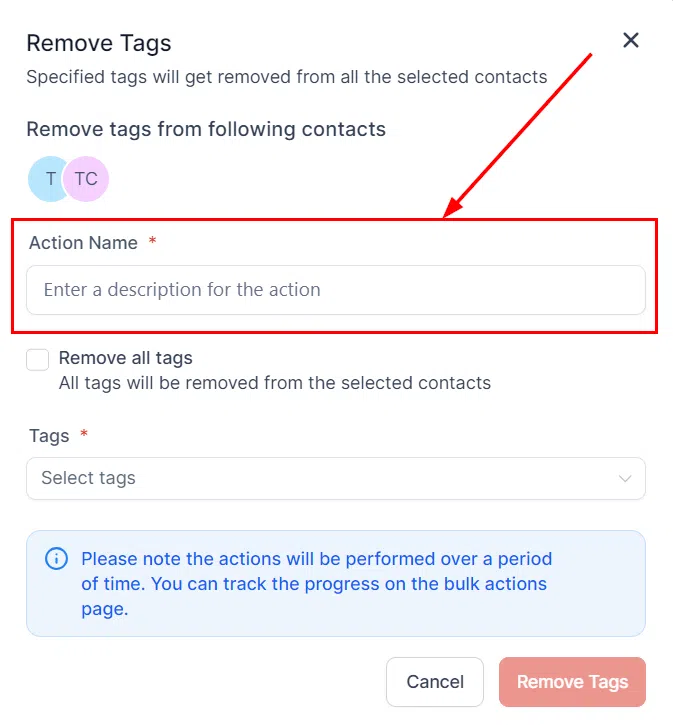
Action Name
Enter a descriptive name for the action – it will appear in the tracking report.
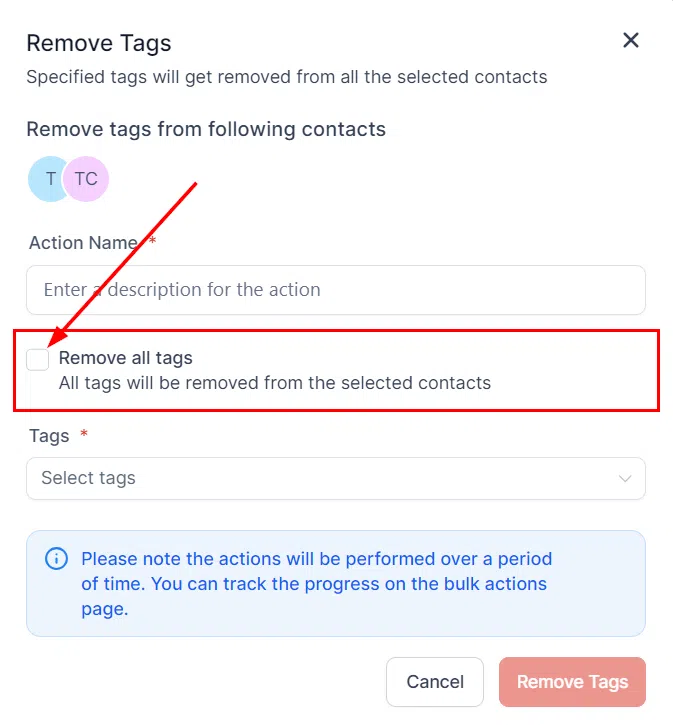
Remove All Tags
Select Remove All Tags to strip every tag from the chosen contacts at once. Use this when you need to clear outdated or irrelevant tags across multiple contacts.
Remove Selected Tags
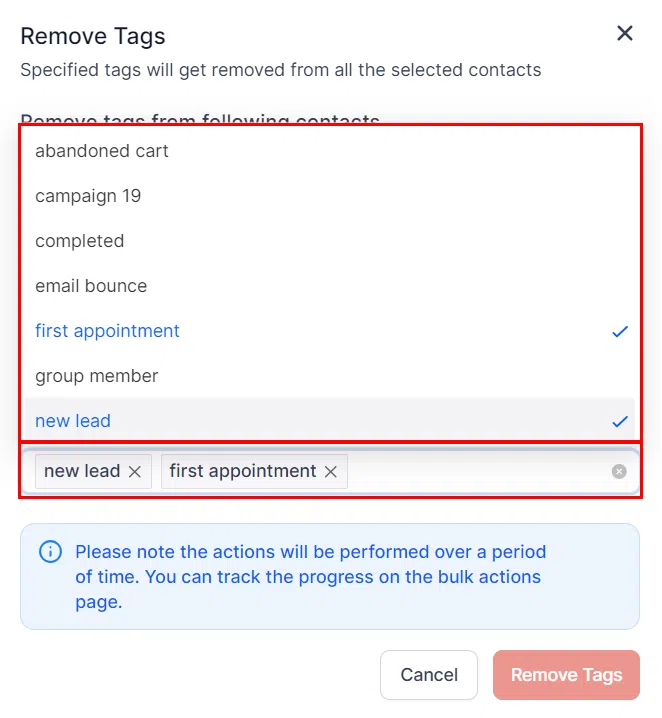
To remove only specific tags, choose them from the dropdown. Only tags currently applied to the selected contacts will appear. Click the x next to a tag to deselect it, then click Remove Tags to process the bulk action.
Restoring Removed Tags
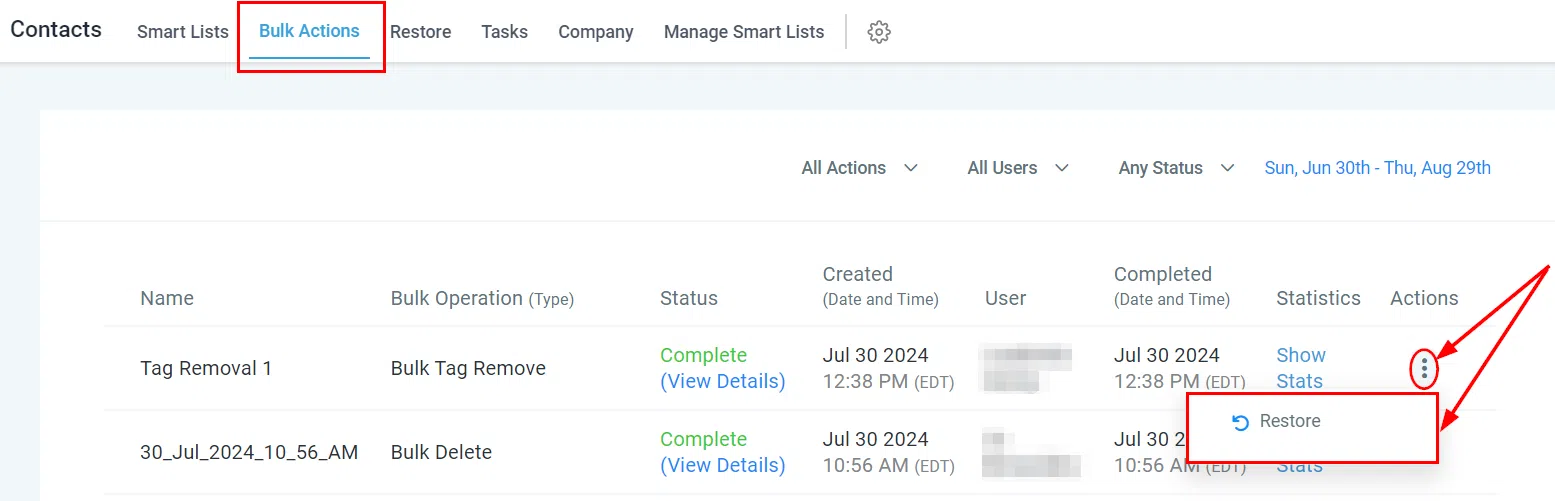
If tags were removed in error, go to Contacts > Bulk Actions, find the relevant action, click the three-dot menu, and select Restore.
Add Multiple Contacts to an Automation
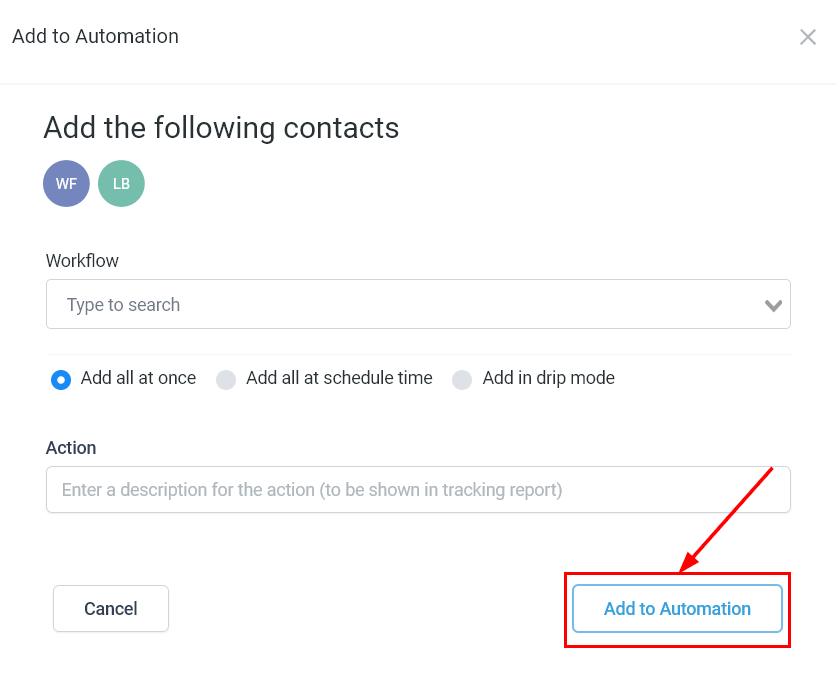
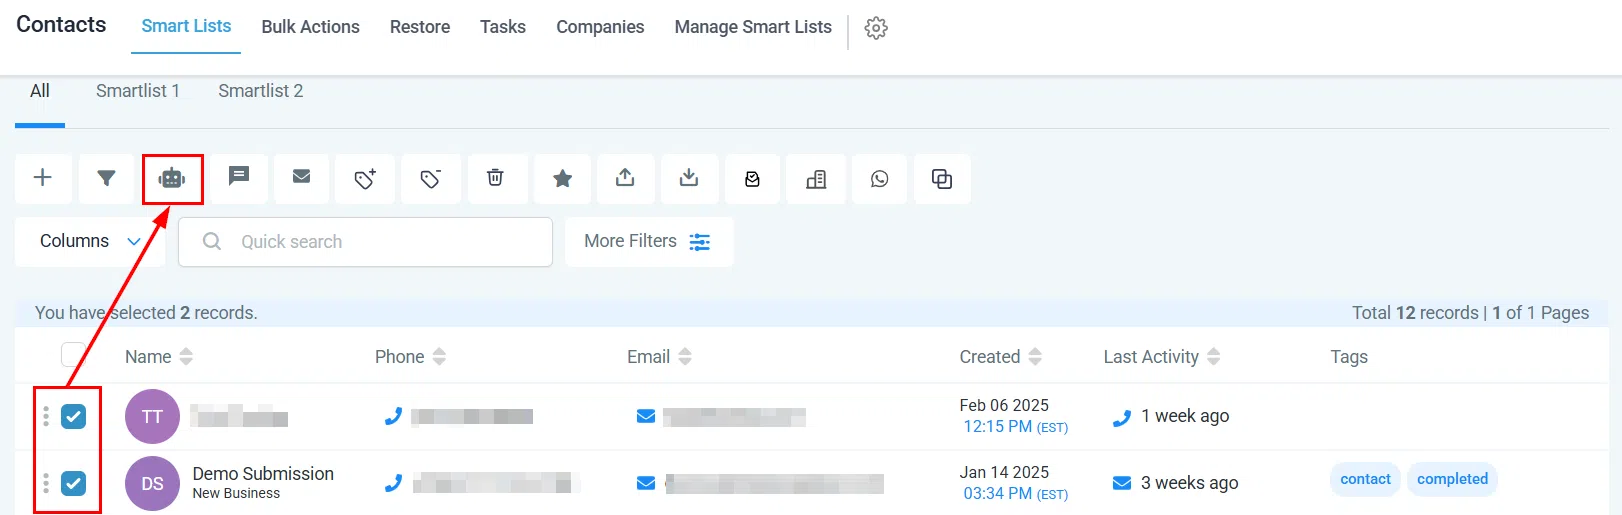
Select the contacts you want to enrol, then click the Add to Automation button in the bulk actions bar.
Review and Proceed
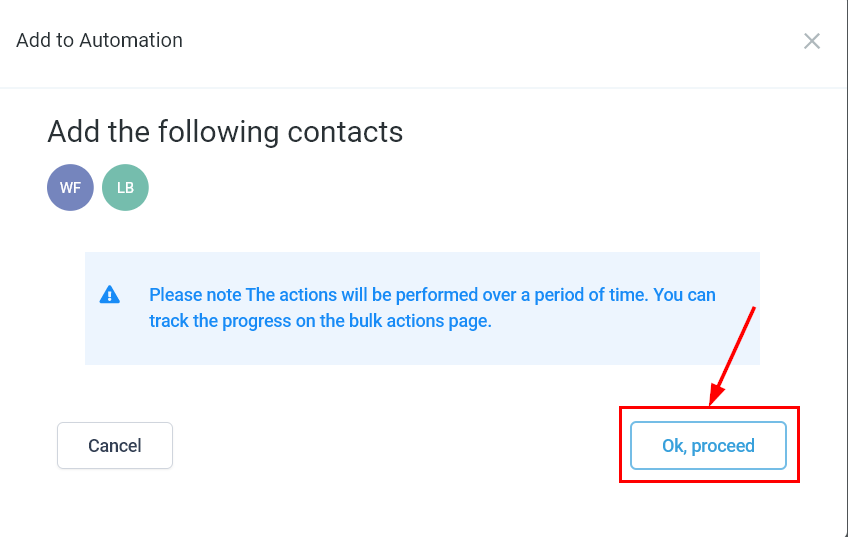
Review the selected contacts, then click Proceed to continue.
Select Workflow
Choose the relevant workflow from the dropdown menu.
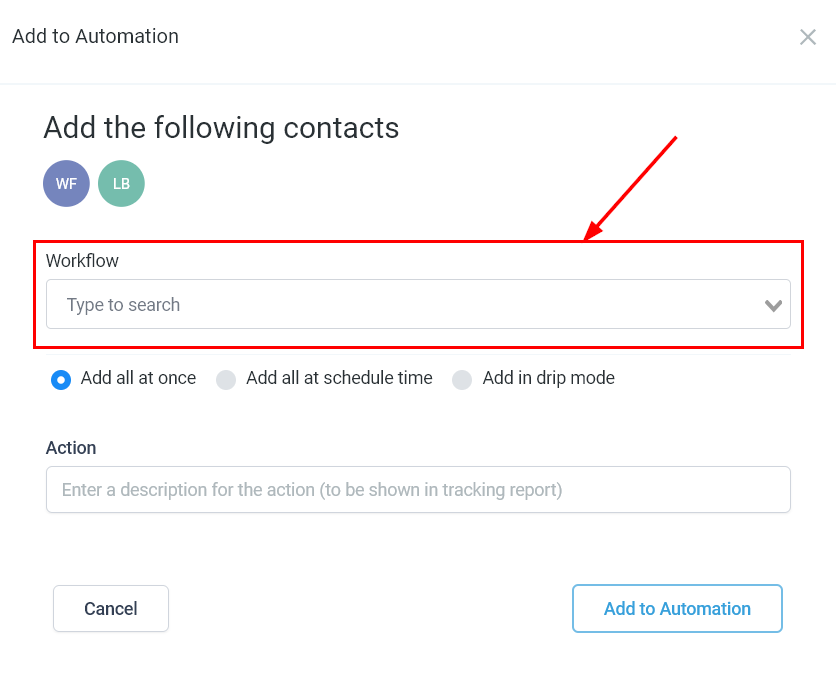
Choose Timing Mode
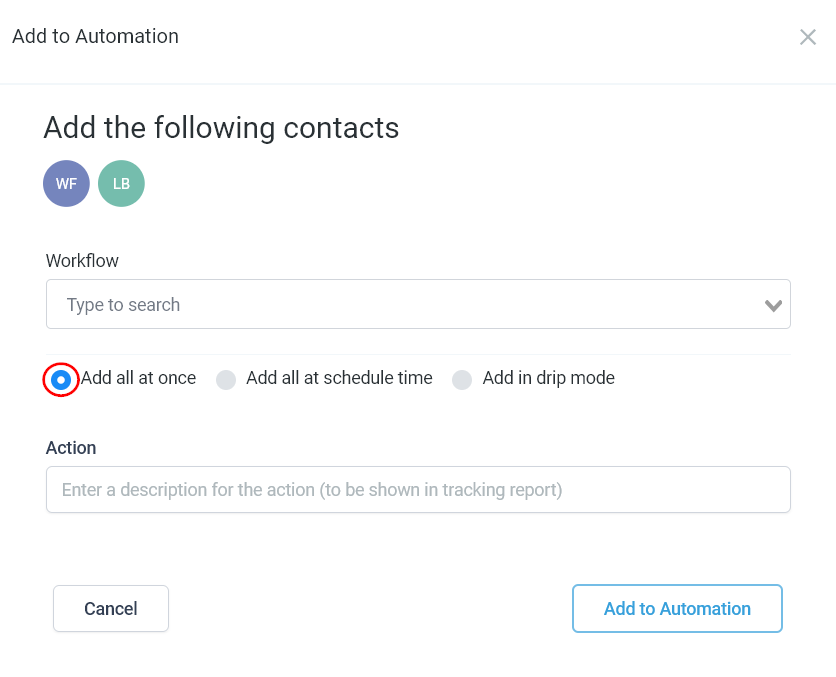
Select how contacts will be added to the automation:
Add All at Once
Immediately adds all selected contacts to the automation.
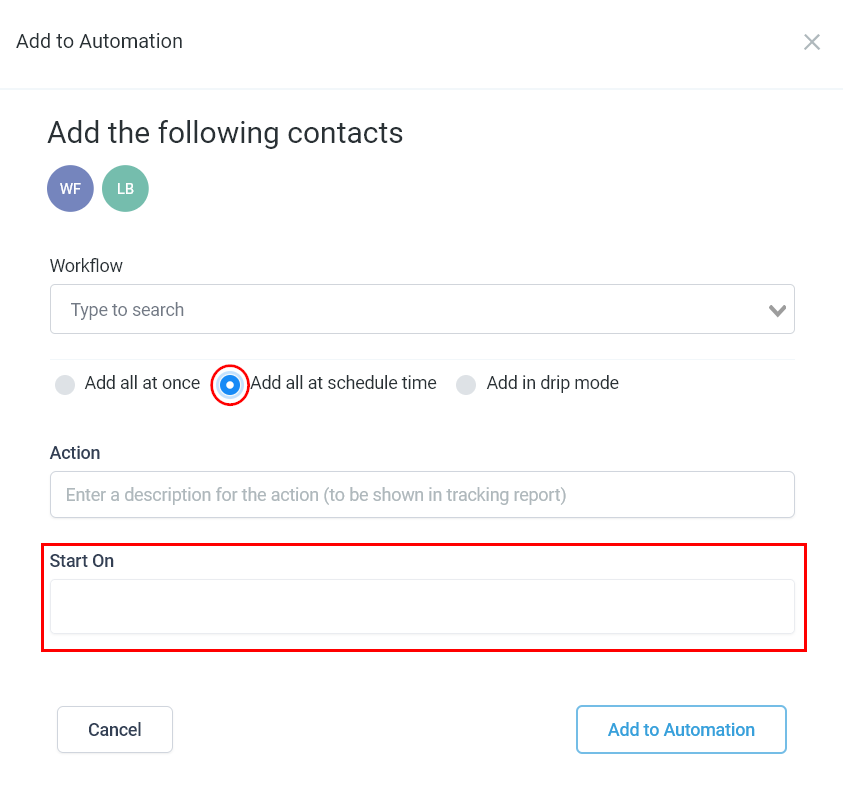
Add All at a Scheduled Time
Schedule the contacts to be added at a specific date and time.
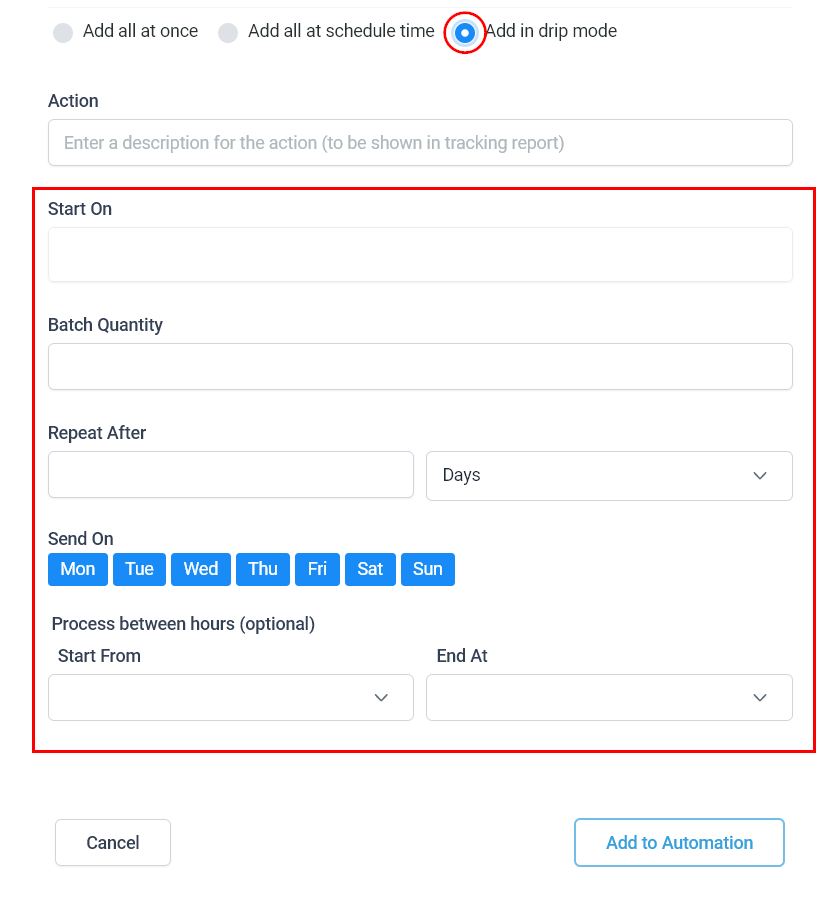
Add in Drip Mode
Drip mode adds contacts in batches over time. Configure the following settings: Start On (date and time to begin), Batch Quantity (contacts per batch), Repeat After (interval between batches), Send On (days of the week), and optionally Process Between Hours to limit the processing window.
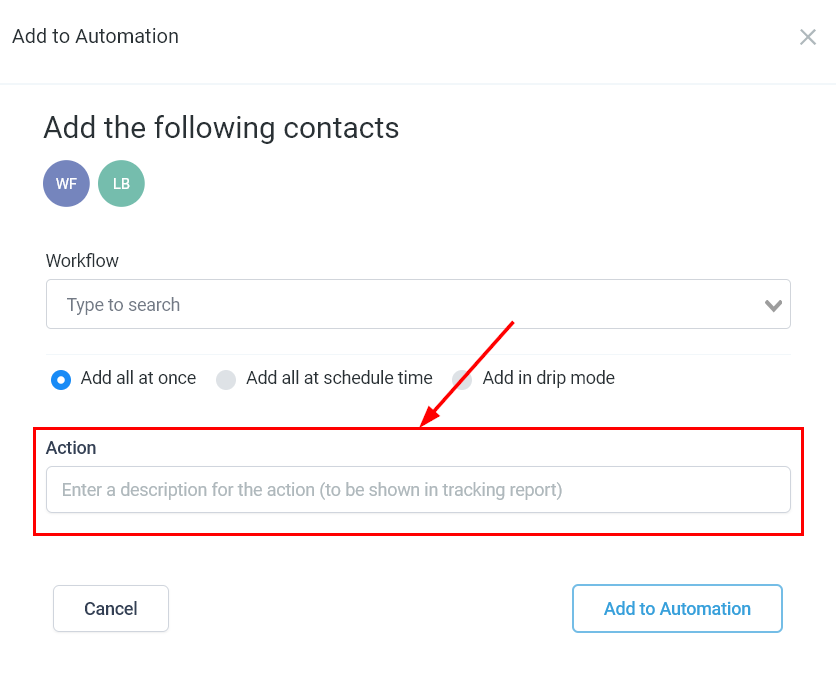
Action Name
Enter a recognisable name for this action – it will appear in the tracking report.
Confirm
Click Add to Automation to begin processing. You can monitor progress on the Bulk Actions page.