Growth360 Documents and Contracts supports reusable templates, digital signatures, multi-recipient signing, custom fields, and flexible sharing options – giving you everything you need to send professional documents and get them signed efficiently.
Documents and Contracts Templates
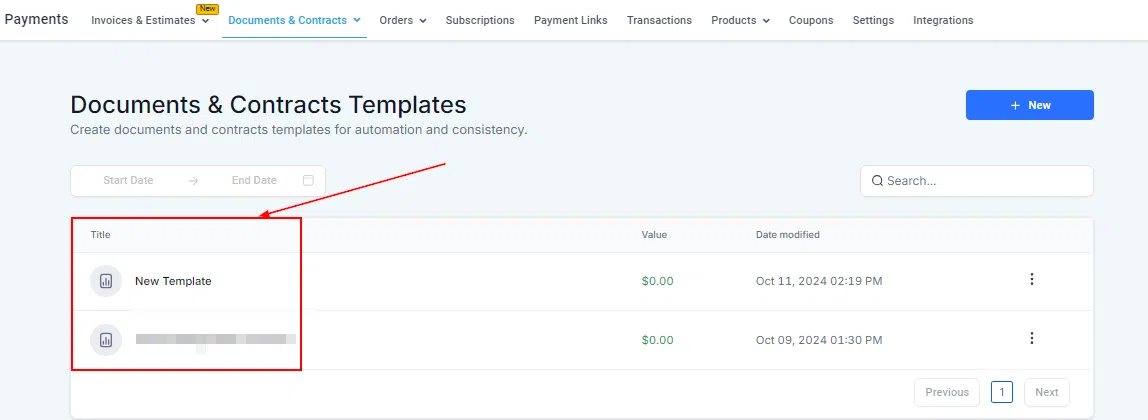
The Templates section in Documents and Contracts is your centralised library for storing and managing reusable document layouts. Rather than building each proposal, estimate, or contract from scratch, you create a template once and reuse it across clients – saving time and ensuring consistent, professional presentation every time.
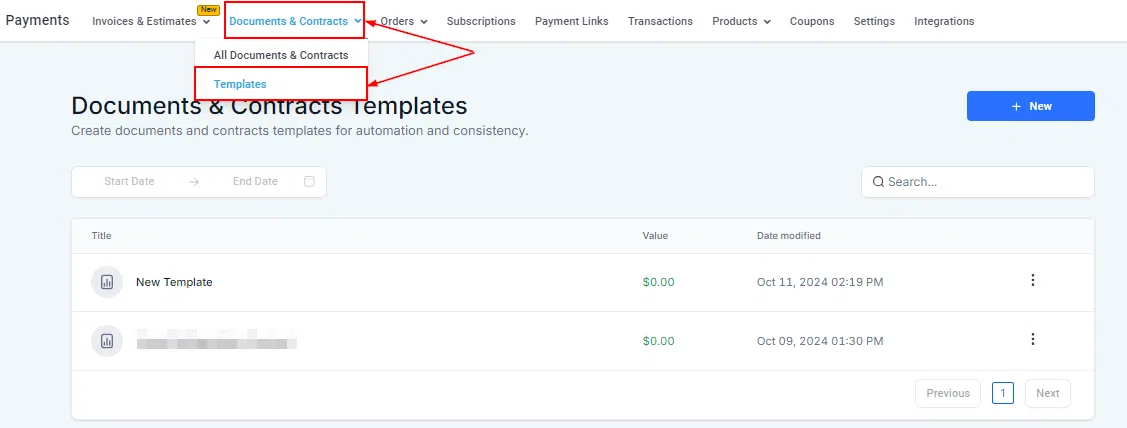
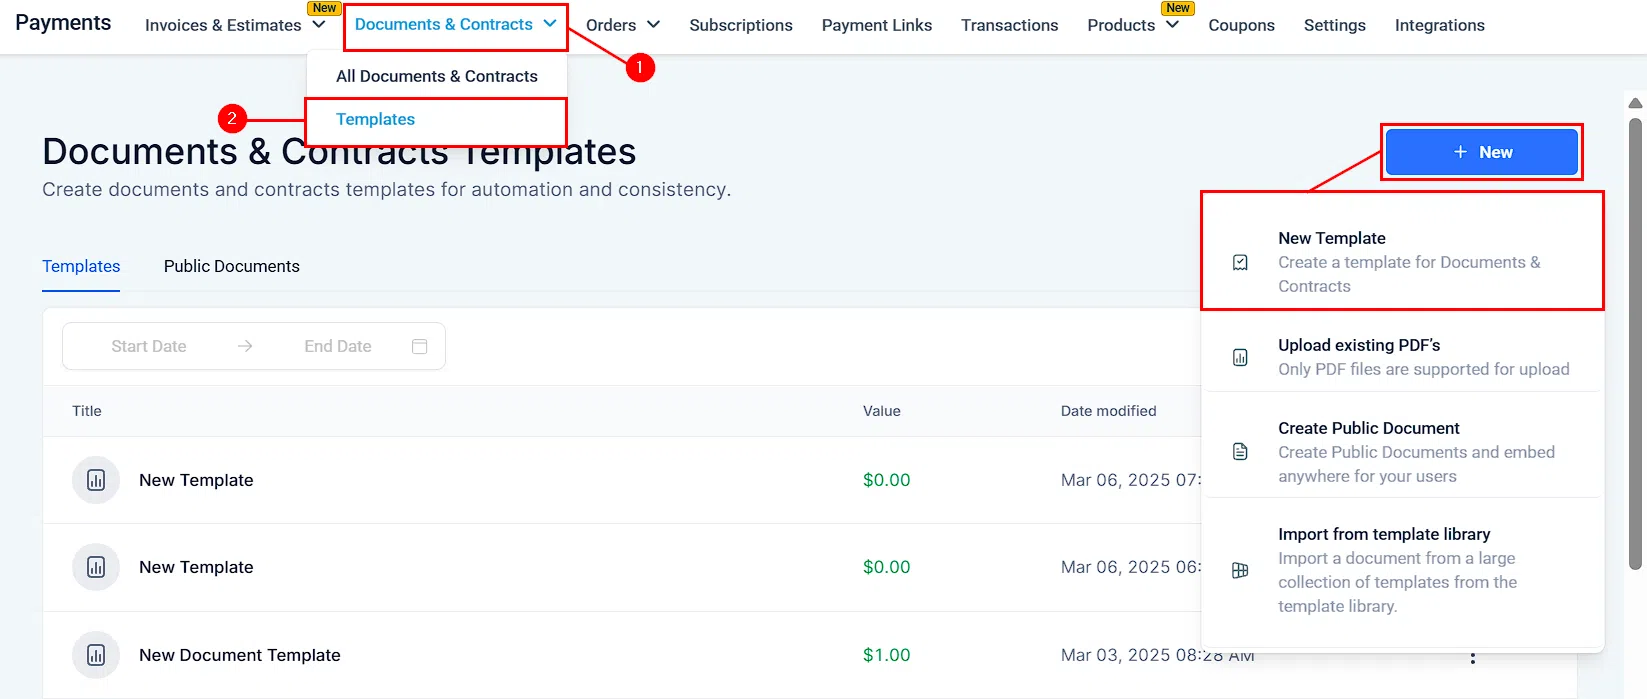
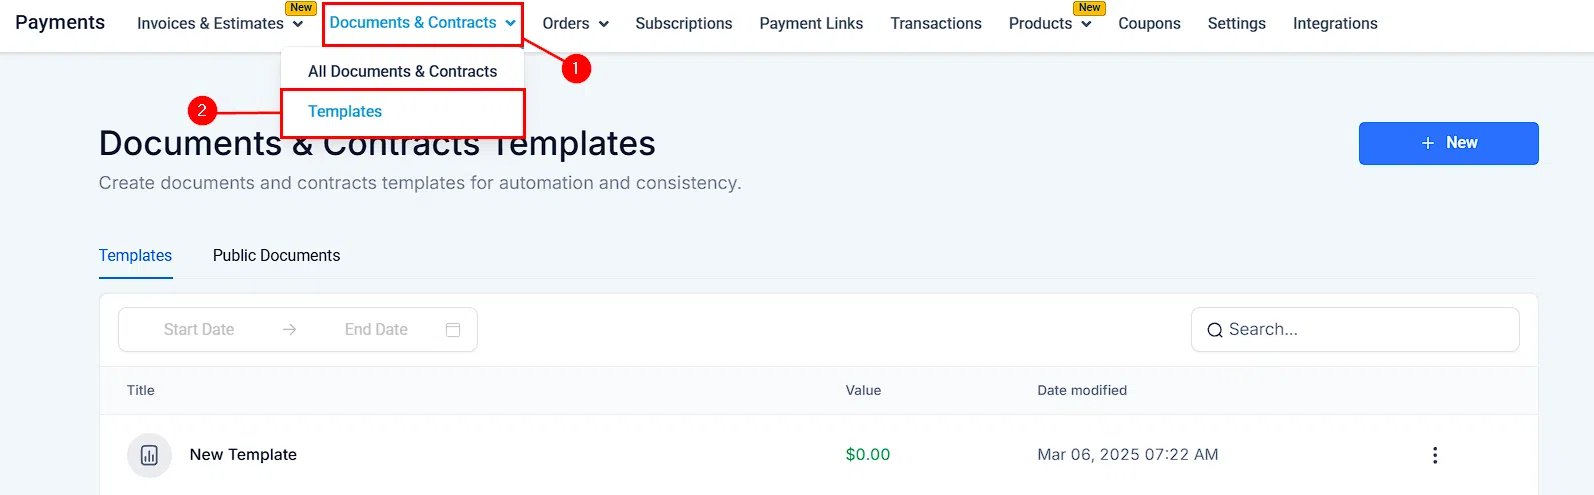
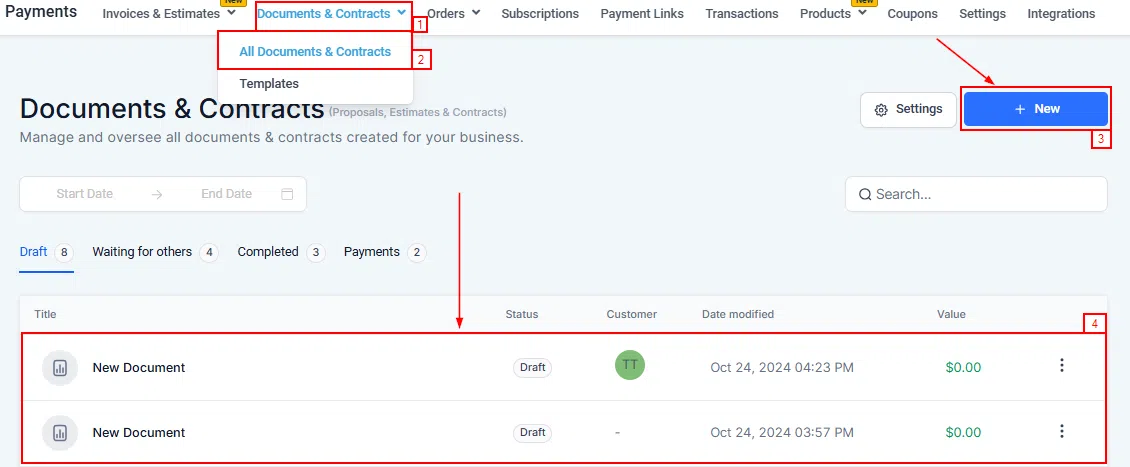
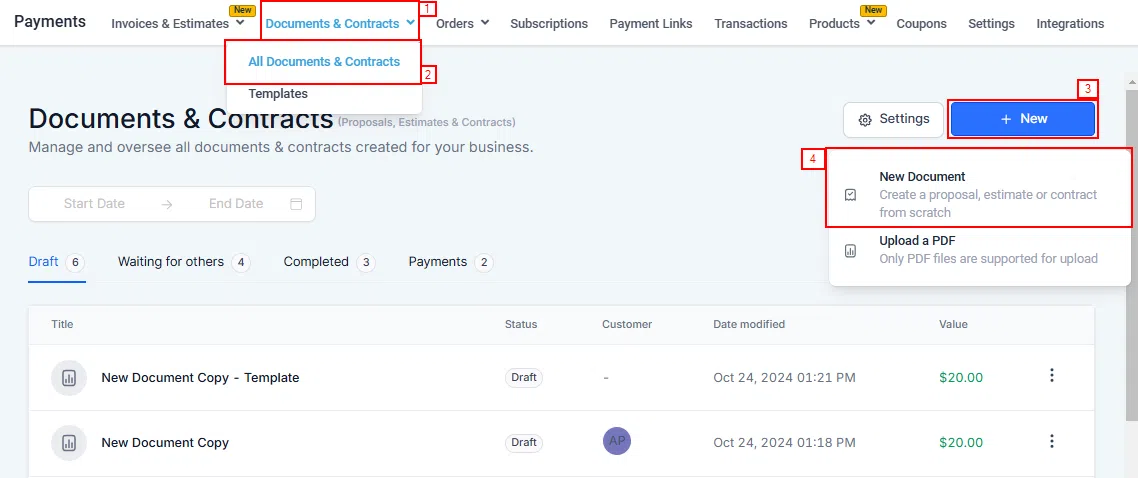
Navigate to Payments > Documents & Contracts > Templates to access this section.
Filtering Templates
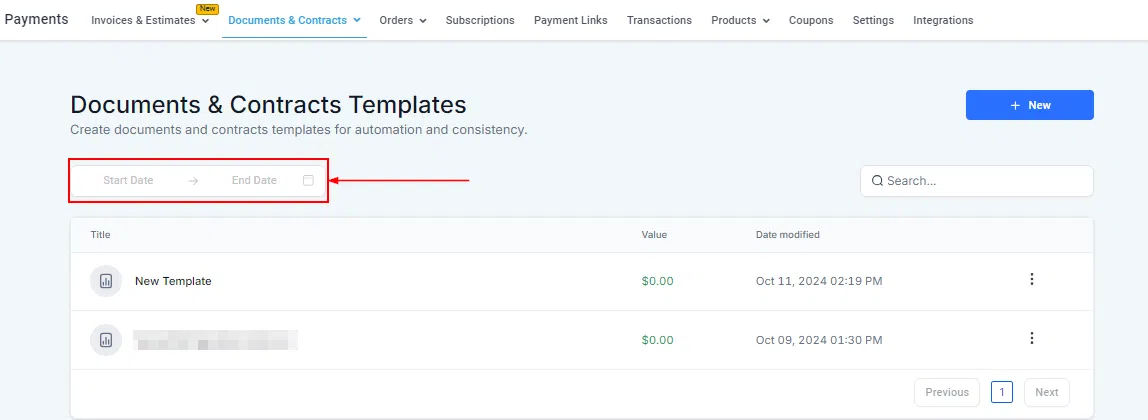
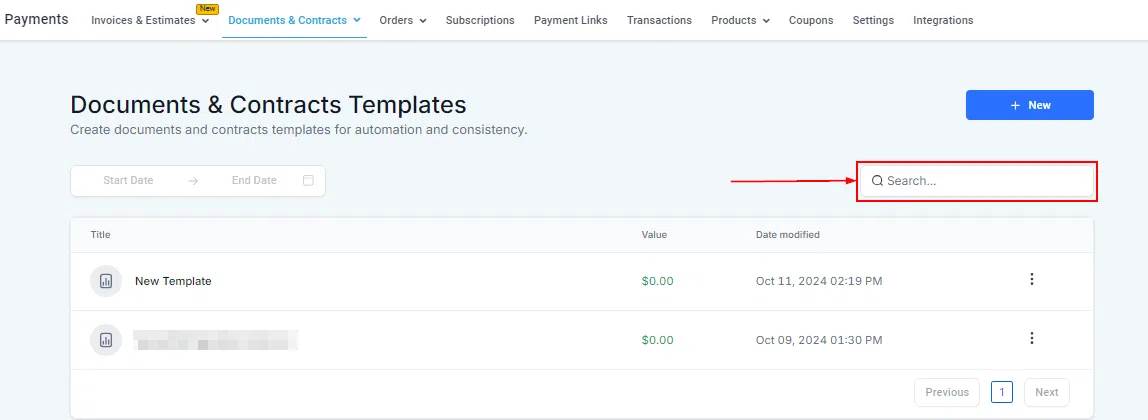
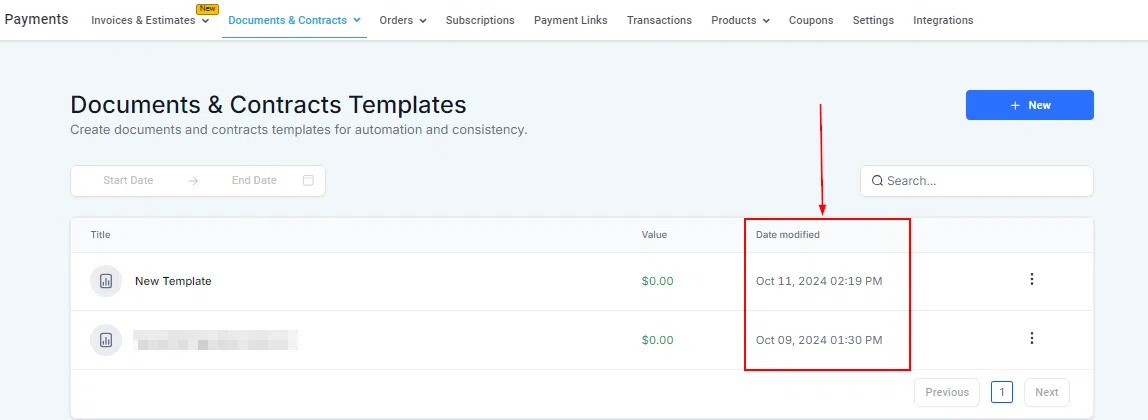
Use the Date Range filter to narrow the template list to a specific time period, making it easier to find recently created or updated templates in a growing library.
Template Actions
Each template has an action menu giving you quick access to common tasks. You can edit the template to update its content or layout, clone it to create a variation, delete it if no longer needed, or use it immediately to generate a new document for a client.
Creating and Importing Templates
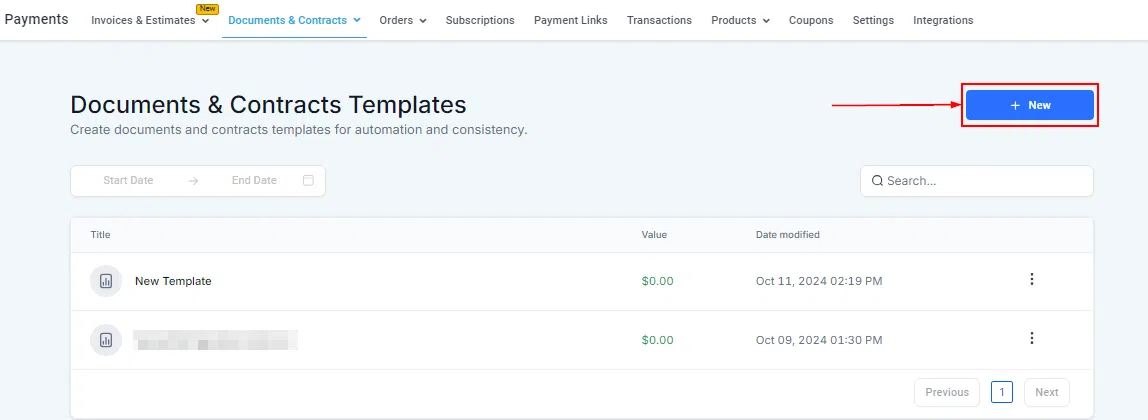
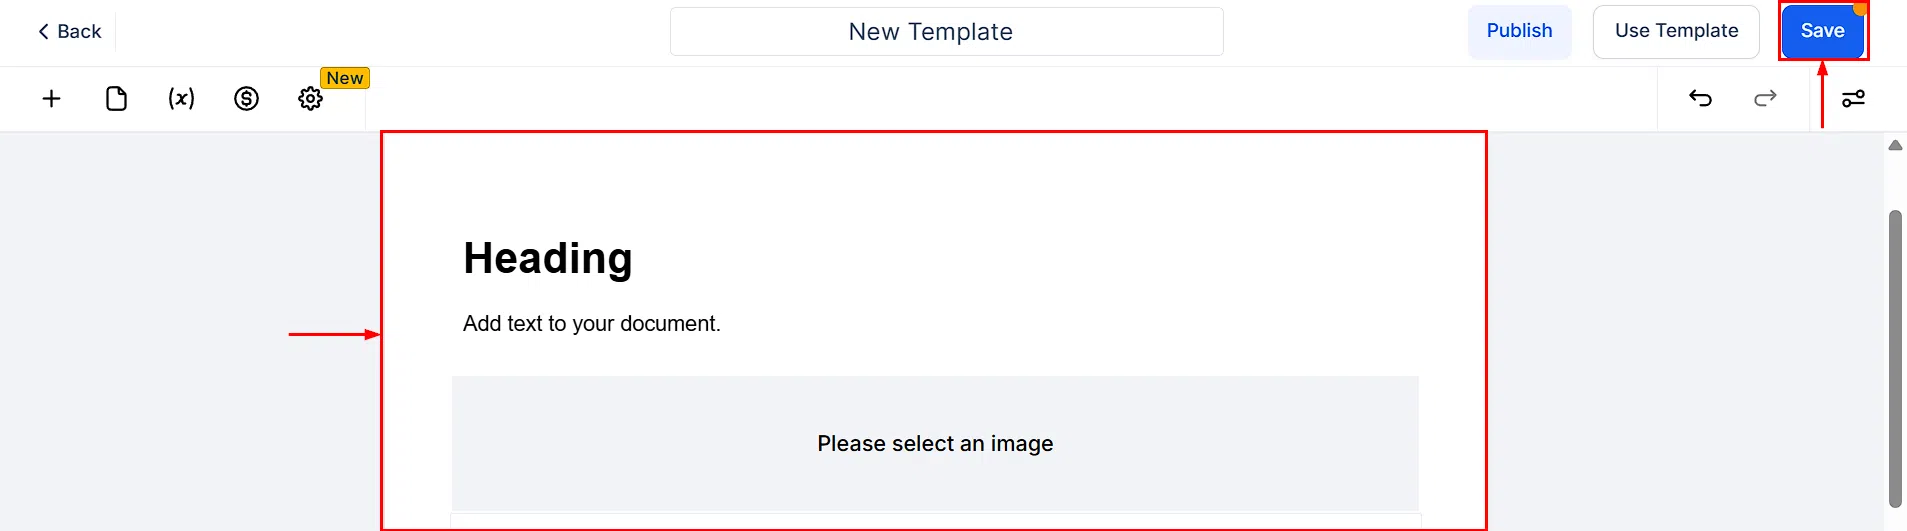
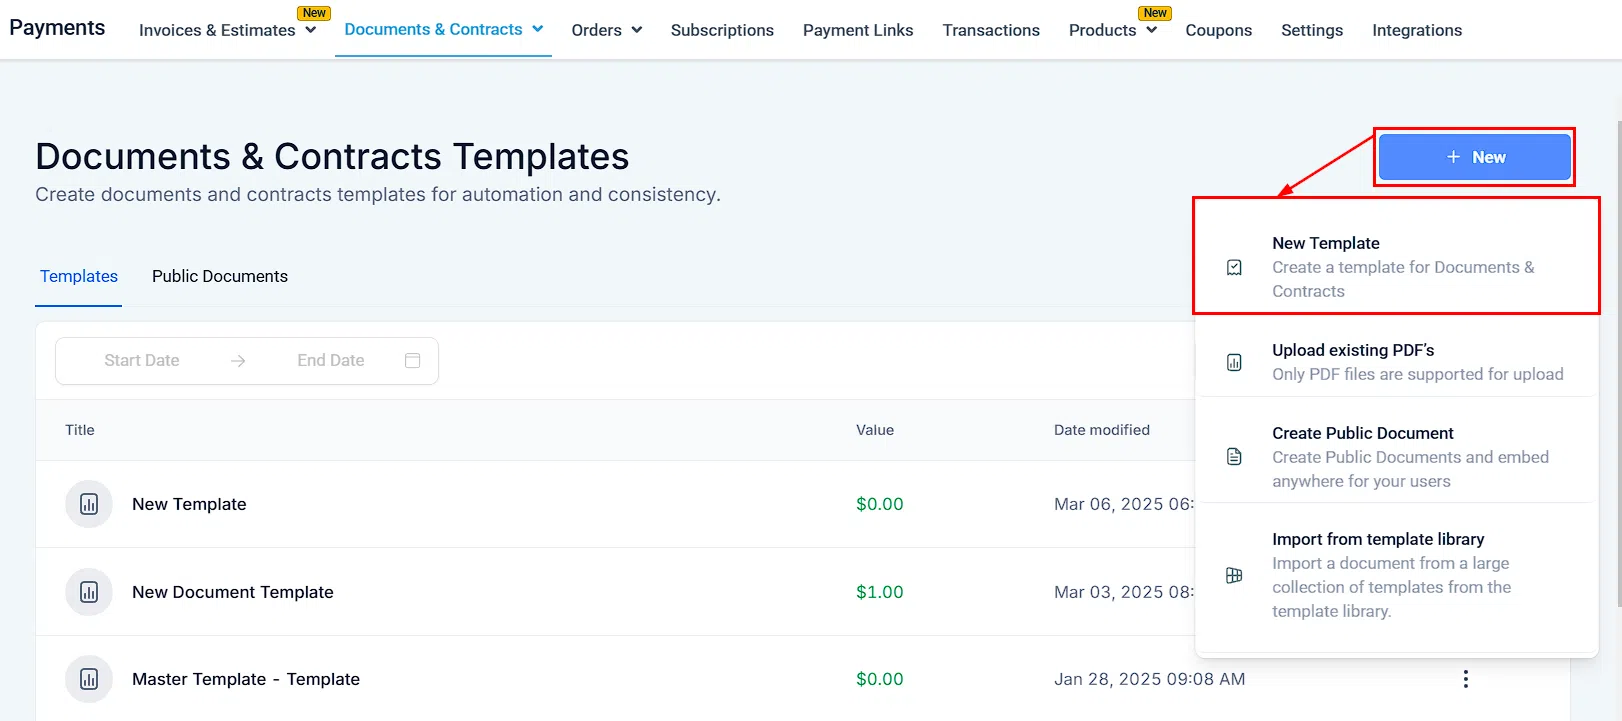
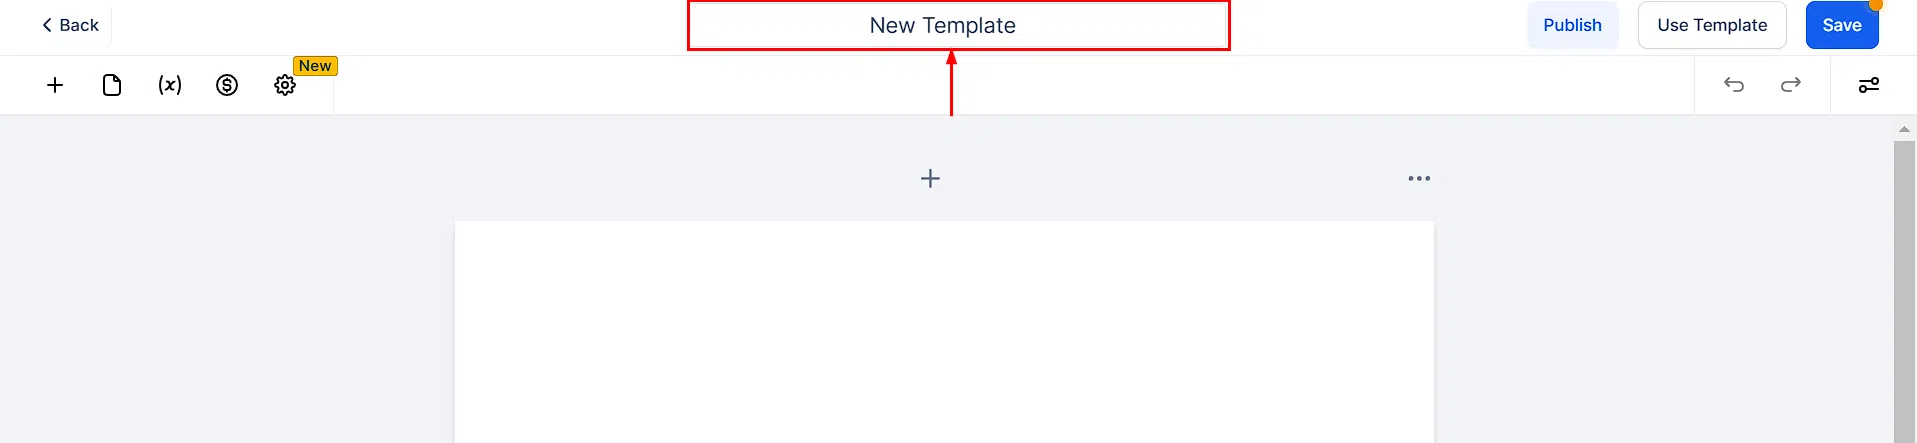
Click New Template to start a fresh template in the builder, upload an existing PDF, create a Public Document, or import from the template library. The template library includes pre-built layouts you can customise to match your brand and requirements.


Sending Templates Automatically via Workflows
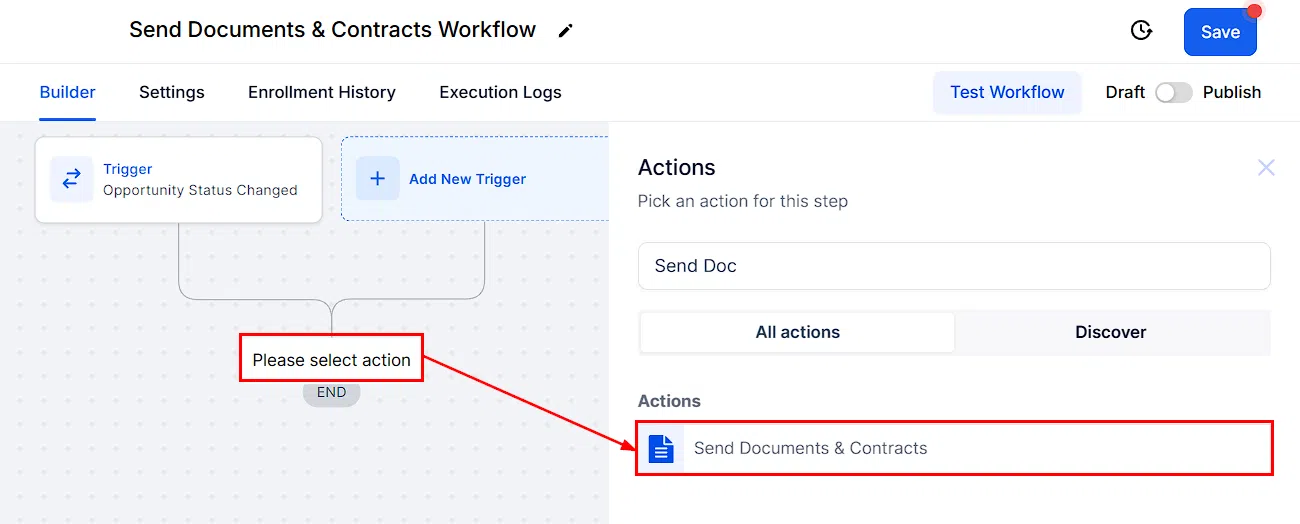
Once you have a document template set up, you can automate sending it through Growth360 Workflows. This lets you trigger a document to be sent to a contact automatically – for example, when a lead reaches a certain pipeline stage, when a form is submitted, or when a specific tag is applied.
Setting Up the Workflow Action
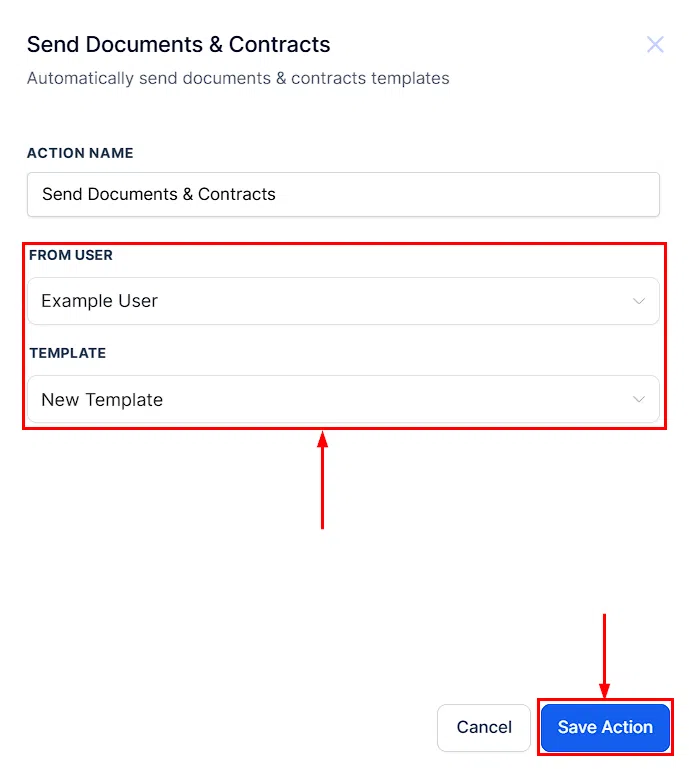
In your workflow, add a Send Document action. Select the template you want to send, then configure the recipient – typically the contact associated with the workflow trigger. You can also set a specific sender, customise the email subject and message, and choose whether the document requires a signature.

Adding Signatures to Documents and Contracts
Digital signatures are a core part of Growth360 Documents and Contracts. You can add signature fields to any template, assign each field to a specific signer, and send the document for signing with a single click. Signers receive a personalised link that guides them directly to their assigned fields.
Adding a Signature Field
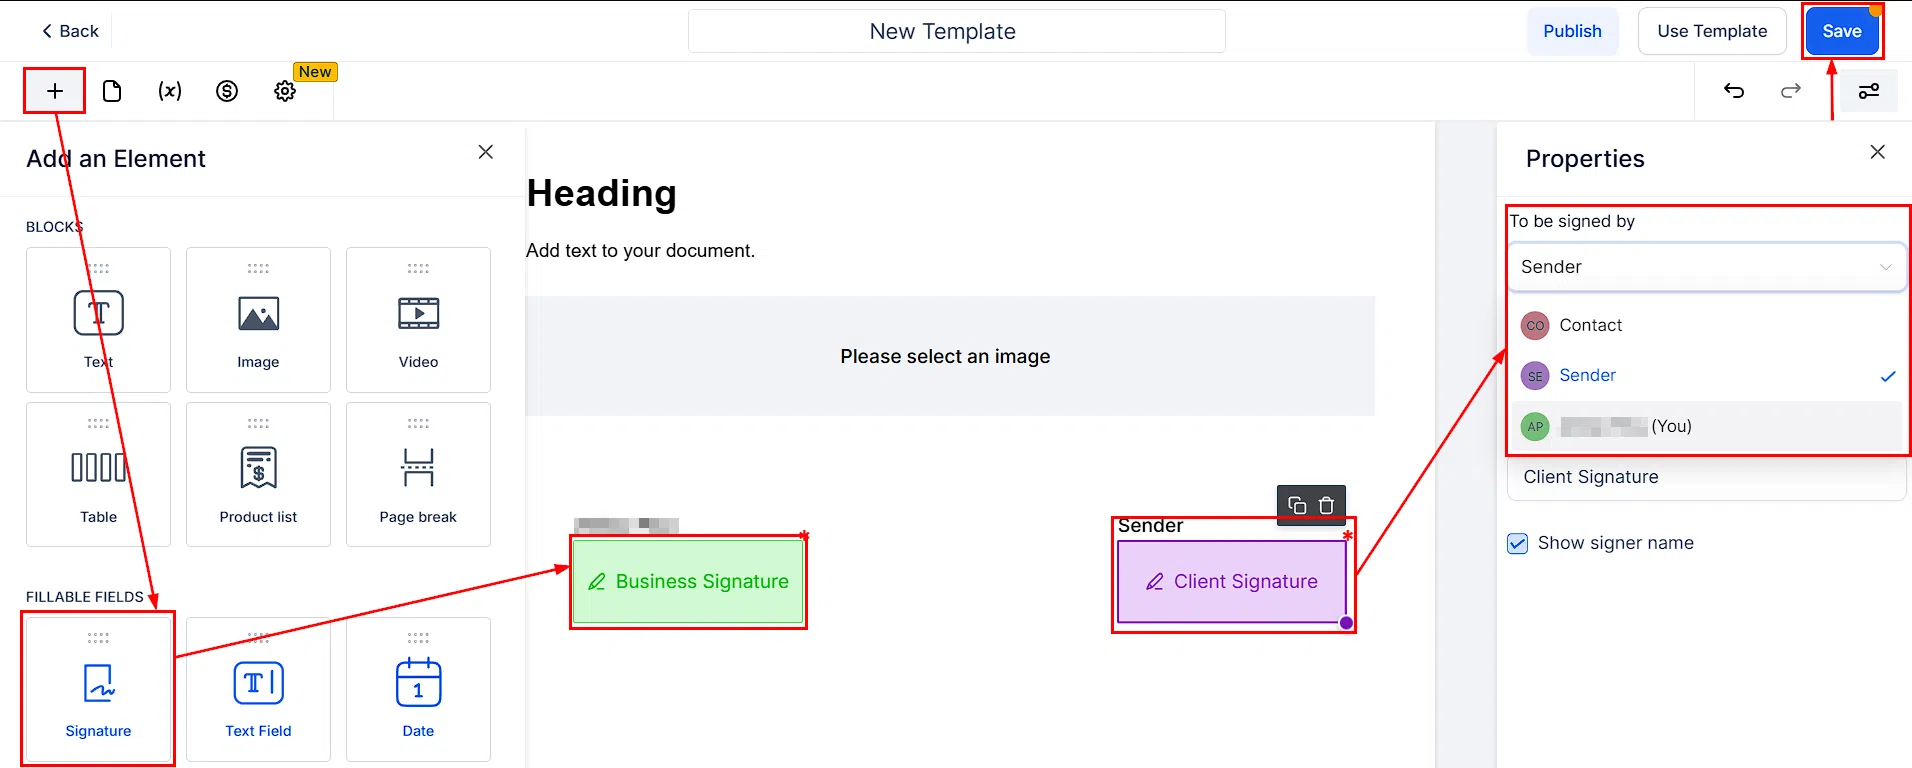
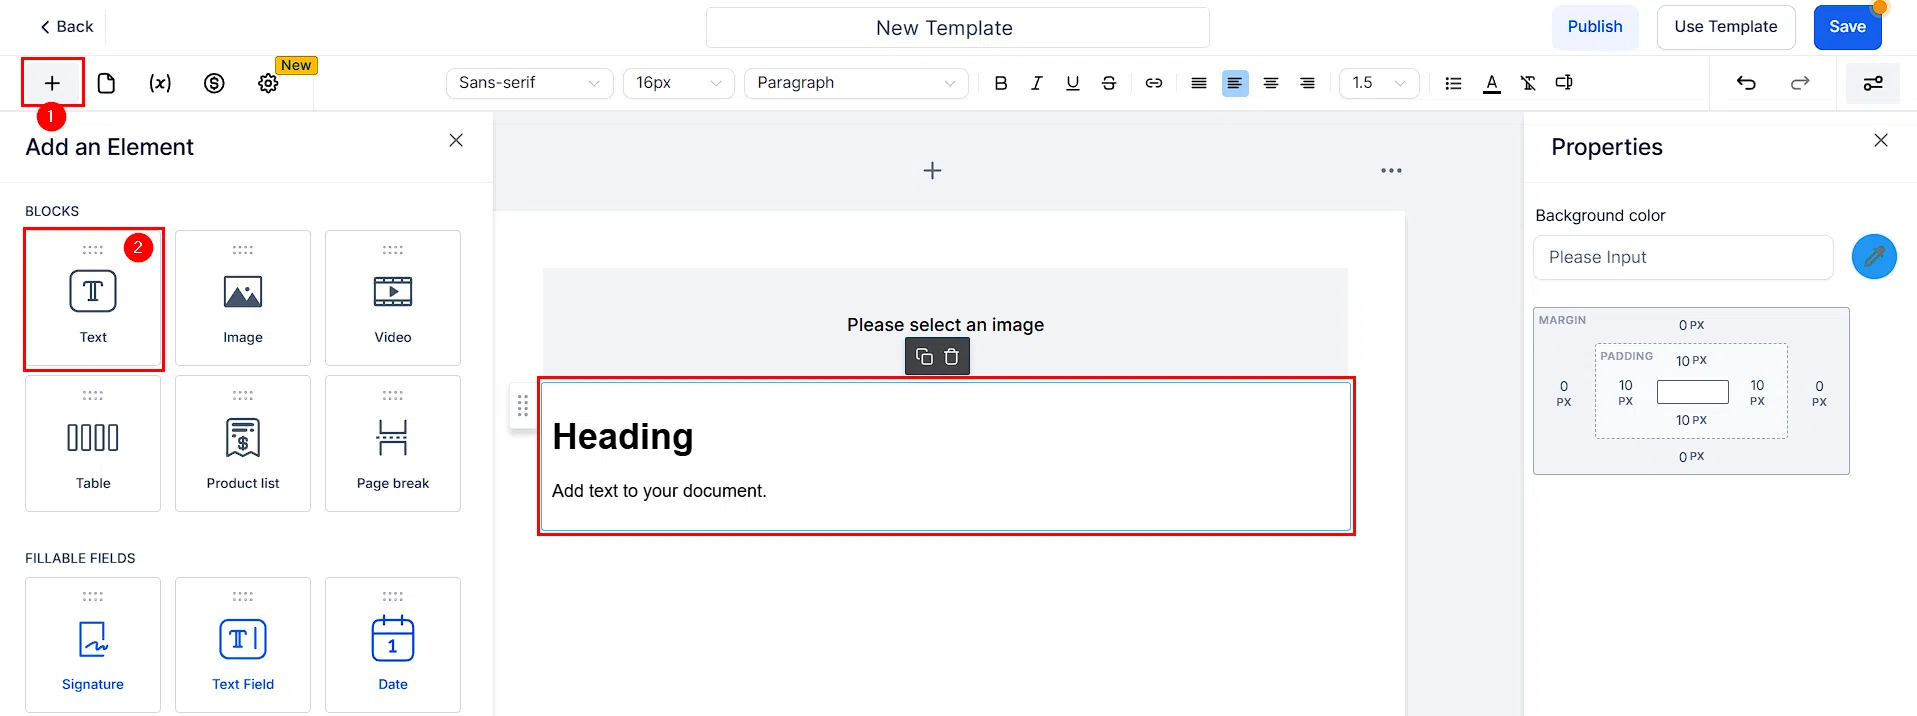
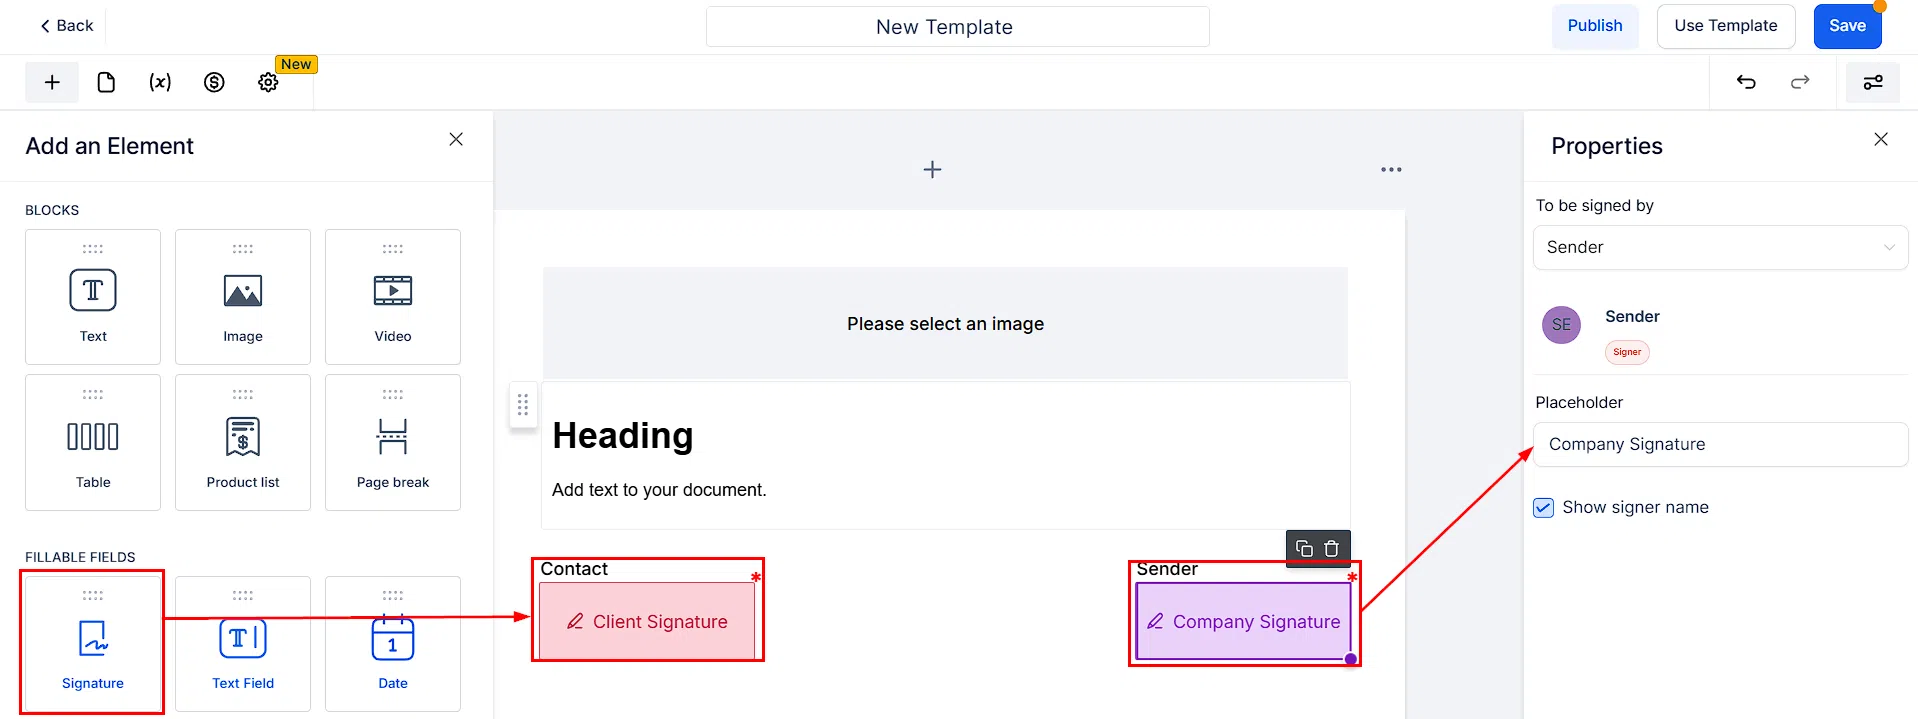
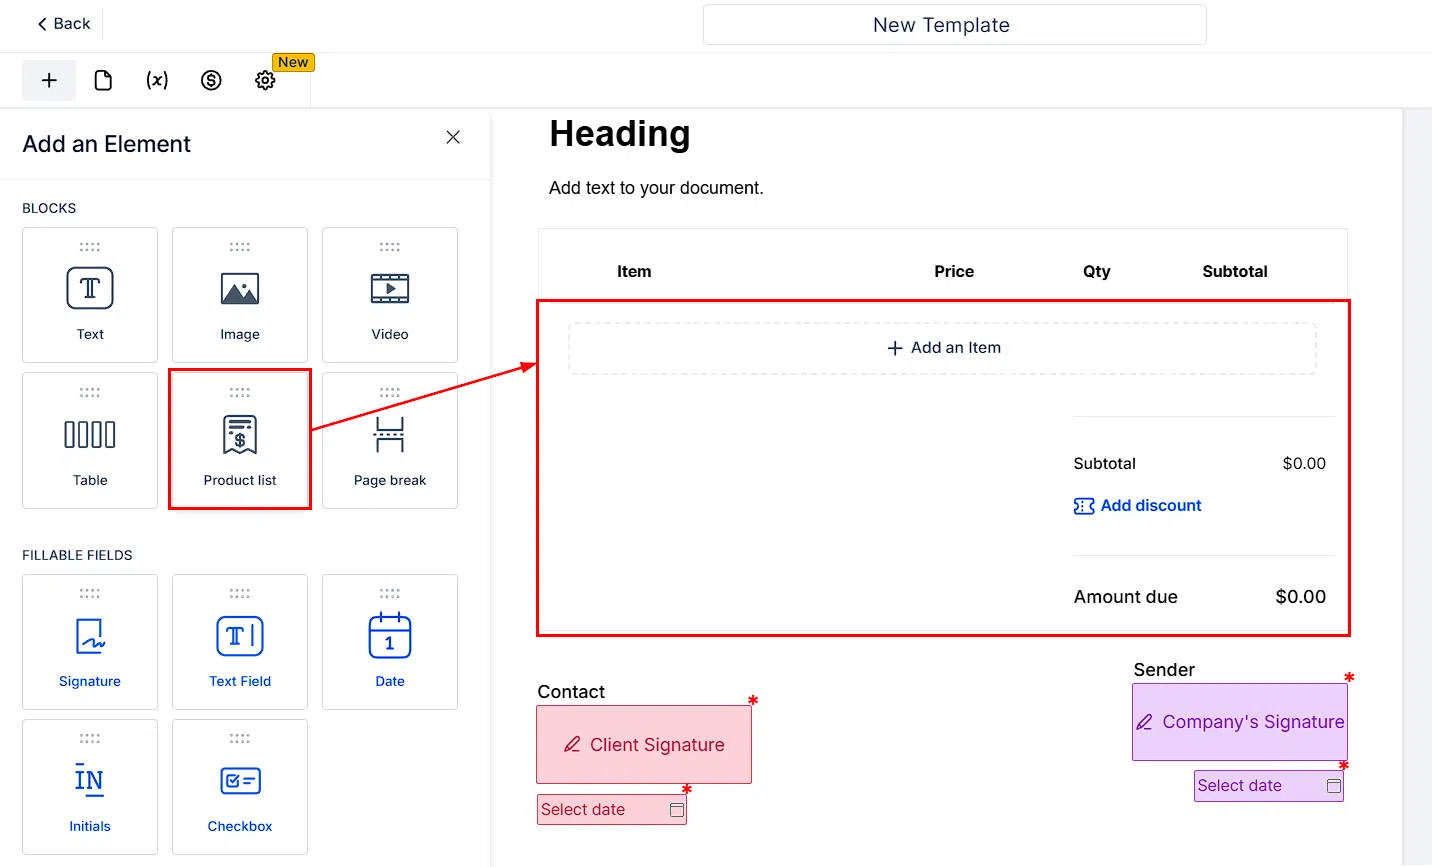
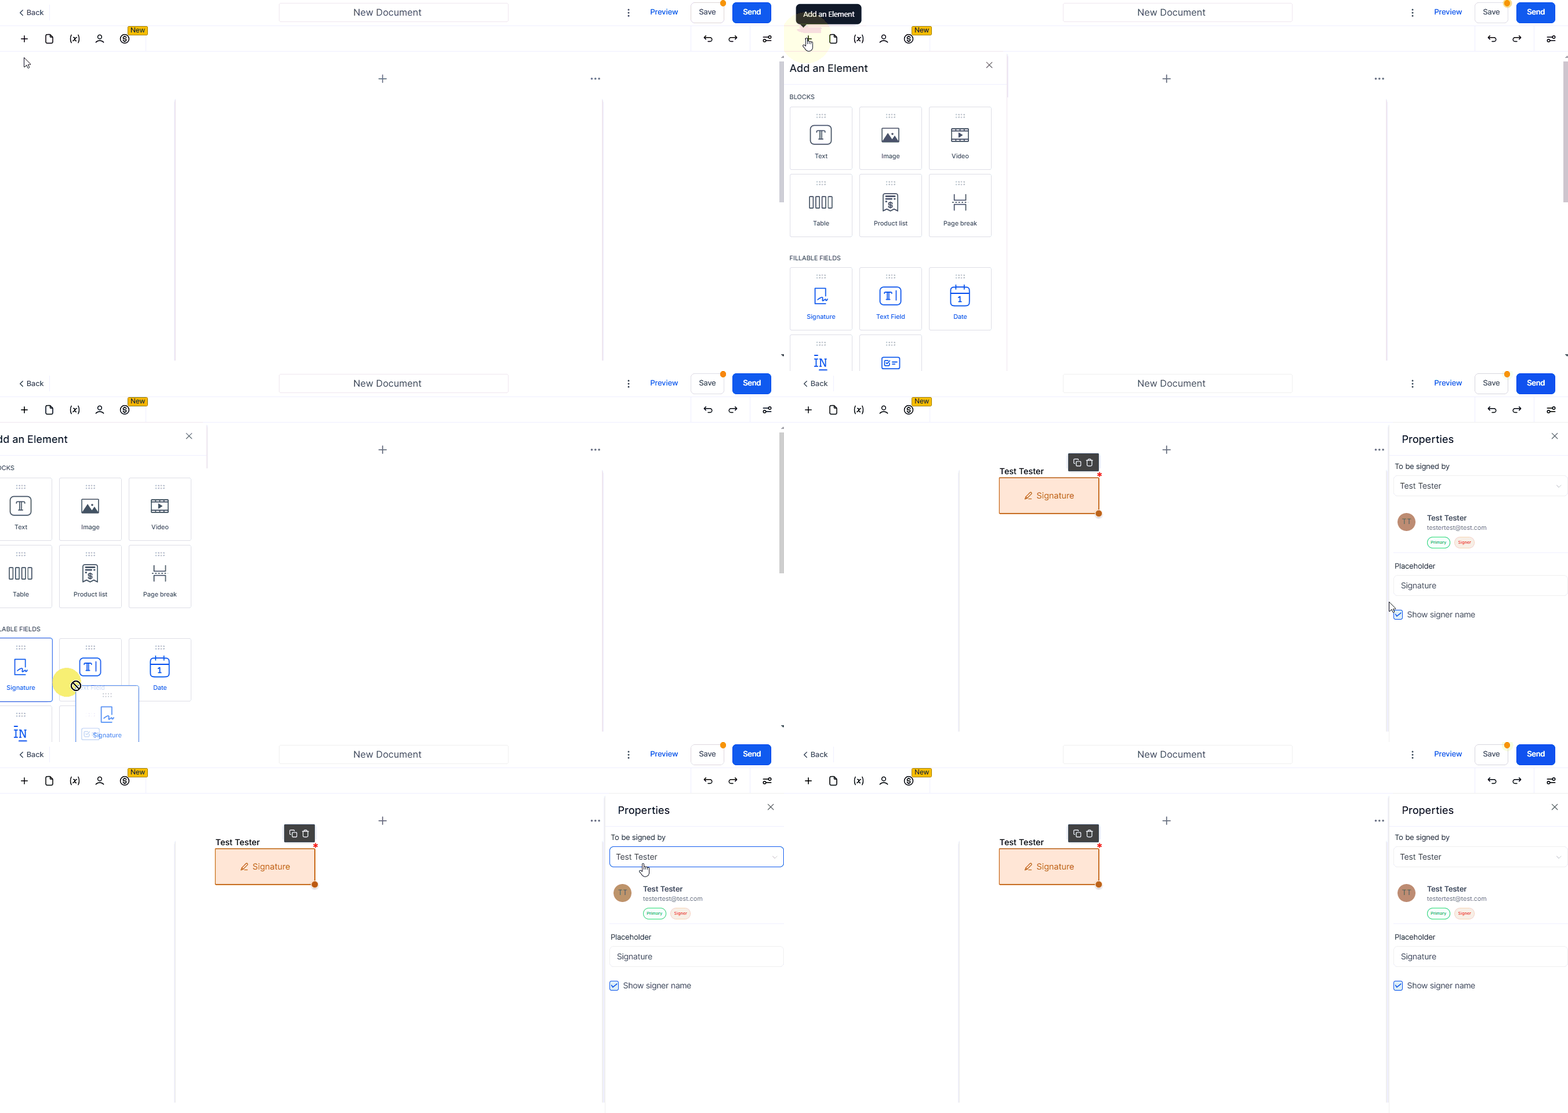
In the builder, use Add an Element to insert a signature block. You can add multiple signature fields to a single document – for example, one for the client and one for your company. Position each field where the appropriate party needs to sign.
Assigning Signers
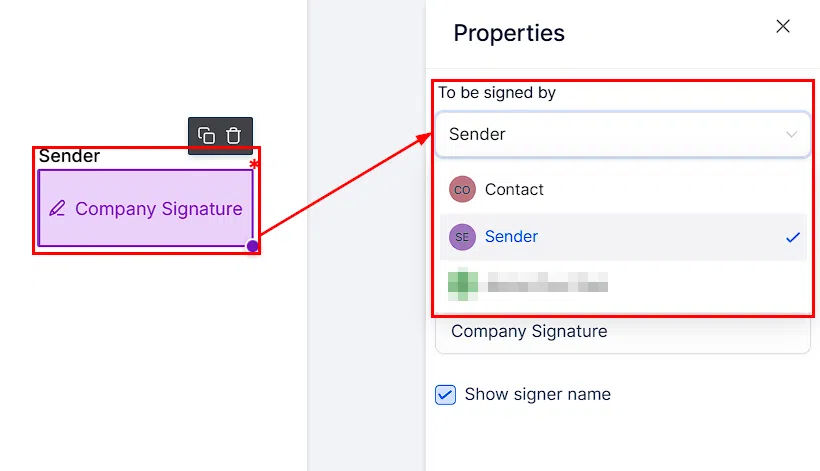
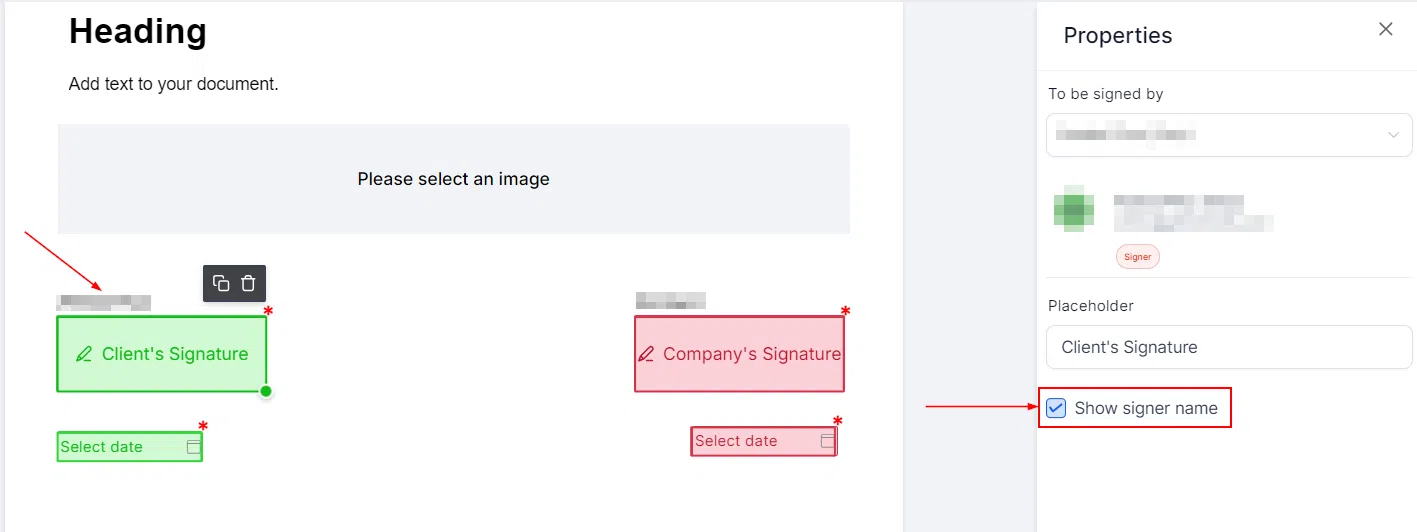
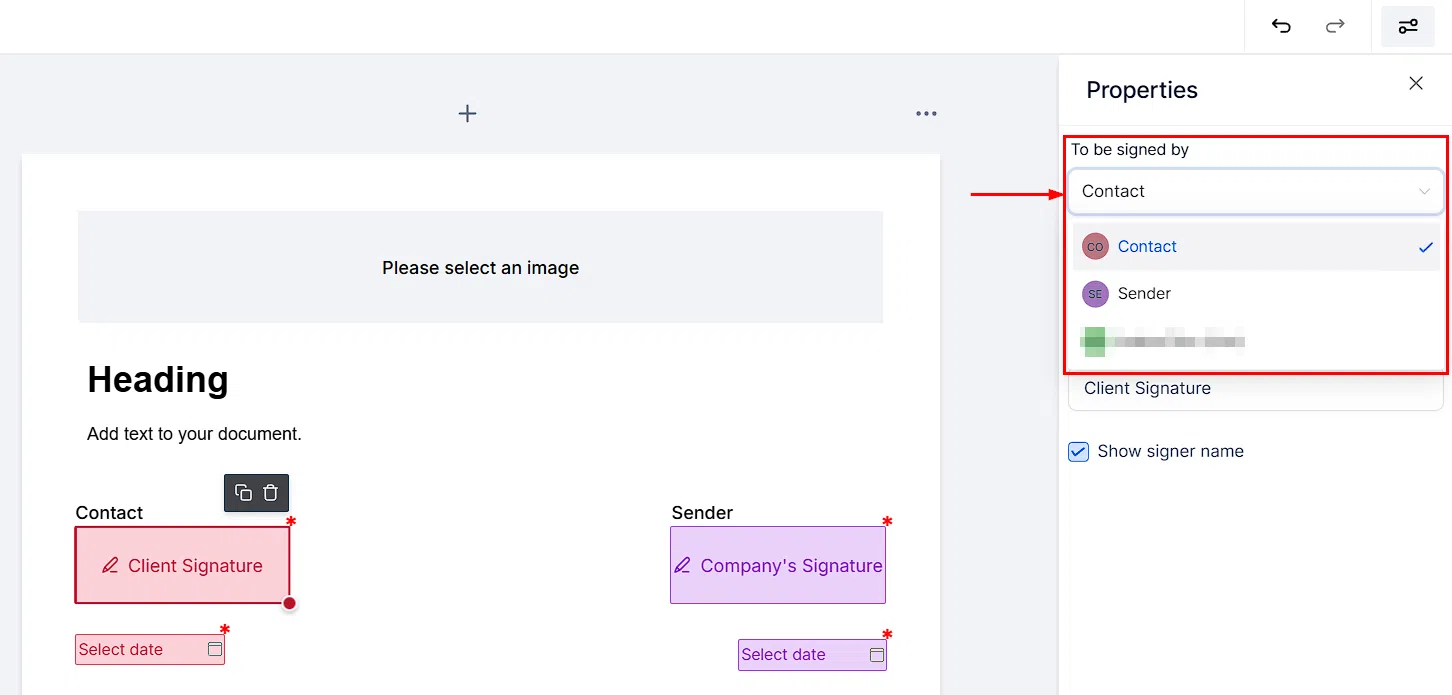
Click on each signature block and use the Properties panel on the right to assign who needs to sign it. Select the appropriate contact (client) for their signature field, and your company user for any internal signature field. This ensures each signer only sees and signs the fields assigned to them.

Sending for Signature
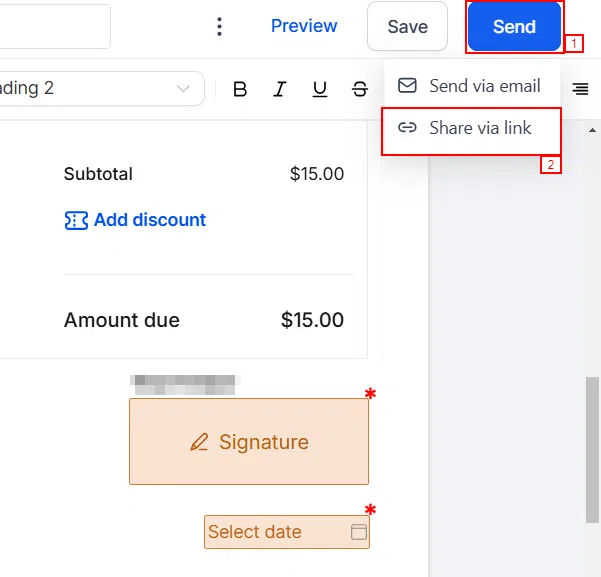
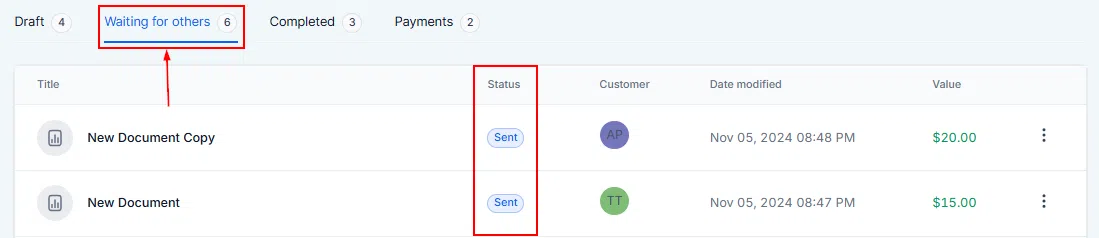
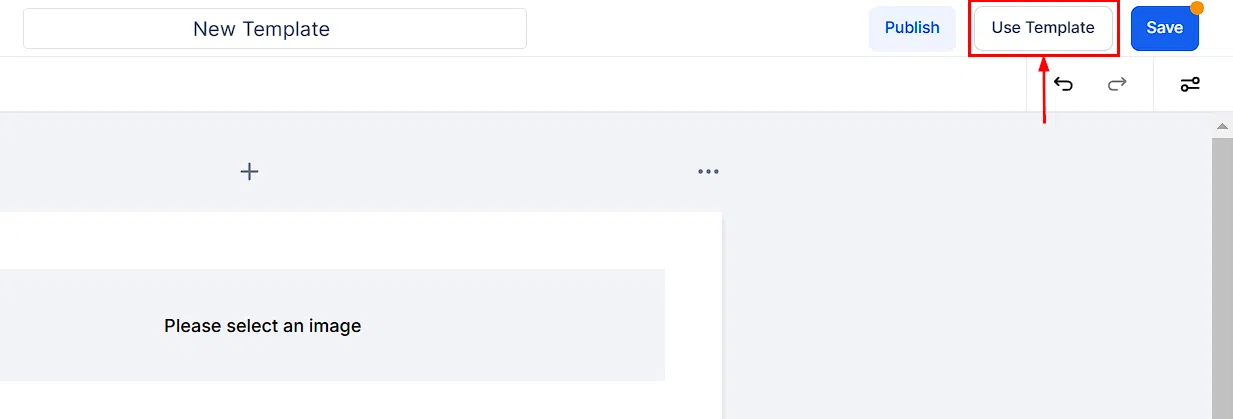
Before sending, update any client-specific details in the document such as products, charges, or custom terms. Then use the Send option to deliver the document. Each signer receives a secure, personalised link to their assigned signature sections.
Fillable Element: Initials
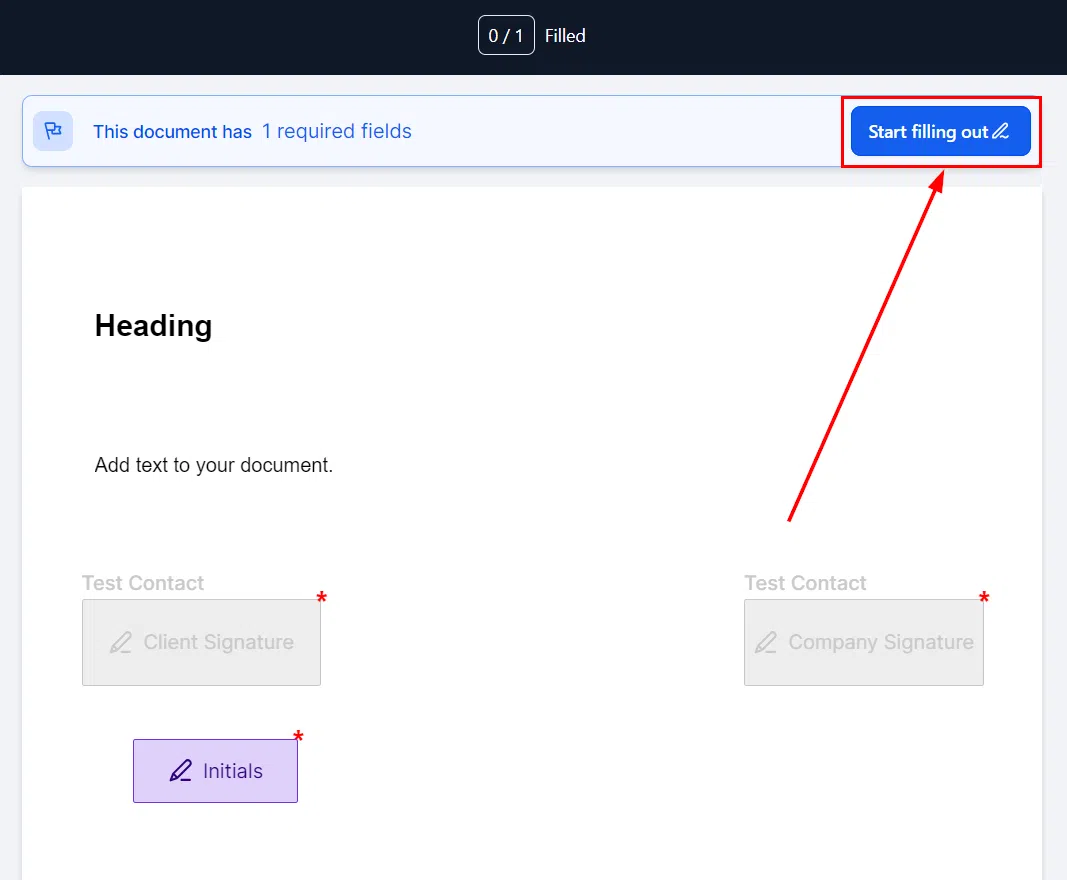
The Initials feature adds an initials field to your document, requiring the signer to initial each relevant page or section before completing the full signature. This is particularly useful for multi-page documents and PDFs where you need confirmation that the recipient has reviewed every section, not just signed the final page.
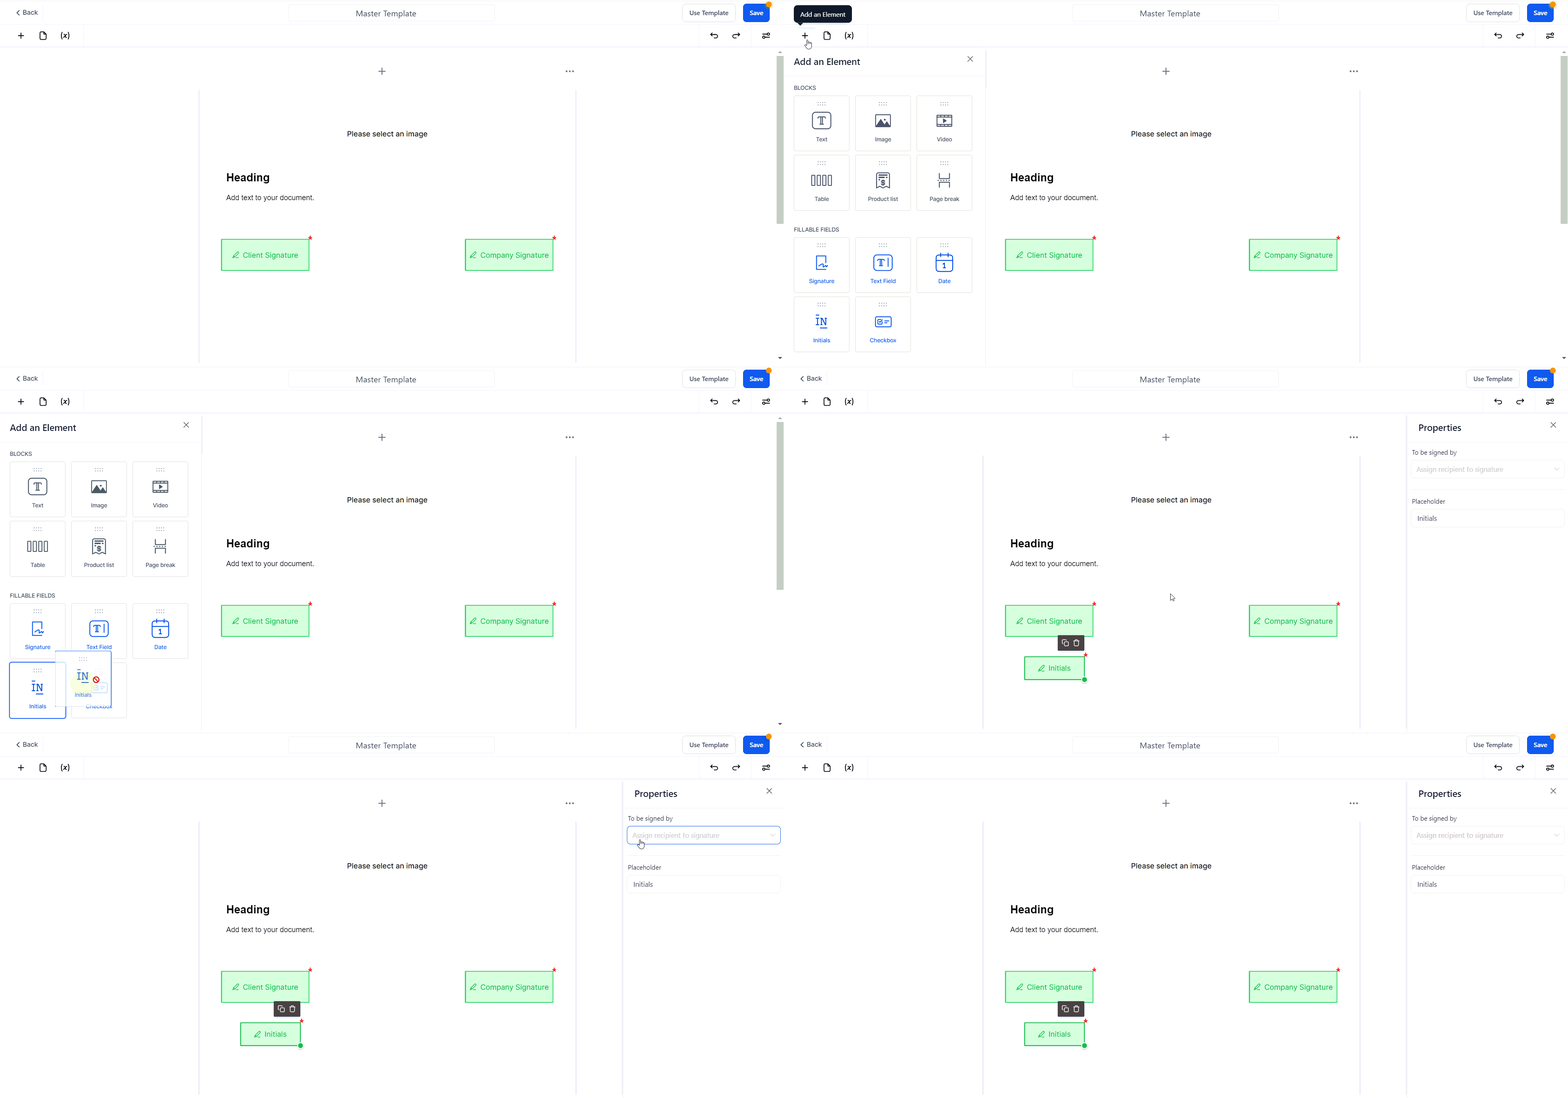
Adding and Using Initials Fields
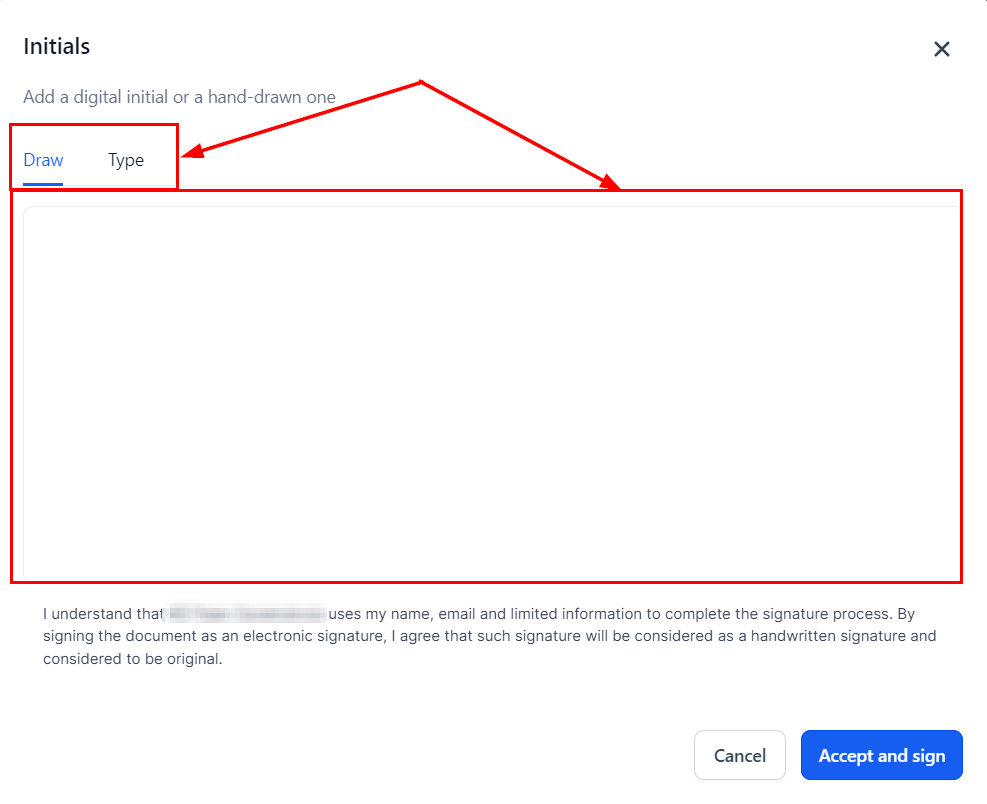
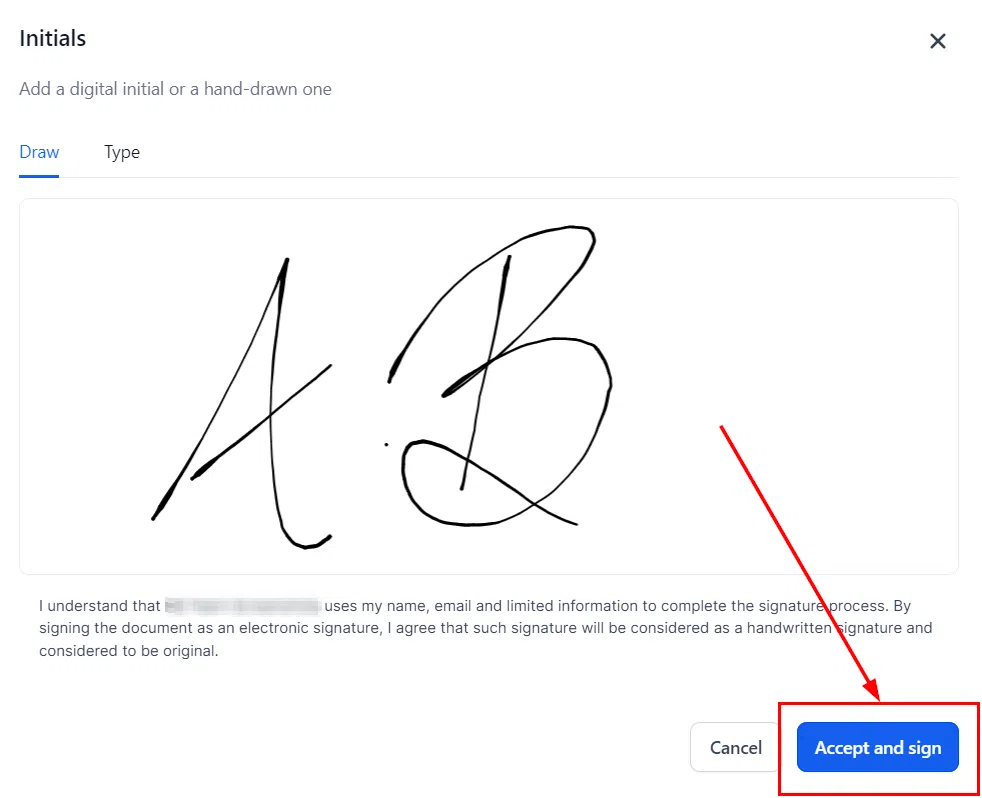
Insert an Initials element via Add an Element in the builder, just as you would a signature block. When the client receives the document, they will see the Initials field alongside any signature fields. They add their initials, then complete the full signature to finalise the document.

Multi-Recipient Document Signing
Multi-recipient signing lets you send a single document to multiple people and have each person sign their own assigned section. Instead of managing separate documents for each signer, one document goes out and each recipient receives a personalised link that takes them directly to their fields.
Setting Up Multi-Recipient Signing
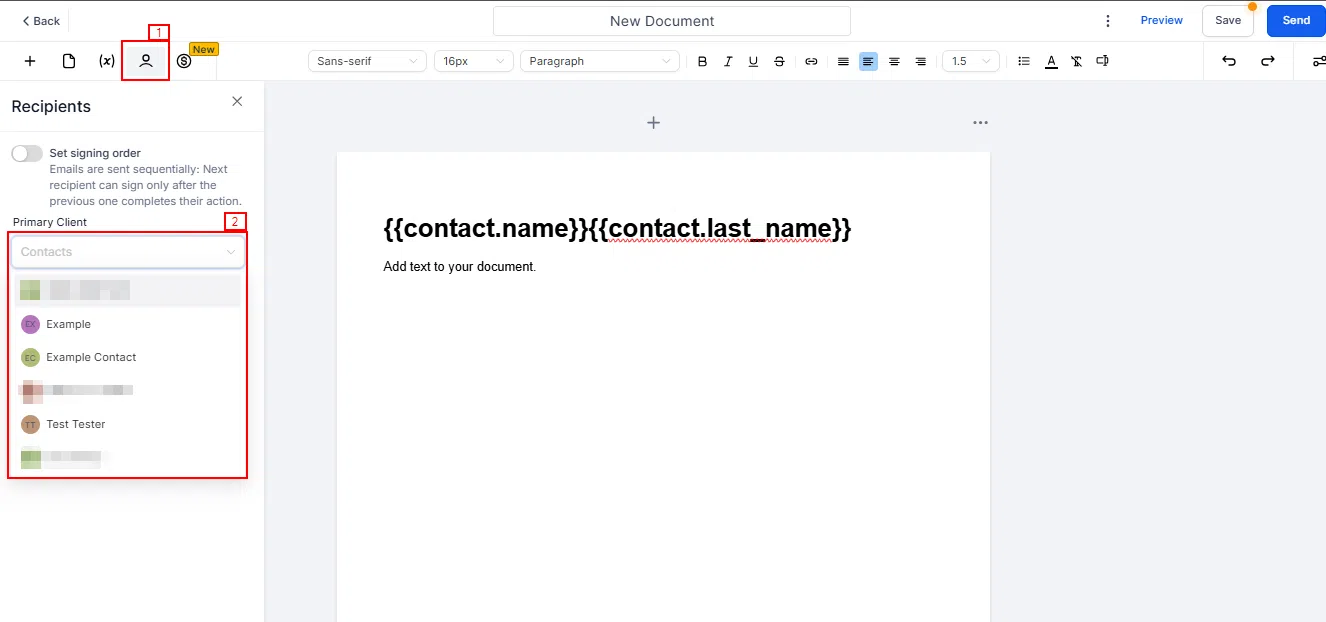
In the builder, add a signature block for each required signer. In the Properties panel for each block, select a different recipient from the To be signed by dropdown. When you send the document, each contact receives their own secure link and only sees the fields assigned to them.

Custom Fields for Document Signing
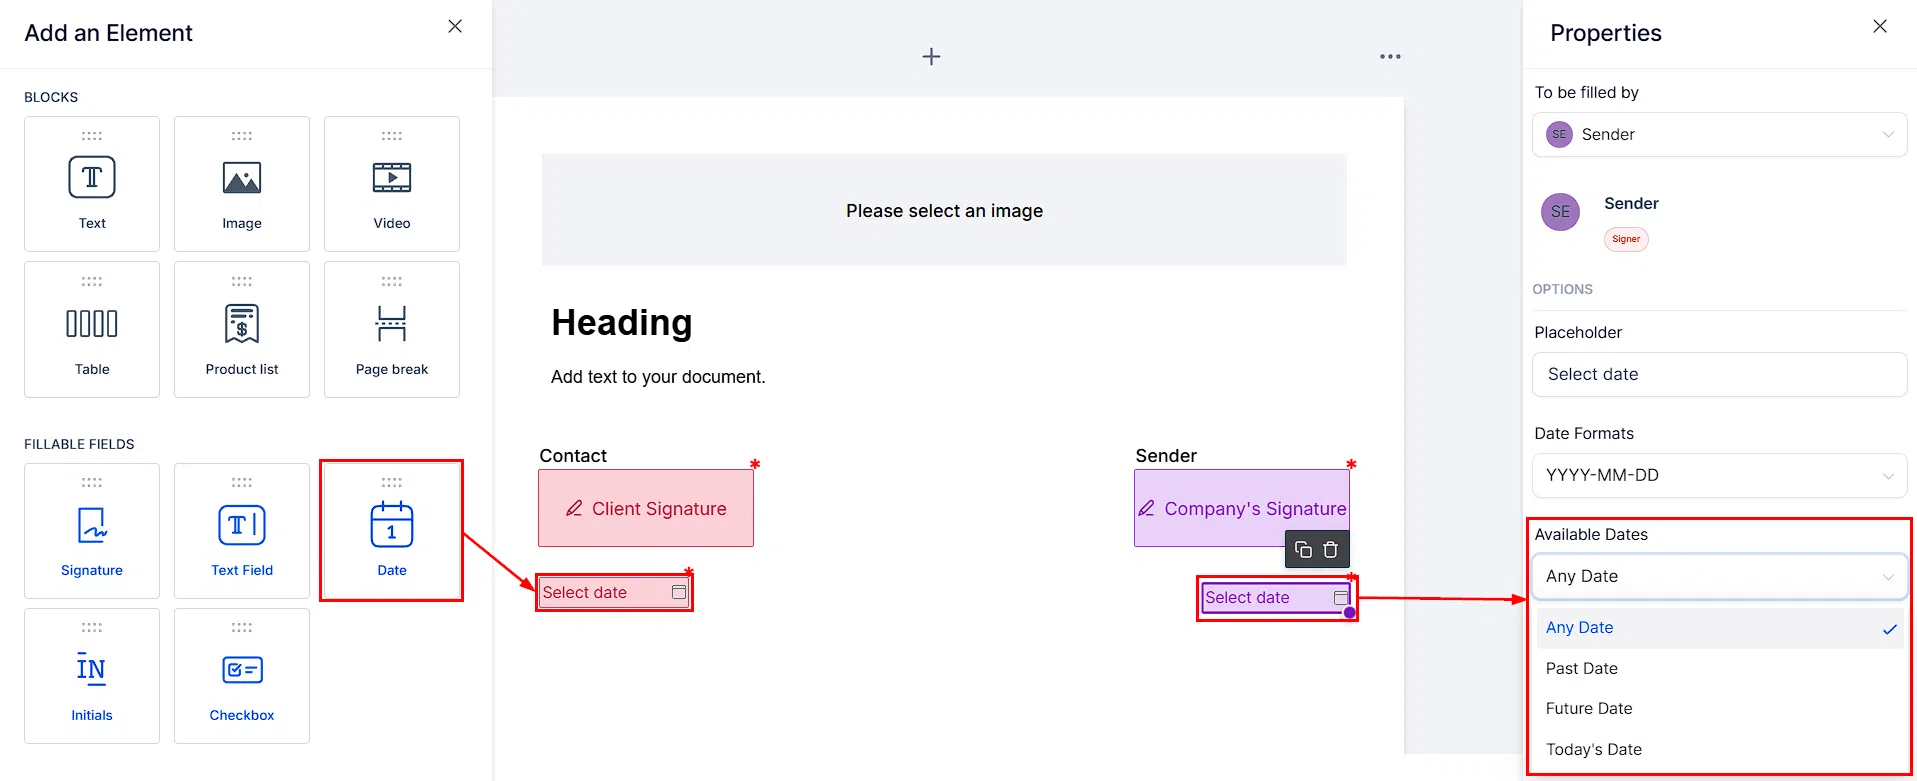
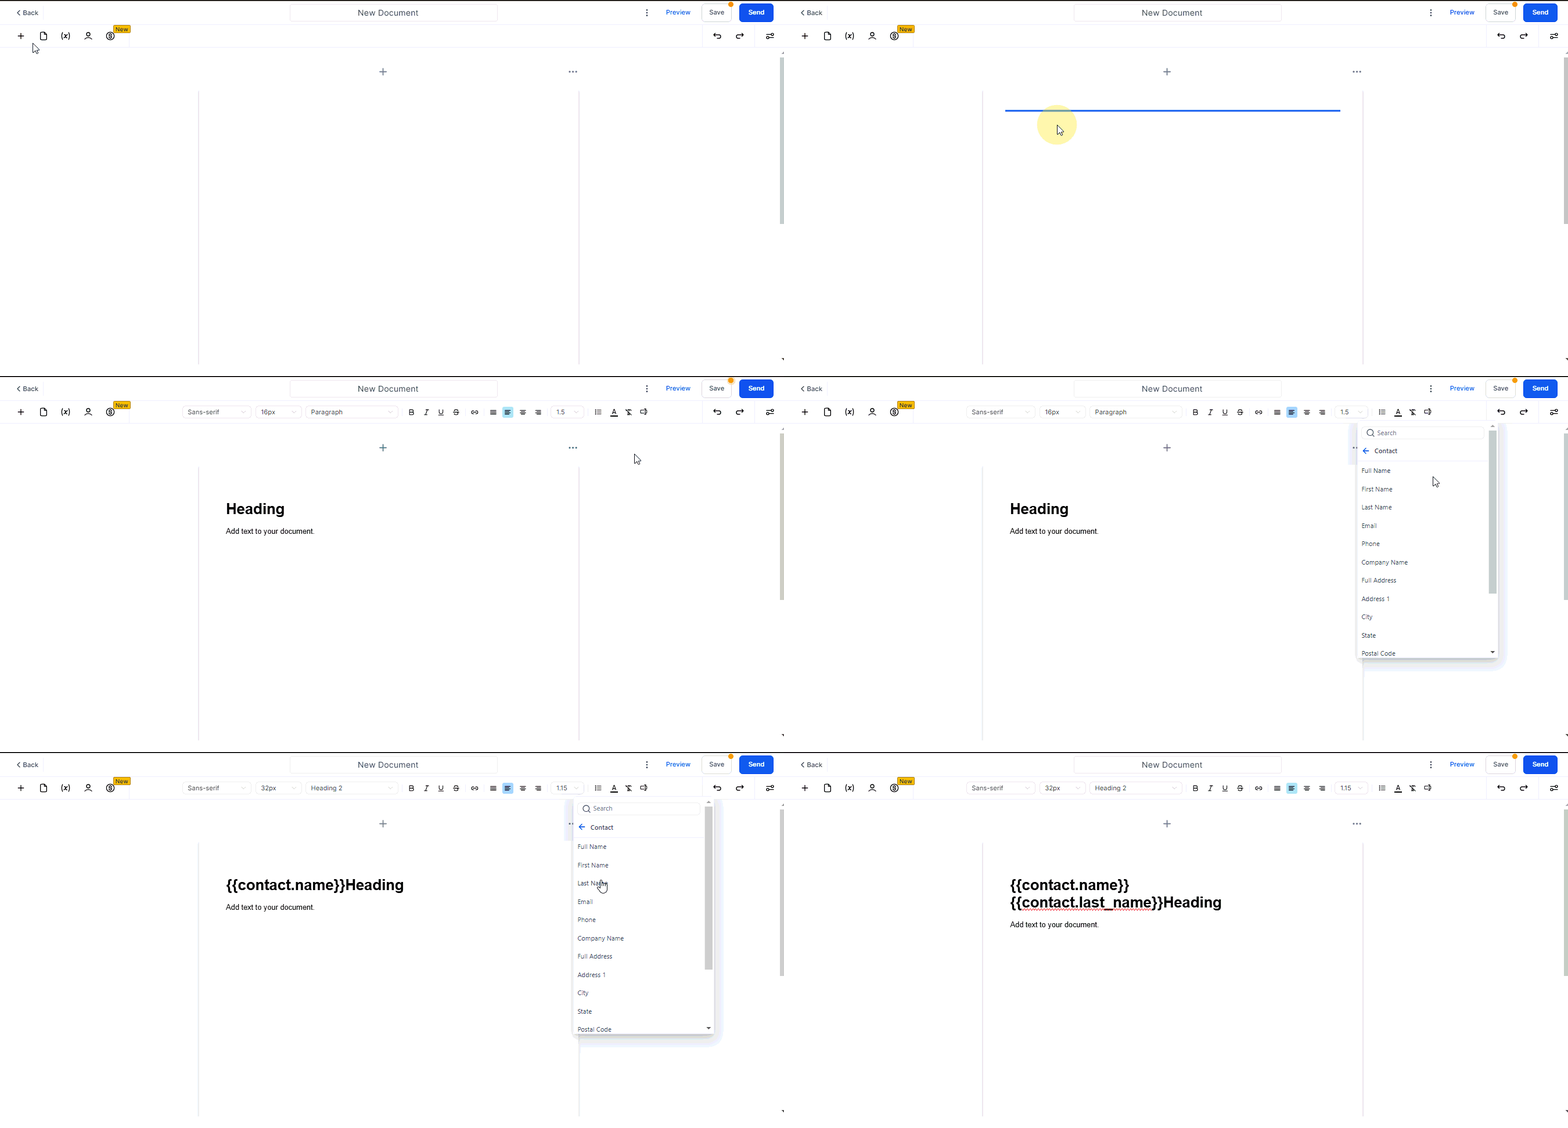
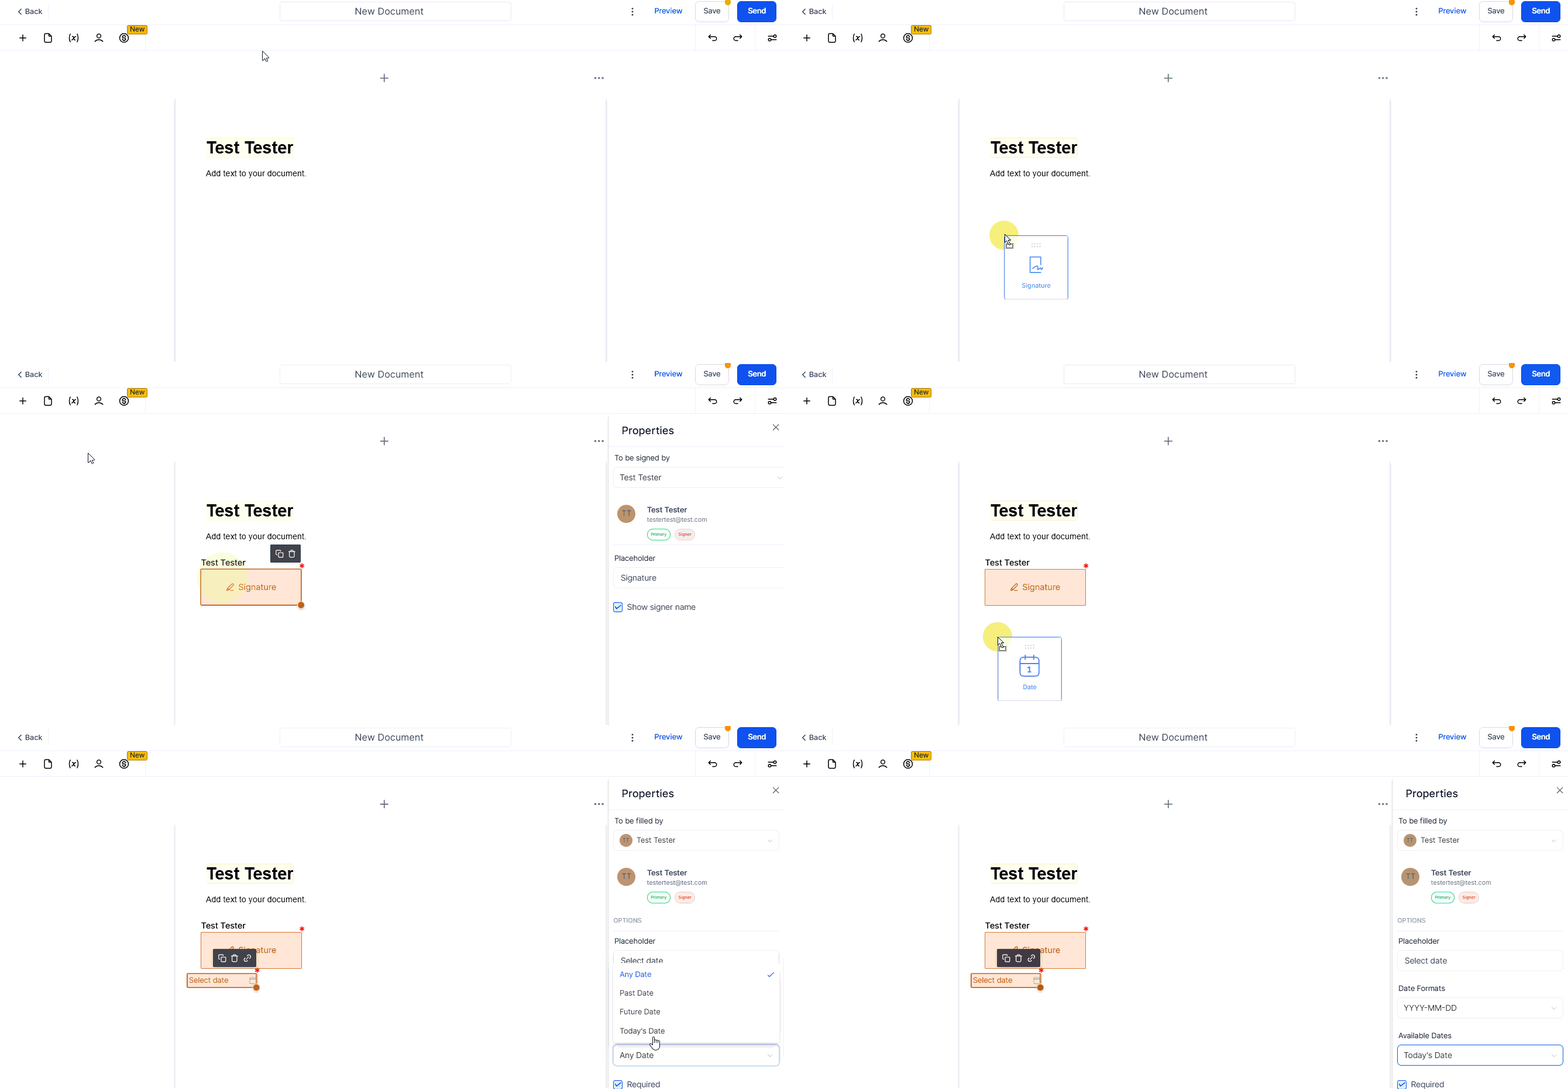
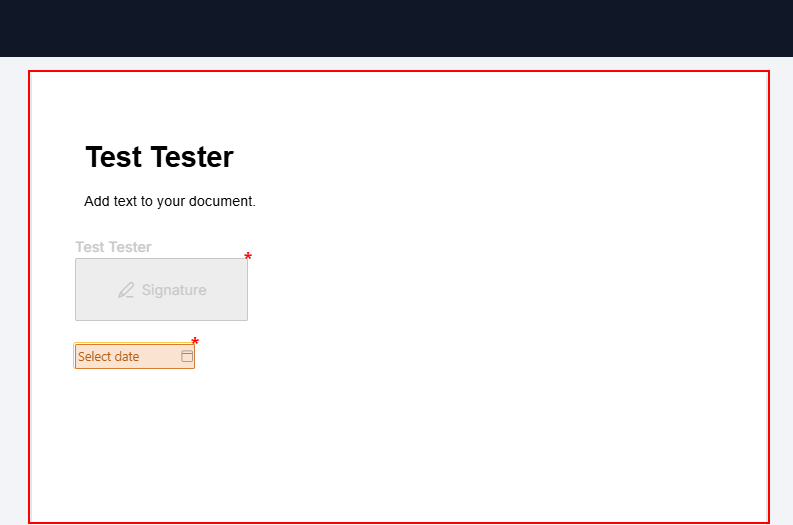
Custom fields let you add fillable input elements to your document templates that signers complete as part of the signing process. These can collect information like dates, text responses, checkboxes, or any other data you need captured at the time of signing – without requiring a separate form.
Configuring Custom Fields
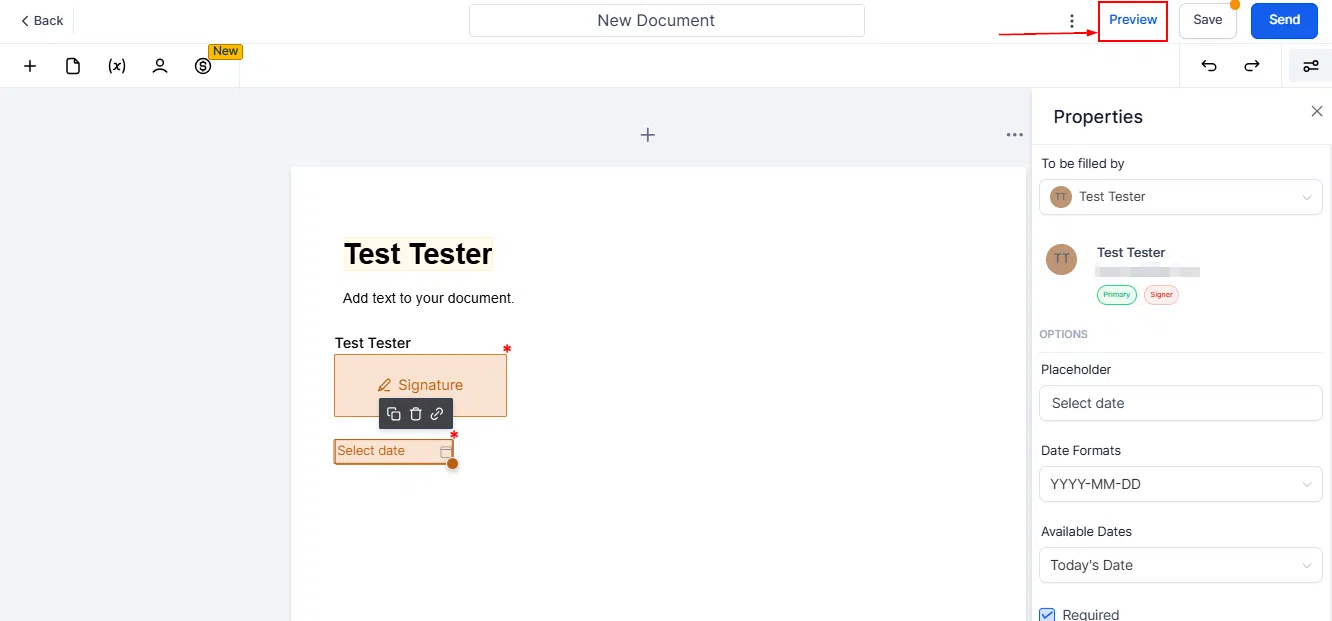
After inserting a custom field element, use the Properties panel to configure its type, label, and whether it is required. You can assign custom fields to specific signers, so each person only fills in the fields relevant to them.
Customising the Email Subject Line
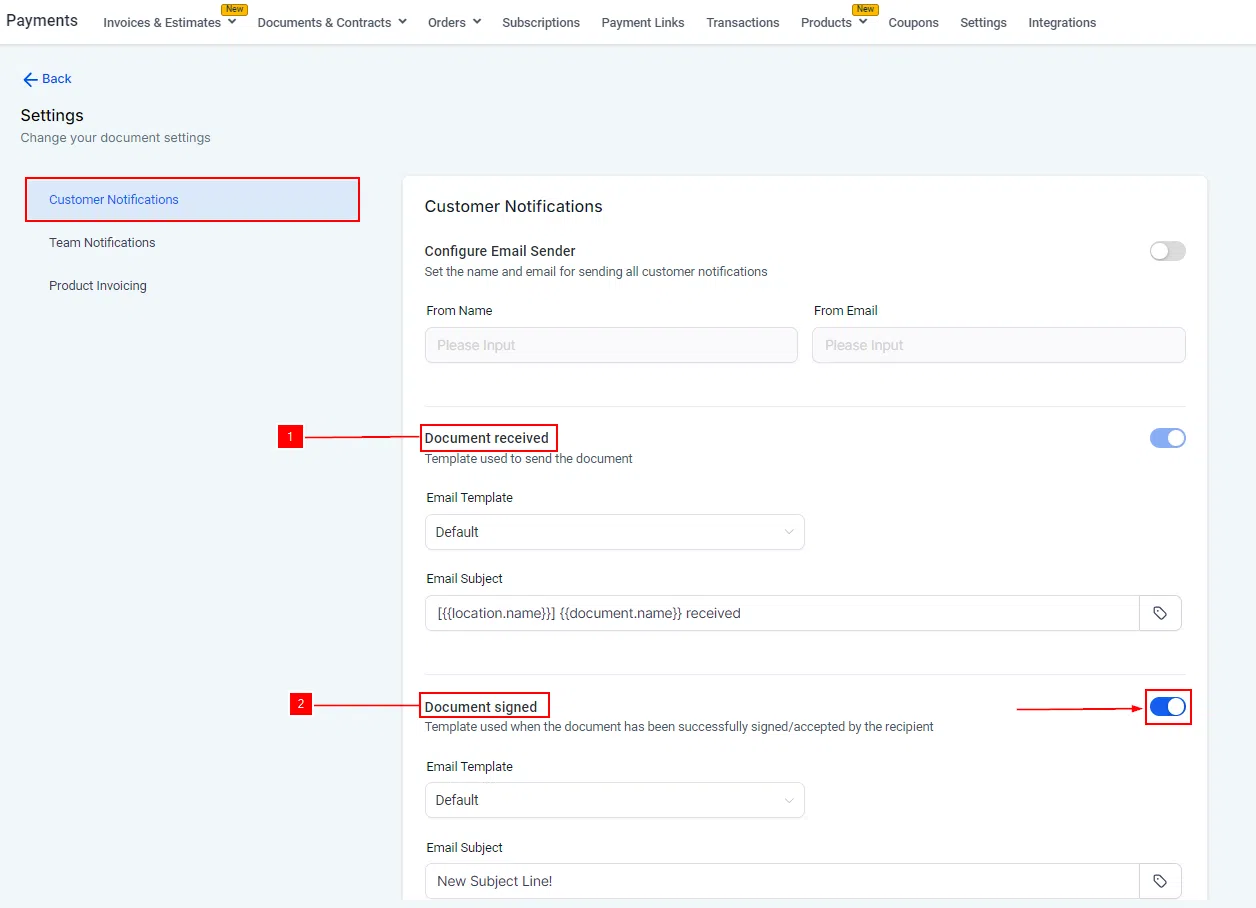
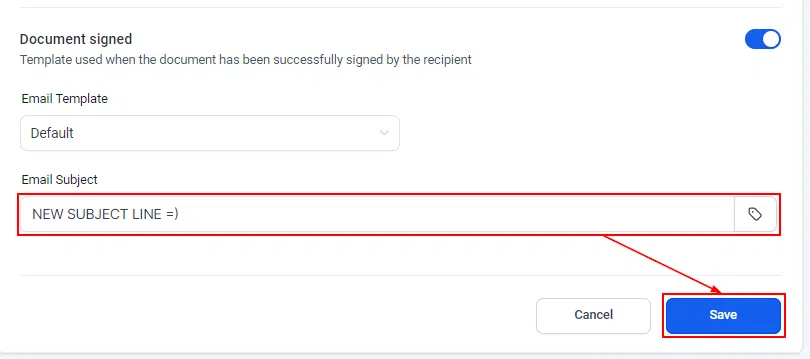
When Growth360 sends a document to a client for signing, the email subject line is the first thing they see. Customising it increases open rates and ensures the email clearly communicates what the document is and why it matters. A strong, specific subject line reduces confusion and helps clients act quickly.
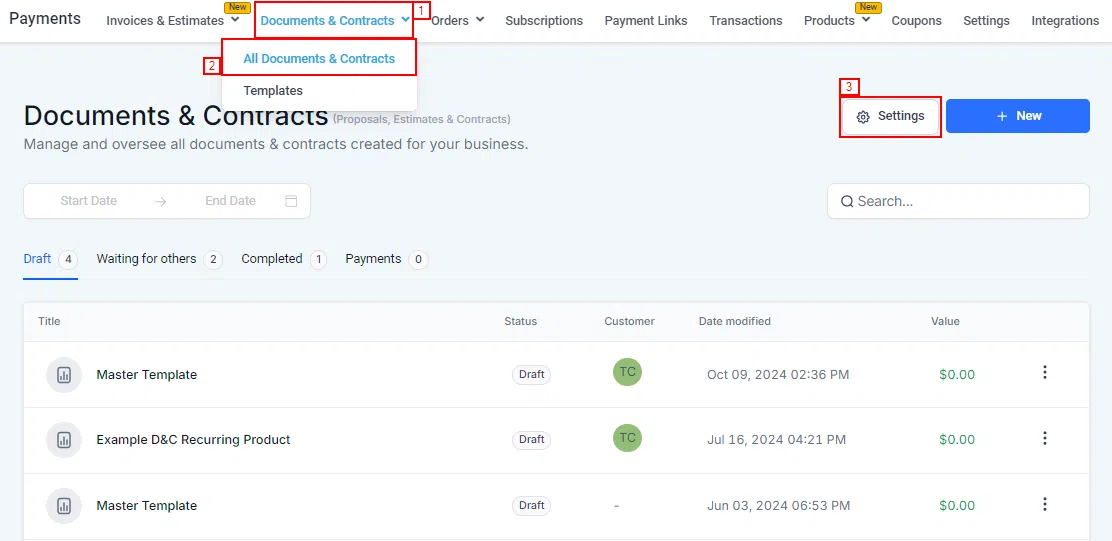
Setting a Custom Subject Line
In the document settings or template configuration, locate the Subject Line field. Enter a subject that clearly identifies the document – for example, “Your Service Agreement is Ready to Sign” or “Action Required: [Contact Name] Proposal.” You can use custom values to dynamically insert contact details, making each email feel personalised even when sent at scale.

Sharing Documents via Customised Links
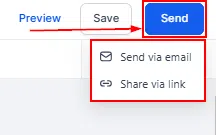
Rather than sending a document via email, you can share it directly using a customised link. This is useful when you want to send the document through another channel – such as SMS, a chat message, or a follow-up email – without going through the standard document send workflow.
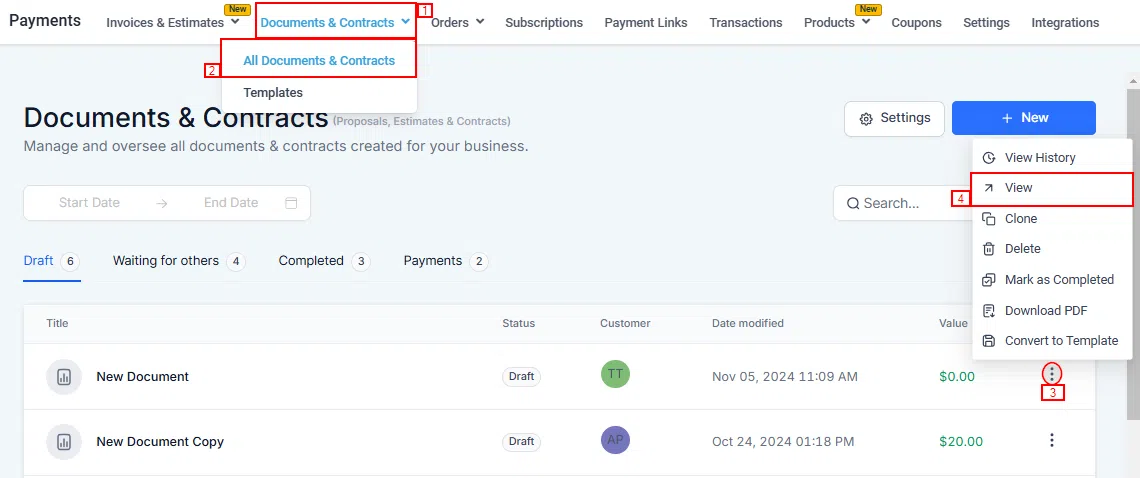
Generating and Sharing a Document Link
Open the document from the All Documents and Contracts list and use the Share option to generate a personalised link for the contact. Copy the link and send it through whichever channel suits the situation. The recipient clicks the link to open the document and complete any required fields or signatures, with no login required on their end.