
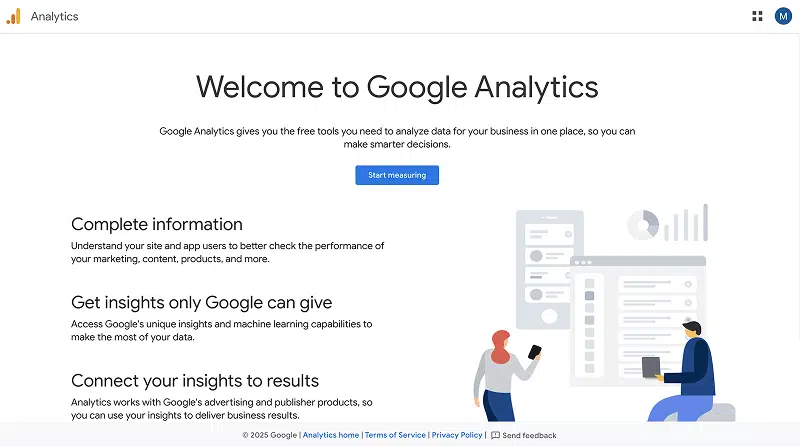
If you want to know how many people visit your website, where they’re coming from, and what pages they view—Google Analytics is the tool you need. It’s free and incredibly powerful, but you don’t need to be techy to get it up and running.
In this post, we’ll walk you through creating your Google Analytics account and connecting it to your site. Once done, you’ll be able to track visitor activity and start making informed decisions.
Steps to Create a Google Analytics Account
Step 1: Go to Google Analytics
Visit https://analytics.google.com and log in with your Google account.

Step 2: Create an Account
Click “Get started today”.
Sign in to your Google Account (email/phone and passkey/password), to continue to Google Analytics.
Note: If you don’t have a Google Account, you’ll need to create a gmail account first (visit https://accounts.google.com/ and ‘Create account’ and follow the prompts).
Once you’re logged in to Google Analytics, click “Start measuring”.
Choose an Account Name (usually your business name).
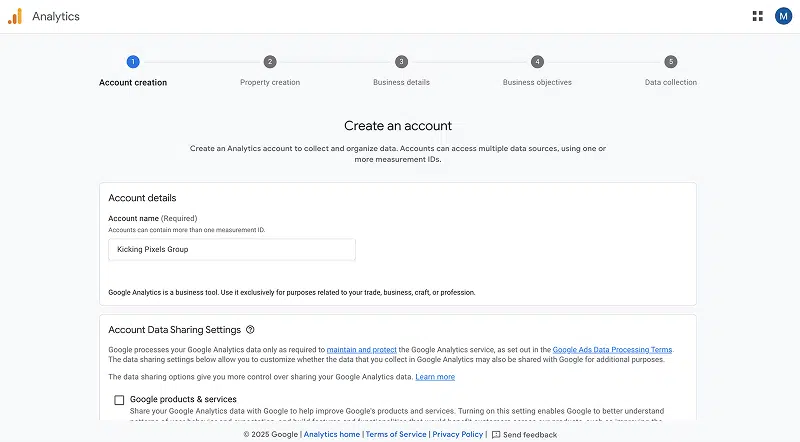
Under Account Settings, you can leave the data-sharing options as-is, or adjust them, if you’re feeling brave!
Click “Next“.
Step 3: Set Up a Property (Your Website)
- Enter a Property Name (e.g. “My Business Website”).
- Select your time zone and currency.
- Click “Next“.
Step 4: Tell Google About Your Business
Select your industry category (e.g. Professional Services).
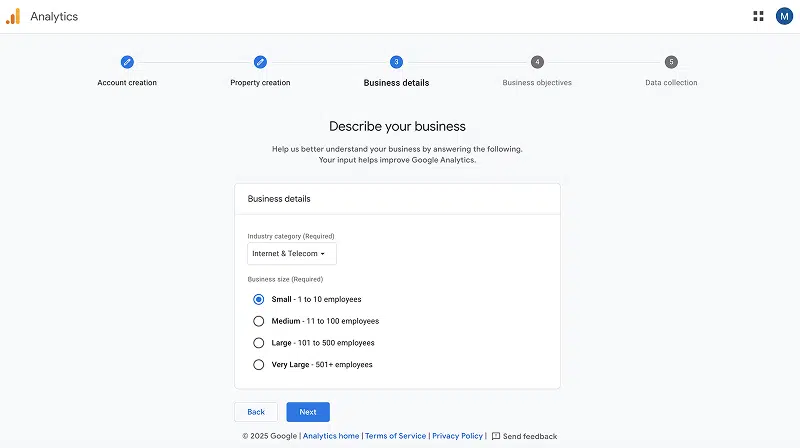
- Choose your business size.
- Select how you plan to use Google Analytics – this helps tailor your experience.
- Click “Next“
Step 5: Choose Your Business Objectives
Before moving to data collection, Google will ask you to select your business objectives. These help tailor the reports shown in your Analytics dashboard.
Choose the option(s) most relevant to your business:
- ✅ Generate leads – if you want to track contact form submissions or quote requests
- 🛒 Drive sales – if you sell products or services online
- 📈 Understand web and/or app traffic – if you’re focused on where traffic is coming from
- 🔁 View user engagement & retention – to see how long people stay and what pages they visit
💡 If you’re not sure, just tick “Generate leads” and “Understand web traffic”, as these are most useful for service-based websites.
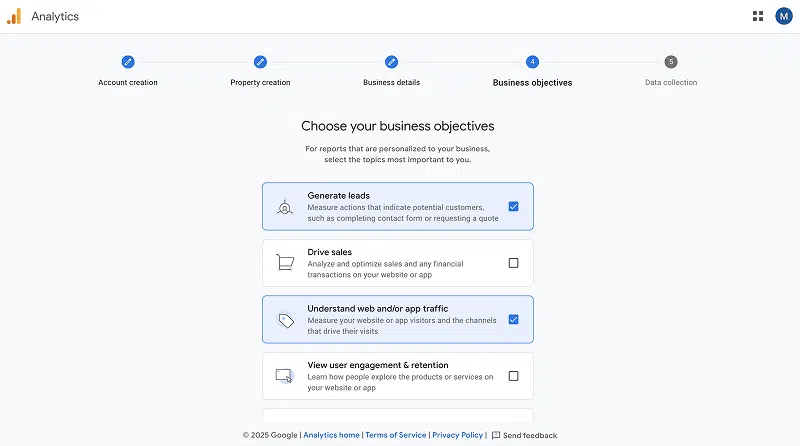
Then click “Create” to continue.
Step 5: Set Up Data Collection
Now you’ll choose a data stream:
- Choose “Web” (for websites).

- Then, on the following screen enter your website URL.
- Give your stream a name (e.g. “Main Website”).
- Click “Create & Continue“.
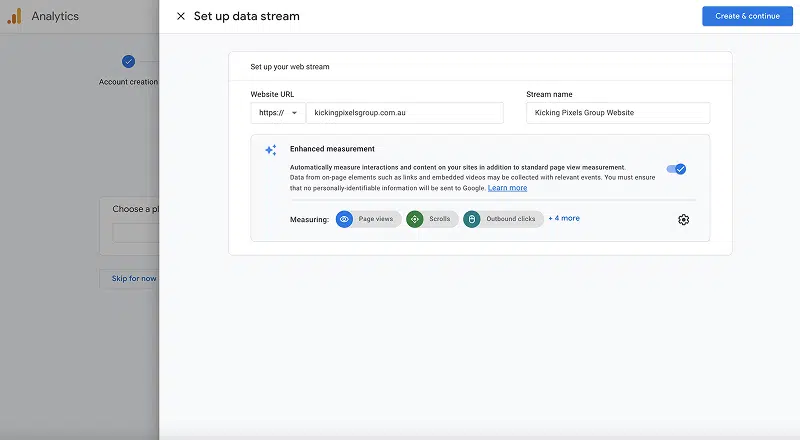
- Next you’ll be asked how you want to setup a Google Tag. In this example, we’ll choose the “Insert Manually” option.
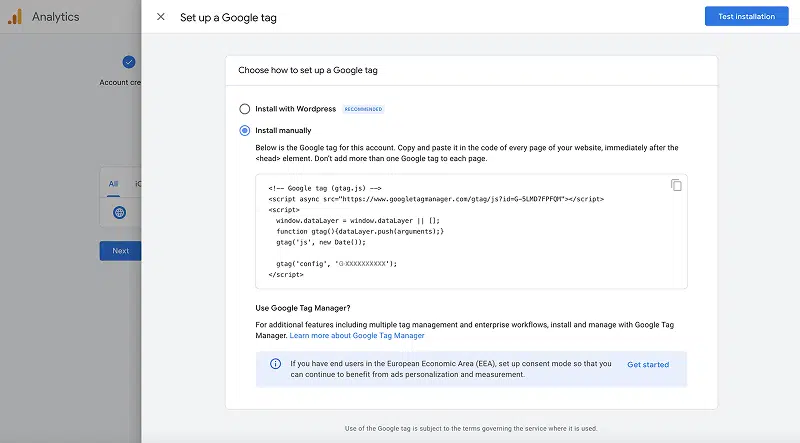
That’s it with Google Analytics for a moment. Next we need to add the Google Tag to your website. I’m using a WordPress website in this example, but website platforms like Wix and Squarespace will have their own methods.
Step 6: Add Google Analytics to WordPress Using a Plugin (No Code Needed)
Option 1: Use the “Tracking Code Manager” Plugin
- Go to your WordPress Website Dashboard (e.g. https://mywebsite.com.au/wp-admin/)
- Navigate to “Plugins” → “Add New“
- In the search bar, type “Tracking Code Manager”
- Click “Install Now“, and once installed, then click “Activate“
![]()
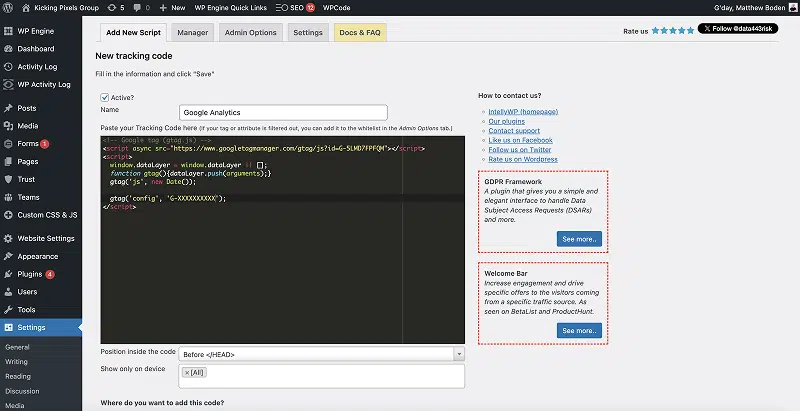
- Go to “Settings” → “Tracking Code Manager“
![]()
- Add your first Tracking Code (Your tracking code list is empty, please “CLICK HERE” to create new ones.)
- Then, paste your Google Analytics Script from Google Analytics (see Step 5 above) into the space provided.
- If you need to find your Google Analytics Script again, in Google Analytics, go to “Admin” → “Data Streams” → “Your Web Stream“
- Scroll down to “View tag instructions” → select “Install manually“
- Copy the Code and return to the Tracking Code section, and paste.
The remaining options in Tracking Code Manager are as follow:
- Show on: All
- Where do you want to add this code? Choose:
- In which page do you want to insert this code? Choose: In the whole website (pages, posts and archives)
- Finally, Click “Save“
Option 2: Use a Dedicated Google Analytics Plugin
You can also use a plugin like:
- GA Google Analytics by Jeff Starr (lightweight & privacy-friendly)
- MonsterInsights (more features, but freemium)
The steps are similar – install, activate, and paste in your Google Analytics Measurement ID when prompted.
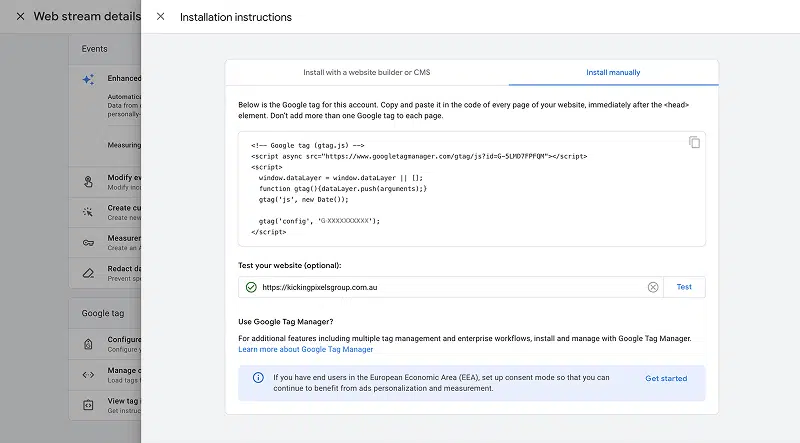
Step 7: Test to make sure your Google Analytics is Connected
Once you’ve added and saved your Google Analytics ID to your website, head back to the Google Analytics Installation Step.
- In Google Analytics to “Admin” → “Data Streams” → “Your Web Stream“
- Scroll down to “View tag instructions” → select “Install manually“
- Then scroll below your analytics script and click “Test“.
- Check that you see a green checkmark and… you’re done : )
That’s It!
Within 24 hours, you’ll start seeing visitor data in your Google Analytics dashboard. From here, you’ll be able to view where users came from, what pages they visited, and how long they stayed.
Visit your Google Analytics Dashboard, by logging into Google Analytics, and heading to https://analytics.google.com/analytics/web/
Google Analytics for Beginners – Next up:
Once your account is set up, the next step is to start tracking activity on your site.
👉 Read: How to Create a Google Tag Manager Account
👉 Read: How to Track Button Clicks with Google Tag Manager
Need a Hand?
If you’re not comfortable connecting all the dots, no stress—that’s what we’re here for. At MyWebAdvantage, we help small business owners set up simple, effective tracking so you can see what’s working (and what’s not) without the guesswork.
Let’s chat if you want us to take care of it for you.